![Untitled design (1)-Aug-01-2022-12-37-27-80-PM.png]](https://help.syscloud.com/hs-fs/hubfs/Untitled%20design%20(1)-Aug-01-2022-12-37-27-80-PM.png?height=40&name=Untitled%20design%20(1)-Aug-01-2022-12-37-27-80-PM.png)
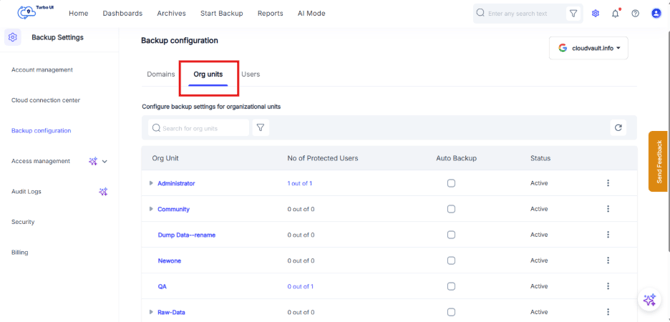
Step 1: Click the Org units tab.
The Org units tab displays Google Workspace Org units and the number of protected users in each Org unit.To enable auto backup for a org unit, select the checkbox under the Auto Backup column for the required group.
Step 2: A confirmation pop-up appears. In the Auto Backup Status window, select Apply to the sub-org units to enable auto backup for the sub-organizational units as well. Then, click Yes to enable auto backup for the selected organizational unit.
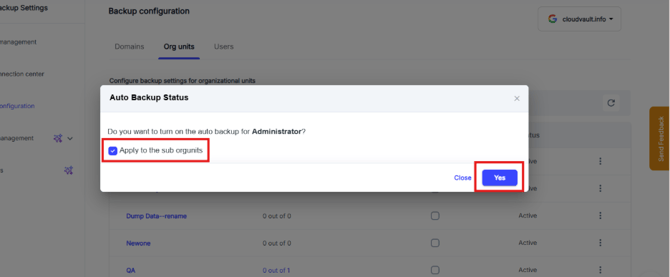
Once enabled, users from the same domain who belong to the selected org unit will be automatically included in the backup based on the org unit-level setting.
Step 3: Click on the 3 dots next to the user, from the dropdown options, click on settings
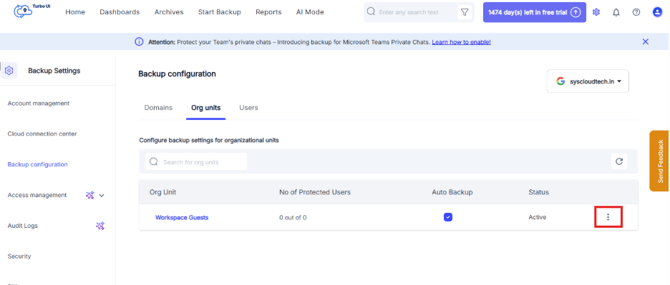
Step 4: From the drop-down click on 'settings'
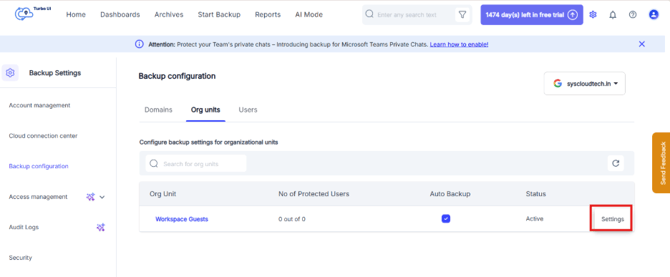
Step 5: Configure File Type Inclusion/Exclusion for Google Drive
By default, certain file types are excluded from Google Drive backups:
1. Enable Drive Trash if you wish to include Drive Trash of Google for backups.
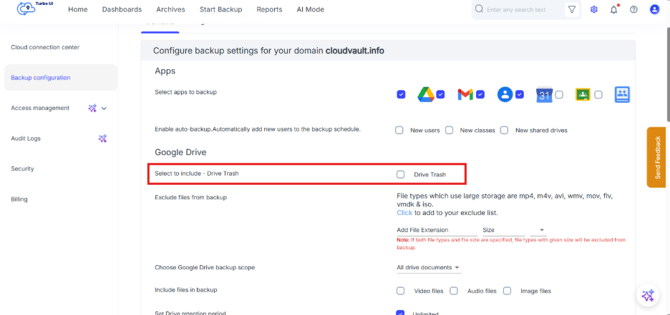
2. Review the Google Drive backup settings. Initially, video files, audio files, and image files are excluded from SysCloud backups to Google Drive. If you want to include these file types in the backup, enable the corresponding option.
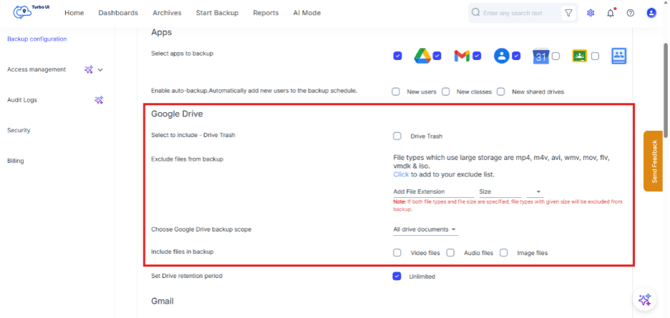
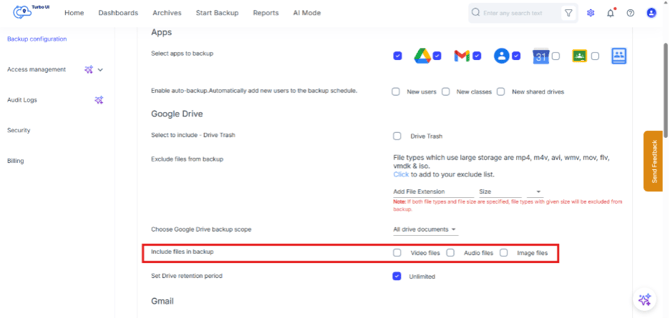
Step 6: If you prefer to keep some or all large media files excluded to save storage, use the exclude list option. Click the control to add these file types to your exclude list. On Clicking, the Click link .mp4, .avi, .wmv, .mov, .flv, .vmdk, .iso will be added to the exclusion list.
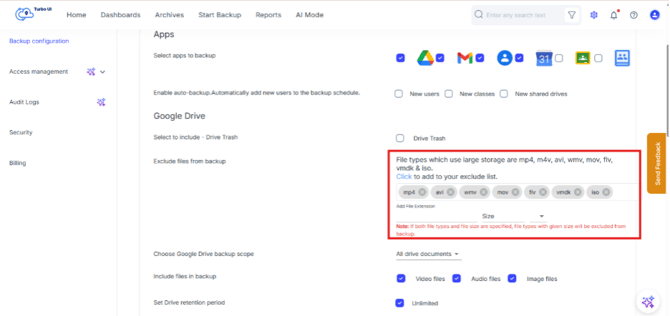
You can also set a file size restriction for exclusions. For example, if the size limit is set to 100 MB, the specified media file extensions in the exclusion list will not be backed up only when the file size is greater than 100 MB.
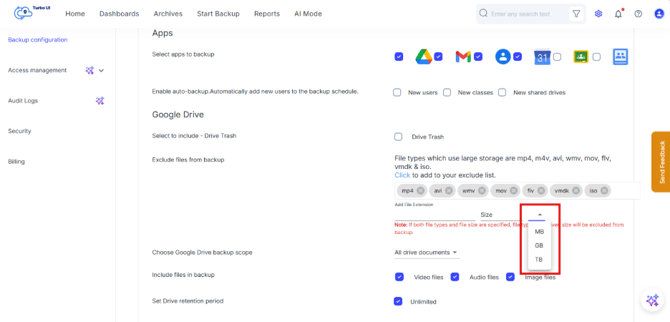
Note: To remove a specific extension (for example, .mp4) from the exclude list, click the close (×) icon next to it. Clicking Click again will auto‑repopulate the default list if needed.
To add a custom extension (for example, .m4v), type the extension into the field and add it to the list.
Step 7: Set Retention Period for Google Drive Data
1. In the Retention period section for Google Drive, note that the default is Unlimited.
2. To change it, first disable/remove the default unlimited setting.
3. Enable Custom retention period and enter the desired value and decide if it should be in Day(s), Month(s) or Year(s).
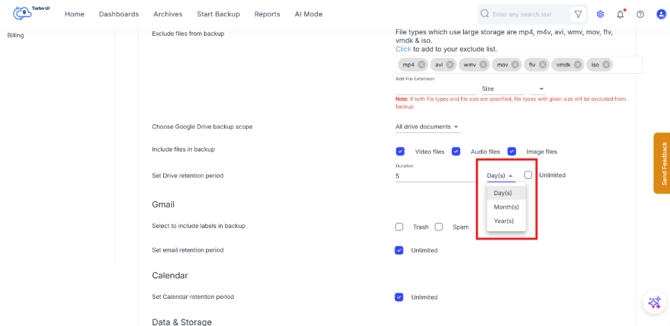
Note: You can revert to unlimited by re selecting the checkbox next to unlimited.
Step 5: Configure Gmail Backup and Email Retention
1. In the Gmail backup section, choose whether to include folders such as Trash and Spam in the backup.
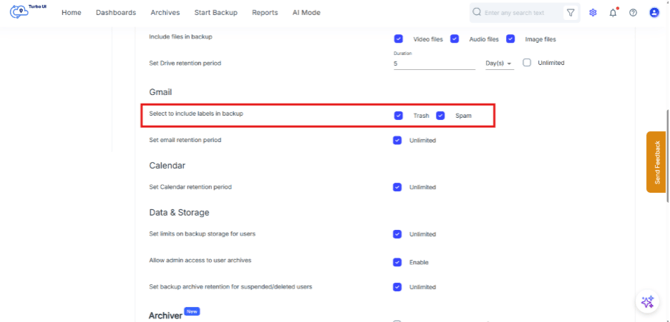
This can be useful for auditing or compliance needs.
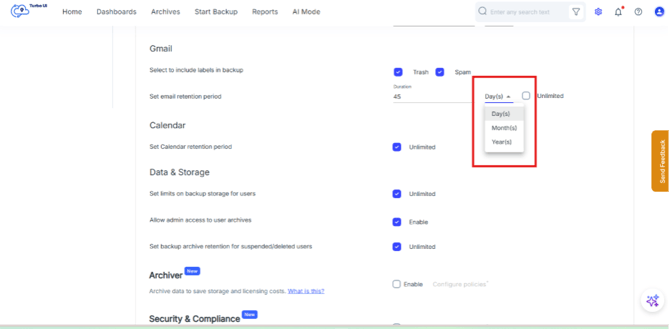
2. The email retention period is also Unlimited by default.
i. Modify it using the same method as before:
- Change the value and select days, months, or years, or
- Keep it Unlimited, depending on organizational requirements.
Step 6: Configure Google Calendar Retention
1. In the Retention period section for Google Calendar, note that the default is Unlimited.
2. To change it, first disable/remove the default unlimited setting by clicking the checkbox off.
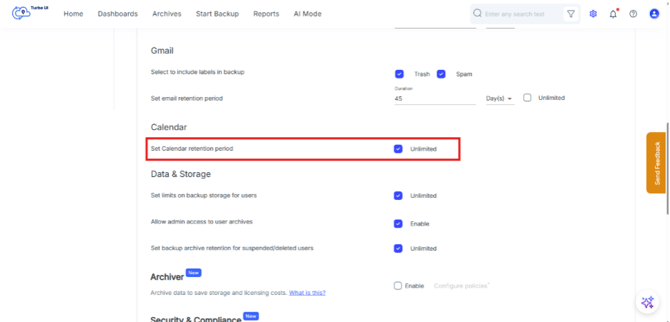
3. Enable Custom retention period and enter the desired value and decide if it should be in Day(s), Month(s) or Year(s).
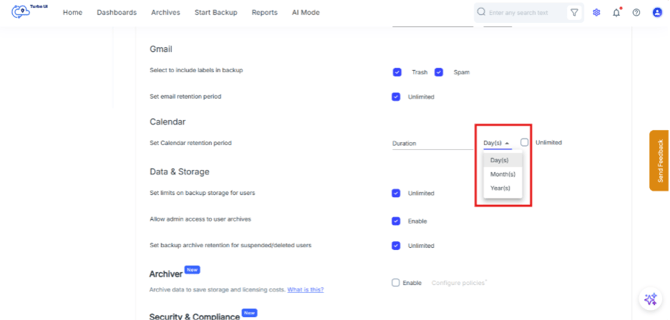
Note: You can revert to unlimited by re selecting the checkbox next to unlimited.
Step 7: Set Per‑User Storage Limits and Admin Access
1. In the Data and storage for users section, set backup storage limits per user by deselecting the checkbox setting into next to Unlimited. Note that it is set to Unlimited by default.
2. Specify the maximum storage per user, such as 1 TB, 100 GB, or 2 GB per user, or choose Unlimited.
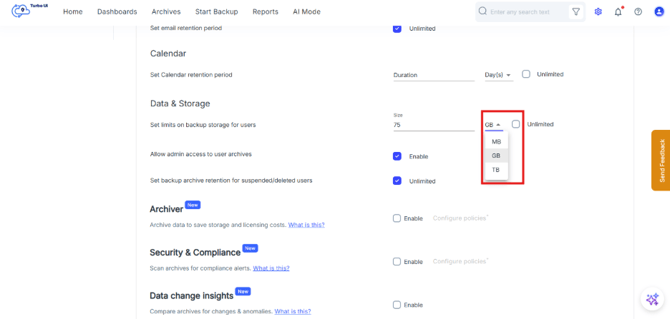
3. Configure whether admins can access user archives by enabling or disabling Admin access to user archives. Toggle the Enable option on or off as required.
Step 8 Configure Retention for Suspended or Deleted Users
1. For users who are suspended or deleted from your organization, configure how long their data should be retained.
2. By default, the retention period is Unlimited. Uncheck the checkbox next to Unlimited to change the retention period.
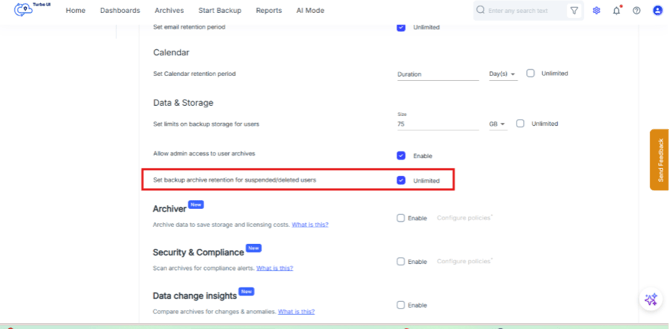
3. You can change this to a fixed duration (for example, 10 years) or another suitable period.
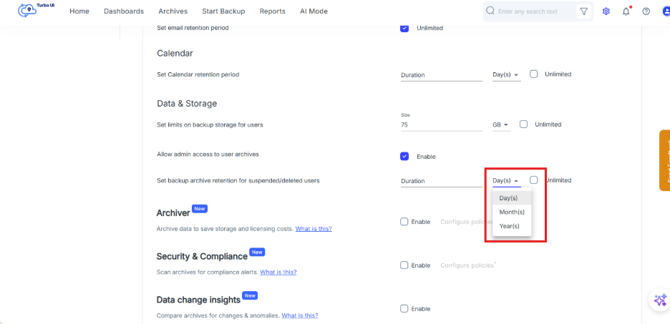
Step 9: Configure add-on and backup settings - Archiver
1. Scroll to the Archiver in the Add-ons section.
2. The Archiver add-on helps archive backed-up data to reduce storage and licensing costs. To enable Archiver, select Enable.
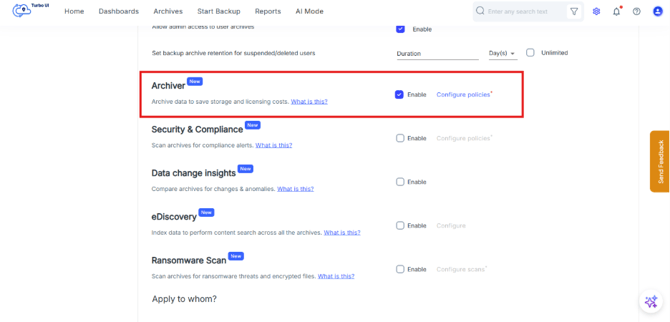
Note: Archiver is available only for Google Workspace and Microsoft 365 apps.
3. After enabling Archiver, click Configure policies.
4. The Archiver side panel opens. You can either create a custom archival policy or perform on-demand archive from the backup archives. In the Archiver side panel, click Create custom policyto create a new archival policy
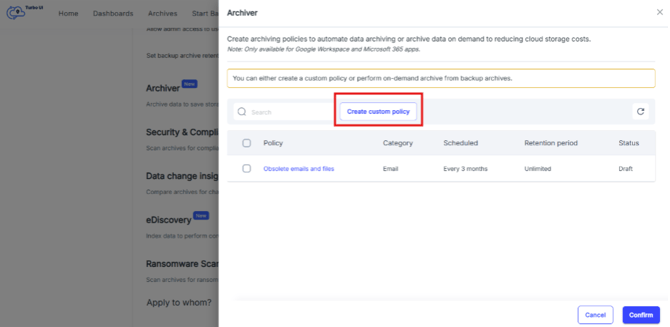
After creating or selecting the required archival policy, click Confirm to save the Archiver configuration.
Step 10: Configure add-on and backup settings – Security & Compliance
1. Scroll to the Security & Compliance in the Add-ons section. Security & Compliance scans the backup archives for compliance alerts. To enable Security & Compliance, select Enable.
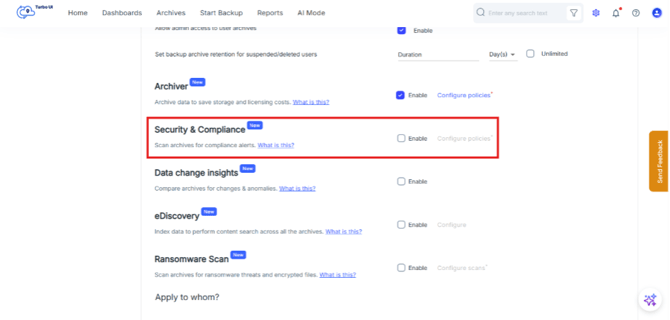
3. After enabling Security & Compliance, click the policy selection link, such as 3 policies selected.
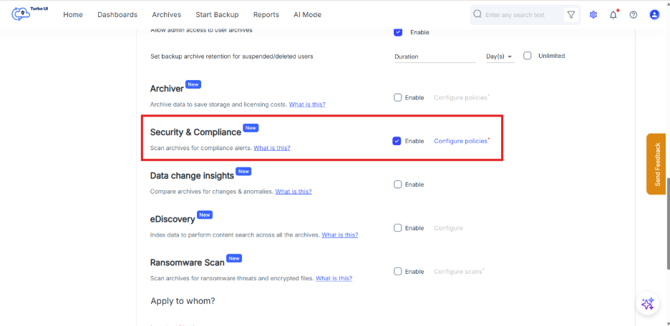
4. In the Security & Compliance Insights panel that opens. Select the policies you want to enable. You can also create a custom policy. Review or update the policy sharing condition, if required. Click the edit icon next to the required policy to update the sharing condition.
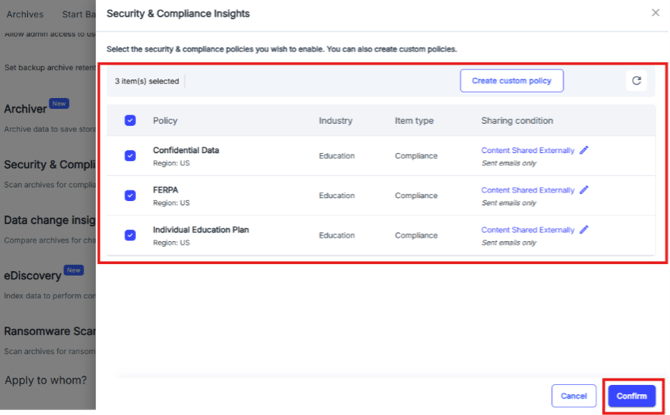
5. In the sharing condition pop-up window, configure the required conditions and click Confirm.
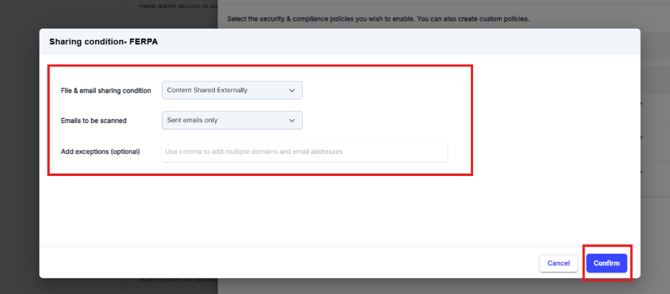
You can configure the following options:
File & email sharing condition: Select whether the policy should scan all stored content, internally shared content, externally shared content, or both internally and externally shared content.
Emails to be scanned: Select whether the policy should scan only sent emails or both sent and received emails.
Add exceptions: Add specific domains or email addresses to exclude from the policy, if required
6. After selecting the required policies and conditions, click Confirm.
Step 11: Configure add-on and backup settings – Data change insights
1. Scroll to Data change insights in the Add-ons section.
2. Data change insights compare backup archives for changes and anomalies. To enable Data change insights, select Enable.
Note: No additional configuration is required for Data change insights from this page.
Step 12: Configure add-on and backup settings – eDiscovery
1. Scroll to the eDiscovery in the Add-ons section.
2. eDiscovery indexes backed-up data so that it can be searched later during eDiscovery operations. To enable eDiscovery, select Enable.
3. Click the eDiscovery configuration link, such as Both searches enabled.
In the eDiscovery side panel, select the required indexing options:
Metadata search: Indexes file attributes and metadata for future eDiscovery searches.
Content search: Indexes the actual content of files, emails, objects, or chat messages for full-text search during future eDiscovery operations.
4. Click Confirm to save the eDiscovery configuration.
Step 13: Configure add-on and backup settings – Ransomware Scan
1. Scroll to the Ransomware Scan section.
2. Ransomware Scan scans backup archives for ransomware threats and encrypted files. To enable Ransomware Scan, select Enable.
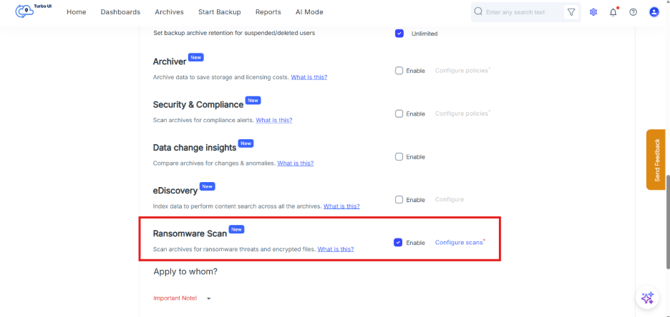
3. Click the ransomware scan configuration link, such as Both scans enabled.
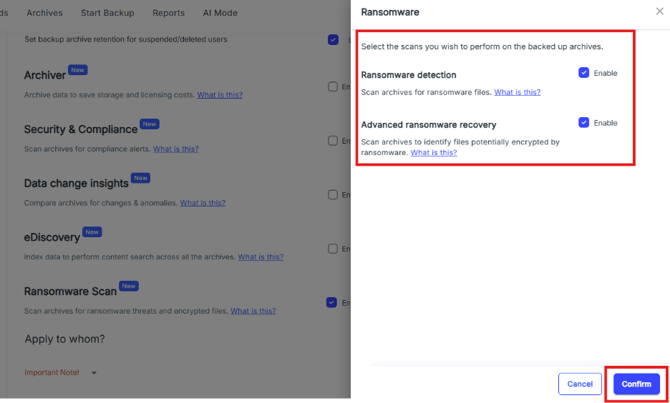
In the Ransomware side panel, select the required scan options:
Ransomware detection: Scans archives for ransomware files.
Advanced ransomware recovery: Scans archives to identify files that may have been encrypted by ransomware.
4. Click Confirm to save the ransomware scan configuration.
Step 14: Apply to whom
1. In the Apply to whom? section, choose how the selected settings should be applied.
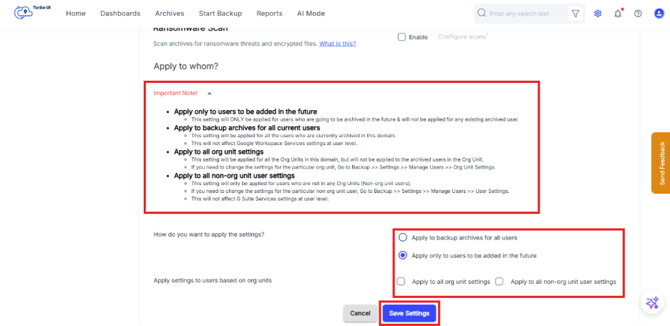
You can choose one of the following options:
Apply to backup archives for all users: Applies the selected settings to all users who are currently archived in the domain.
Apply only to users to be added in the future: Applies the selected settings only to users who will be added to the backup configuration in the future. This option does not apply the settings to users who are already archived.
Apply auto backup to all groups: Applies auto backup settings to all groups in the domain. This does not change any user-level settings.
2. After selecting the required option, click Save Settings and the selected backup settings will be saved for the Microsoft 365 domain based on the option selected in the Apply to whom? Section.