Follow the steps below to create and start a backup job for Google Chat:
Step 1: Log in to your SysCloud account.
Step 2: Click "Jobs" from the top menu bar.
Step 3: Enter a job name and a description (optional). Click "Next".

Step 4: Click the "Connect" option beside Google Chat from the Clouds list.

Step 5: Click "Add account".

Step 6: Enter Client ID and Client Secret and click "Next".

To create Client ID and Client Secret, ensure to follow the following steps -
1. Google Cloud Project Creation
Note:
If you already have a project in ‘Google Cloud console” you can skip Step 1.
2. Enable Chat API and configure app
3. OAuth 2.0 consent screen configuration & add scopes
4. Create OAuth 2.0 Client Credentials
Step 7: Authorize Admin Access
-
Once the credentials are verified, click on "Authorize admin access" to give SysCloud access to the scopes defined for this client.

-
This will open a pop-up asking for Google authorization. Login to the Google Workspace account, you wish to backup.
-
You will see the OAuth scopes & consent screen. Click on "Accept" to give SysCloud the necessary scopes to backup Admin console.

-
If the authorization is successful, you will see the account listed in Google Chat cloud connection side tray as connected.
-
If the authorization fails, refer to this help article to know the potential reasons. Once the issues are resolved, re-try credential validation & admin authorization.
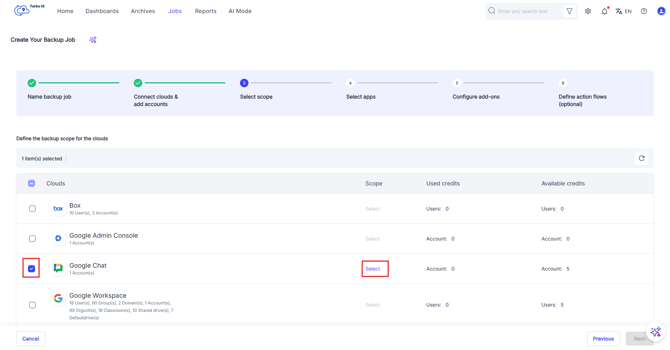
Step 8: Select scope
a. Select the checkbox next to the Google Chat you want to backup and click on "Select" to choose the scope of backup.
b. Select the entity you want to backup and click "Confirm" and move to the next step.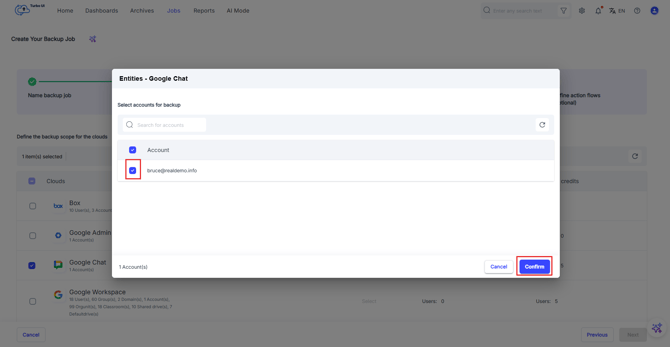
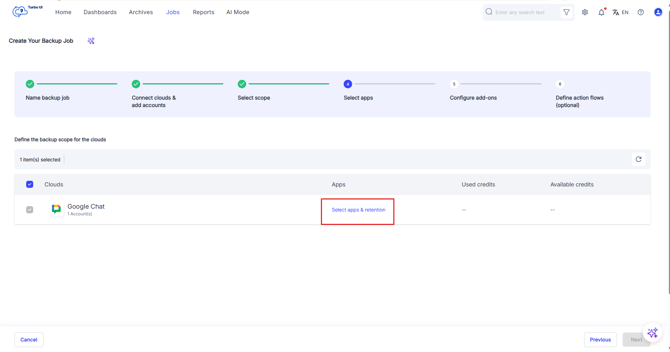
Step 9: Select apps and retention
a. Click on "Select apps & retention" to configure retention for the selected SaaS application.
b. Select the checkbox next to Google Chat to choose the app. If you want the items retained only for a certain period of time, uncheck the box under “Retention period” and specify the number of days, months or years for which you want the items retained. Click on “Confirm” and then move to the next step.

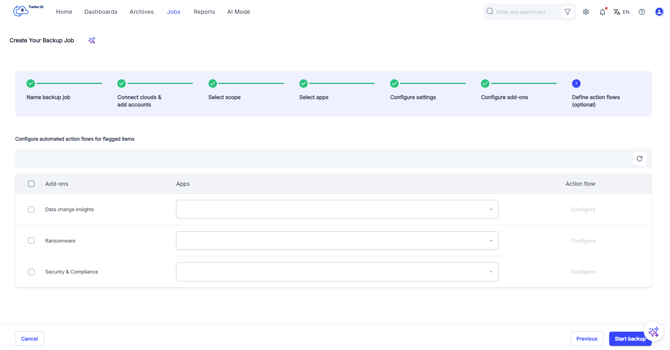
Step 10: The step to configure add-ons and define action flows can be skipped. After that select "Start backup".