You can export backed up Xero data from the Xero archive in SysCloud. You can export supported Xero data such as transactions, lists, files, and attachments from the selected Xero organization.
To export Xero data
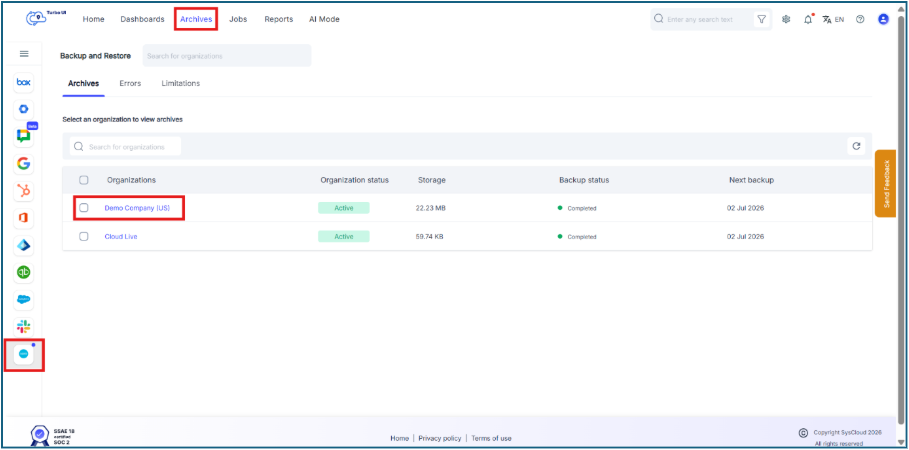
Step 1: Log in to SysCloud using your admin credentials.
Step 2: Click Archives from the top navigation menu. Select Xero from the left-side cloud navigation. On the Backup and Restore page, select the Xero organization from which you want to export data.
Step 3: Open the required tab to view the backed-up Xero data. Available tabs include Transactions, Lists, Files, and Attachments.
Step 4: Select the required Xero data type or item you want to export.
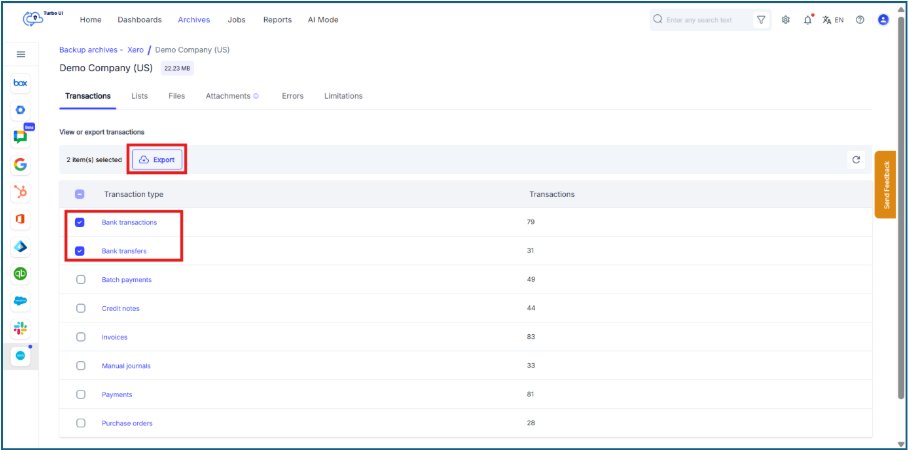
For example, under Transactions, you can select transaction types such as Bank transactions, Bank transfers, Batch payments, Credit notes, Invoices, Manual journals, Payments, Purchase orders etc.
You can export specific record(s) within a data type, click the required data type to drill down into its item-level view.
For example, click Bank transactions to view all backed up bank transaction records.
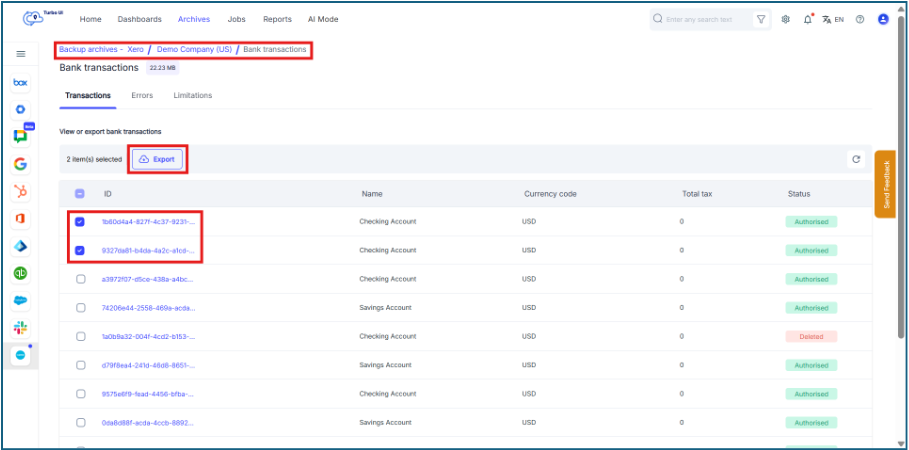
Step 5: Click Export.
Step 6: In the Export - Xero window, review the selected item or items. If multiple items are selected, click View to review the selected items. Verify the selected snapshot date and time using the calendar icon. Add an optional comment to be shown in the Export report, if required.
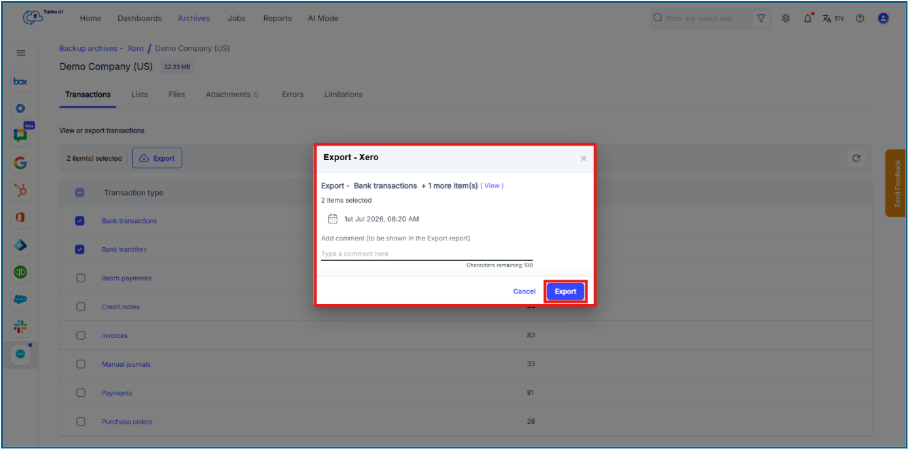
Step 7: Click Export to initiate the export.
Step 8: You can view the export status and access the download link from Reports > Export report.
Xero data is exported as CSV inside a ZIP folder. Files, if included, are exported in their original/native format. The export download link remains active for 7 days. After the link expires, you must initiate the export again to generate a new download link.