![Untitled design (1)-Aug-01-2022-12-37-27-80-PM.png]](https://help.syscloud.com/hs-fs/hubfs/Untitled%20design%20(1)-Aug-01-2022-12-37-27-80-PM.png?height=40&name=Untitled%20design%20(1)-Aug-01-2022-12-37-27-80-PM.png)
You can start a Google Workspace backup in SysCloud by selecting the Google Workspace apps to back up and defining the backup scope. The scope can include the entire domain or selected users, Org Units, Shared Drives and Classrooms.
To start a Google Workspace backup you can start by selecting the entire domain or Select Users, please follow the below steps:
Entire Domain
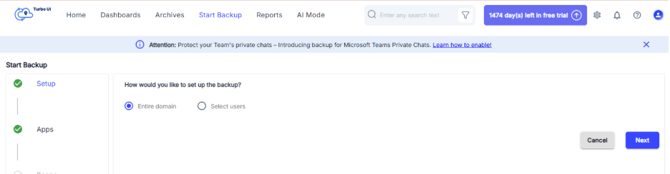
Step 1: Log in to SysCloud using your admin credentials. Click Start Backup from the top navigation menu. Select Entire domain and click Next.
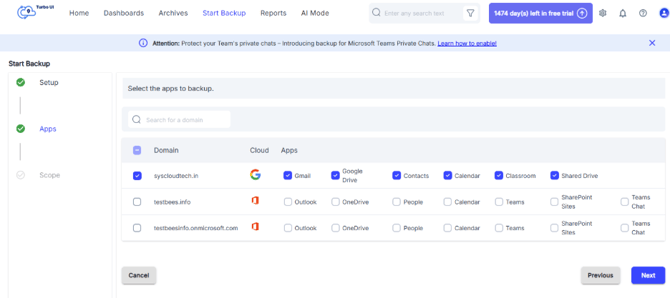
Step 2: In the Apps step, select the Google Workspace domain and choose the apps you want to back up. You can select apps such as Gmail, Google Drive, Contacts, Calendar, Classroom and Shared Drive. Click Next.
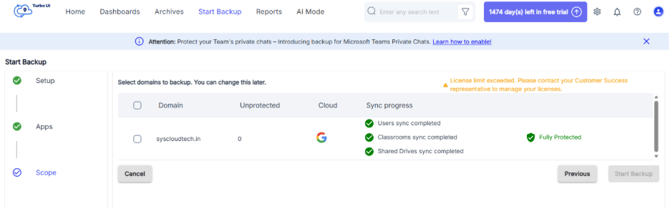
Step 3: Review the number of selected users, groups, Org Units, Classes or Shared Drives. Once the sync is complete, click Start Backup.
Select Users
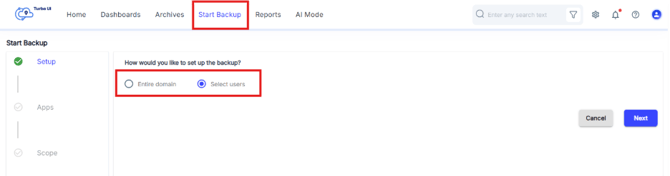
Step1: Log in to SysCloud using your admin credentials. Click Start Backup from the top navigation menu. Select Entire domain and click Next.
Step 2: In the Apps step, select the Google Workspace domain and choose the apps you want to back up. You can select apps such as Gmail, Google Drive, Contacts, Calendar, Classroom and Shared Drive. Click Next.
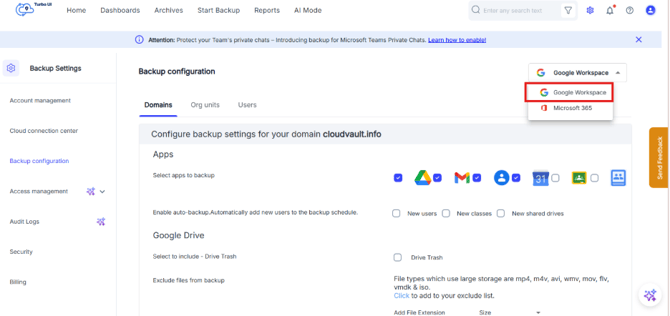
Step 3: In the Scope step, review the selected domain and sync status. Wait until the required sync activities, such as Users sync, Shared Drive sync, and Org Unit sync, are completed. If you selected Select users in the setup step, click Add scope to choose the users, groups, SharePoint sites, or Teams sites to include in the backup.
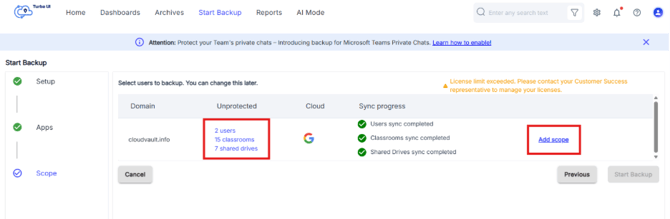
Step 4: In the Add Scope window, use one or more of the available tabs to define the backup scope.
i. To back up specific users, go to the Backup by users tab, select the checkbox next to the required users, and click Confirm.
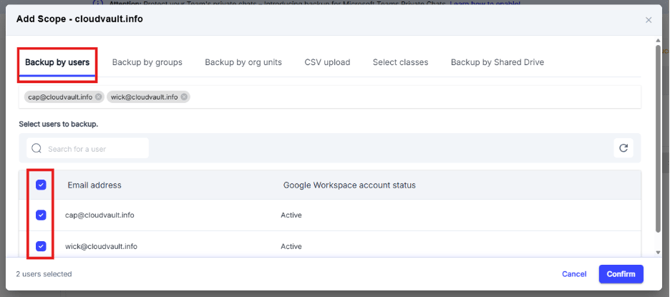
ii. To add users through Google Workspace Org Units, go to the Backup by org units tab select the checkbox next to the required org unit and click Confirm.
iii. To add users through a CSV file, go to the CSV upload tab. Click Download Sample CSV Template, update the file with the required user email addresses without changing the column headers, and click Upload CSV File. After the CSV file is uploaded, click Confirm.
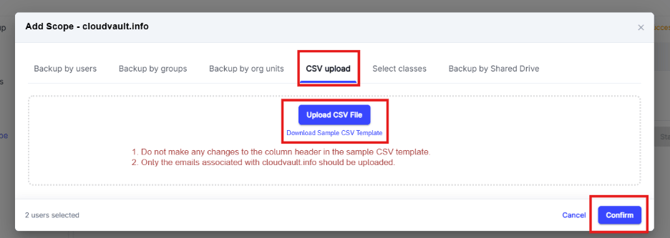
Note: Upload only the email addresses associated with the selected Microsoft 365 domain.
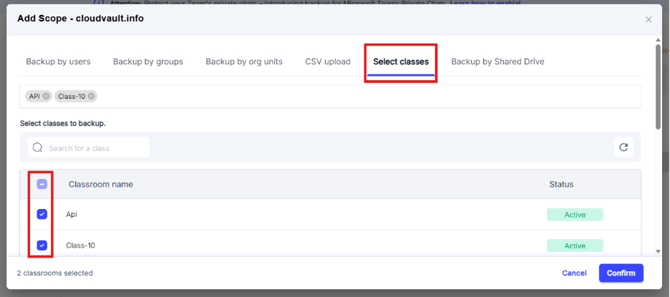
iv. To add Google Classroom for backup then use the Select classes tab, select the checkbox next to the required groups, and click Confirm.
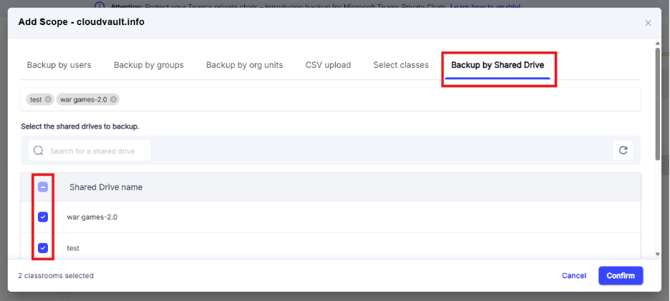
v. If required, use the Backup by Shared Drive tab to include specific Shared Drive in the backup scope. After selecting the required Shared Drive, click Confirm.
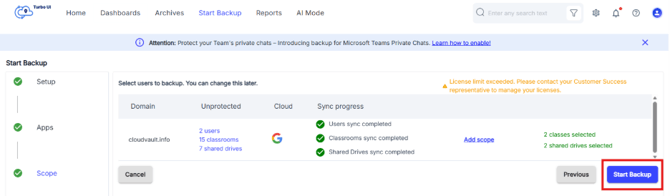
Step 5: After defining the scope, review the number of selected users, groups, Org Units, Classes or Shared Drives. Once the sync is complete and the required scope is selected, click Start Backup.
Note: To remove a specific extension (for example, .mp4) from the exclude list, click the close (×) icon next to it. Clicking Click again will auto‑repopulate the default list if needed.
To add a custom extension (for example, .m4v), type the extension into the field and add it to the list.
Step 6: Set Retention Period for Google Drive Data
1. In the Retention period section for Google Drive, note that the default is Unlimited.
2. To change it, first disable/remove the default unlimited setting.
3. Enable Custom retention period and enter the desired value and decide if it should be in Day(s), Month(s) or Year(s).
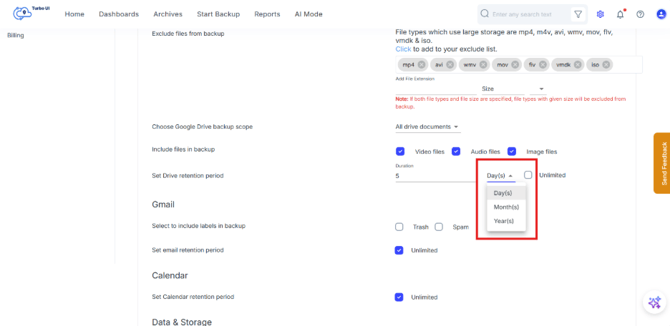
Note: You can revert to unlimited by re selecting the checkbox next to unlimited.
Step 7: Configure Gmail Backup and Email Retention
1. In the Gmail backup section, choose whether to include folders such as Trash and Spam in the backup.
This can be useful for auditing or compliance needs.
2. The email retention period is also Unlimited by default.
Modify it using the same method as before:- Change the value and select days, months, or years, or
- Keep it Unlimited, depending on organizational requirements.
Step 8: Configure Google Calendar Retention
1. In the Retention period section for Google Calendar, note that the default is Unlimited.
2. To change it, first disable/remove the default unlimited setting by clicking the checkbox off.
3. Enable Custom retention period and enter the desired value and decide if it should be in Day(s), Month(s) or Year(s).
Note: You can revert to unlimited by re selecting the checkbox next to unlimited.
Step 9: Set Per‑User Storage Limits and Admin Access
1. In the Data and storage for users section, set backup storage limits per user by deselecting the checkbox setting into next to Unlimited. Note that it is set to Unlimited by default.
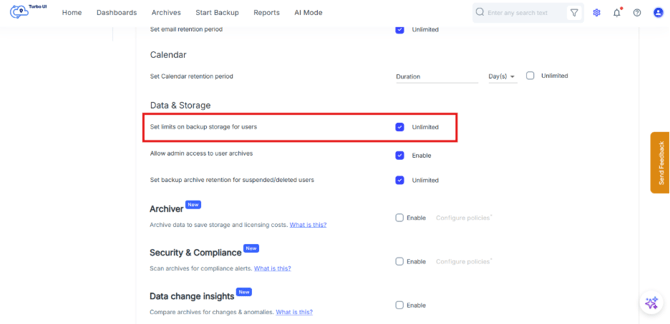
2. Specify the maximum storage per user, such as 1 TB, 100 GB, or 2 GB per user, or choose Unlimited.
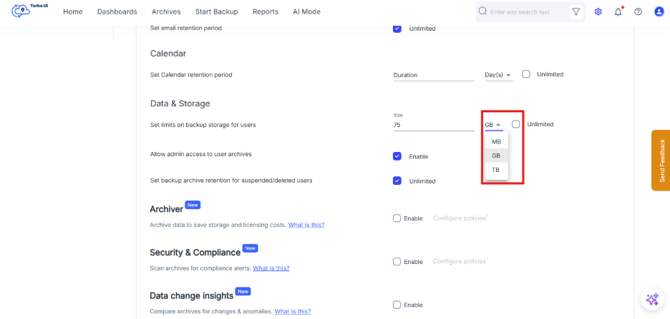
3. Configure whether admins can access user archives by enabling or disabling Admin access to user archives. Toggle the Enable option on or off as required.
Step 10: Configure Retention for Suspended or Deleted Users
1. For users who are suspended or deleted from your organization, configure how long their data should be retained.
2. By default, the retention period is Unlimited. Uncheck the checkbox next to Unlimited to change the retention period.
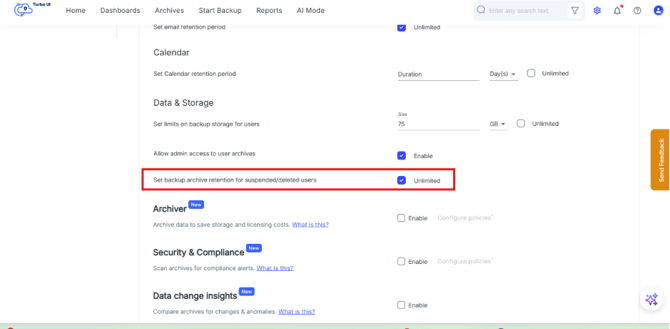
3. You can change this to a fixed duration (for example, 10 years) or another suitable period.
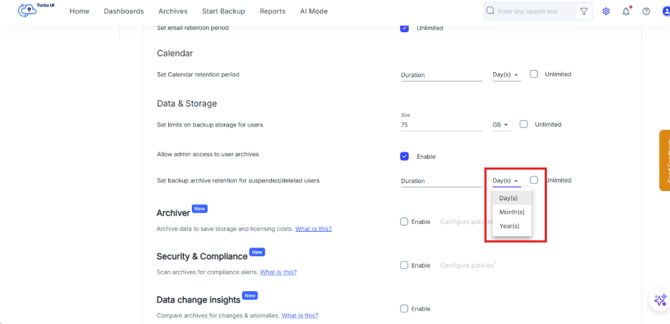
Step 11: Apply to whom
1. In the Apply to whom? section, choose how the selected settings should be applied.
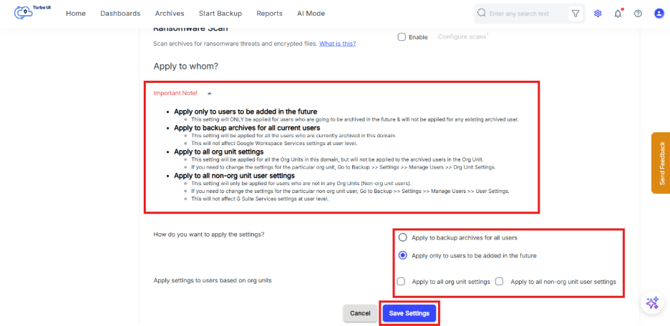
You can choose one of the following options:
Apply to backup archives for all users: Applies the selected settings to all users who are currently archived in the domain.
Apply only to users to be added in the future: Applies the selected settings only to users who will be added to the backup configuration in the future. This option does not apply the settings to users who are already archived.
Apply auto backup to all groups: Applies auto backup settings to all groups in the domain. This does not change any user-level settings.
2. After selecting the required option, click Save Settings and the selected backup settings will be saved for the Microsoft 365 domain based on the option selected in the Apply to whom? Section.
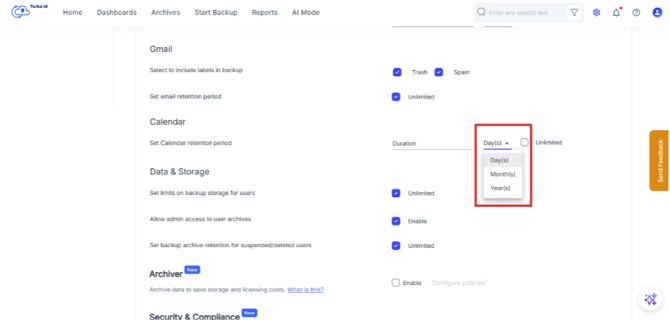
Note: You can revert to unlimited by re selecting the checkbox next to unlimited.
Step 12: Set Per‑User Storage Limits and Admin Access
1. In the Data and storage for users section, set backup storage limits per user by deselecting the checkbox setting into next to Unlimited. Note that it is set to Unlimited by default.
2. Specify the maximum storage per user, such as 1 TB, 100 GB, or 2 GB per user, or choose Unlimited.