![Untitled design (1)-Aug-01-2022-12-37-27-80-PM.png]](https://help.syscloud.com/hs-fs/hubfs/Untitled%20design%20(1)-Aug-01-2022-12-37-27-80-PM.png?height=40&name=Untitled%20design%20(1)-Aug-01-2022-12-37-27-80-PM.png)
SysCloud allows you to restore Microsoft 365 data from a selected backup snapshot or snapshot range. You can perform a point-in-time restore at two levels:
- Item-level restore: Restore specific items such as OneDrive files, Outlook emails, Microsoft People contacts, Calendar events, SharePoint files, or Teams data from a selected snapshot or snapshot range.
- Entity-level restore: Restore an entire Microsoft 365 app for a user, an app, entire Team, or a SharePoint site from a selected backup snapshot.
The main difference between the two flows is where the snapshot is selected. For item-level restore, the snapshot is selected from the item table before selecting the items to restore. For entity-level restore, the snapshot is selected inside the Restore pop-up window.
Item-level point-in-time restore
You can restore Microsoft 365 Apps data from a selected backup snapshot or snapshot range in the SysCloud archive. The selected snapshot determines which backed-up version of the Microsoft 365 Apps item is restored.
To restore Microsoft 365 Apps data from a snapshot
Step 1: Login to SysCloud application using your admin credentials.
Step 2: Click on “Archives” and select “Microsoft 365” from the Side Navigation Panel.
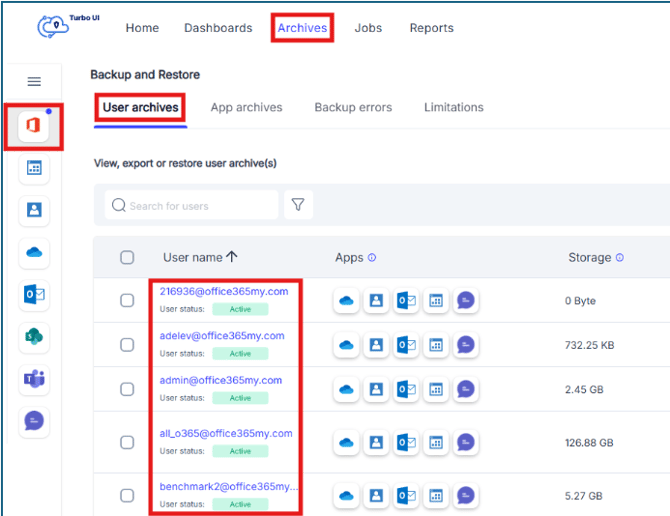
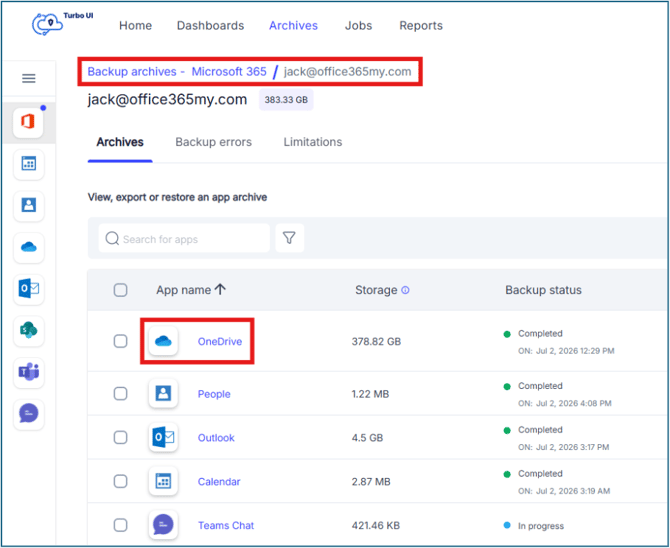
Step 3: Navigate to the user archives tab and click on a username to drill down into their archive. Click on any app in the selected user archive to view files. Here we select OneDrive as an example.
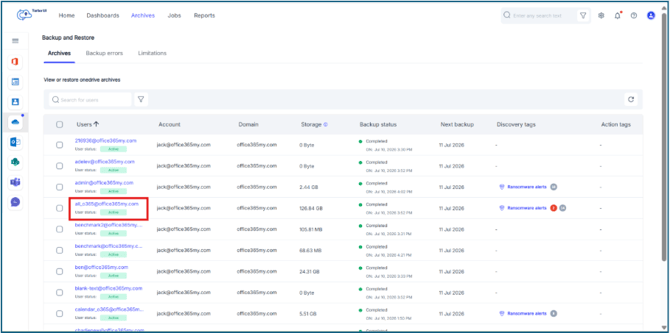
Step 4: In the OneDrive archive page, select the user whose OneDrive backup archive you want to view. You can use the search bar or filter option to locate the required user, and then click the username to open their backed-up OneDrive data.
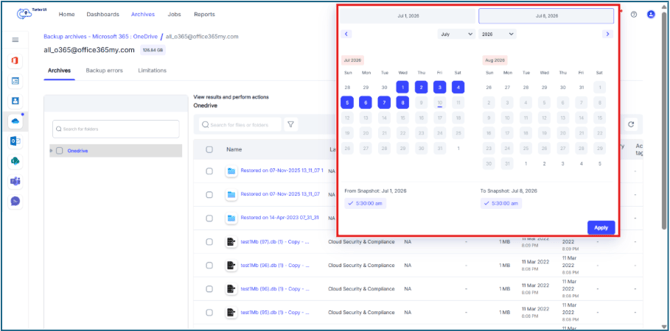
Step 5: Once you enter the OneDrive backup archives click on the Snapshot Selector
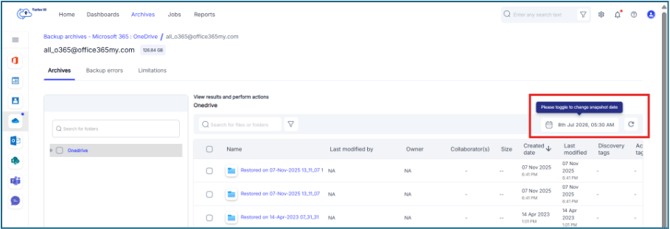
You can choose either:
- Snapshot range: Select a From Snapshot and To Snapshot date and time. SysCloud displays the latest backed-up version of each item available within the selected snapshot range.
- Specific snapshot: Select the same snapshot date and time as both the From Snapshot and To Snapshot. SysCloud displays the item version available in that specific backup snapshot.
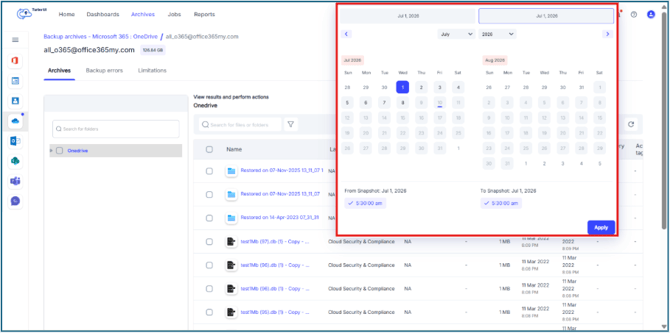
Step 6: Click Apply to load the OneDrive App archive data from the selected snapshot or snapshot range.
Step 7: Select the checkbox next to the Microsoft 365 App item you want to restore and click Restore.
Step 8: In the Restore - OneDrive window, verify the selected snapshot date or snapshot range using the calendar icon.
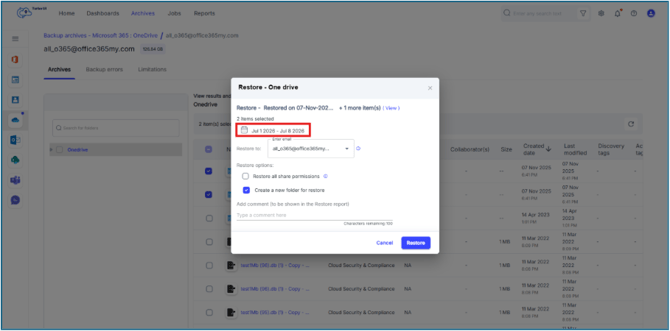
Restore with Snapshot Range
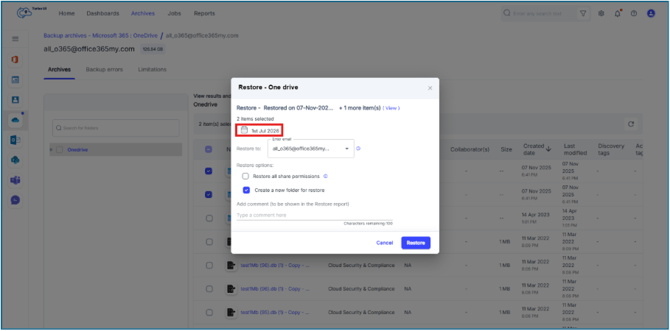
Restore with specific Snapshot
Step 9: Add an optional comment to be shown in the Restore report and click Restore to confirm the restore.
Step 10: You can view the restore/export status from Reports > Restore report.
Entity level point-in-time restore for Microsoft 365
You can use entity-level point-in-time restore to restore an entire Microsoft 365 app for a user, an entire Team, or a SharePoint site from a selected backup snapshot. This is useful when you want to restore the selected entity as it existed at a specific date and time. The steps below use OneDrive as an example.
To perform an entity-level point-in-time restore
Step 1: Log in to SysCloud using your admin credentials.
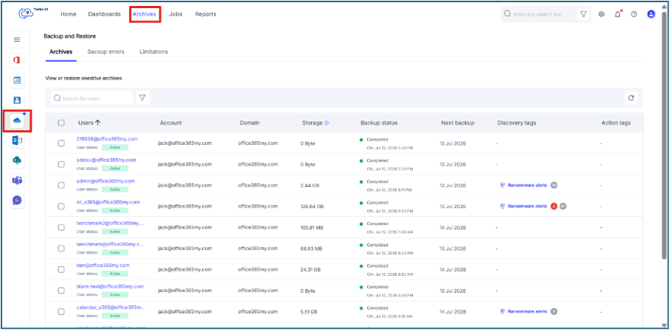
Step 2: Click Archives from the top navigation menu and select Microsoft 365 from the left-side cloud navigation. Select the Microsoft 365 app you want to restore, such as OneDrive.
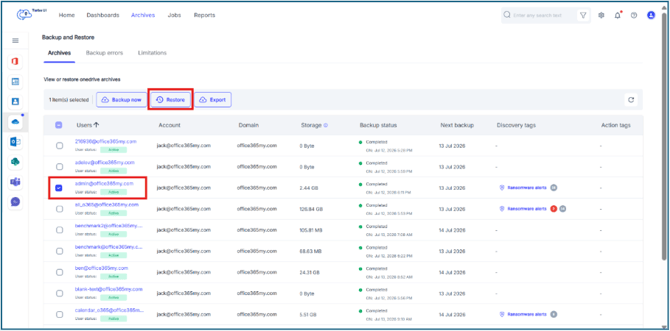
Step 3: In the Archives tab, locate the user whose app-level data you want to restore. Select the checkbox next to the required user and click Restore.
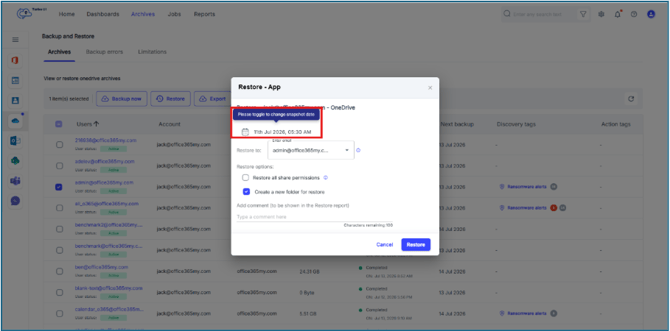
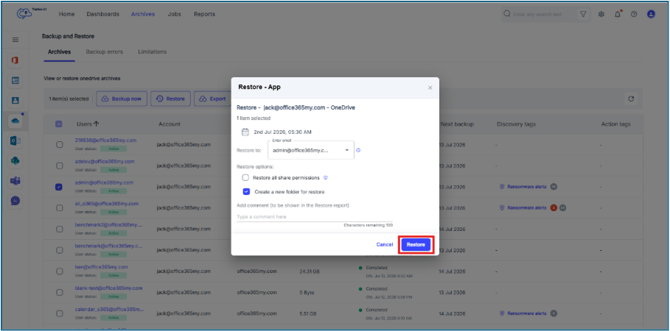
Step 4: In the Restore - App window, verify the selected user and app and click the snapshot selector.
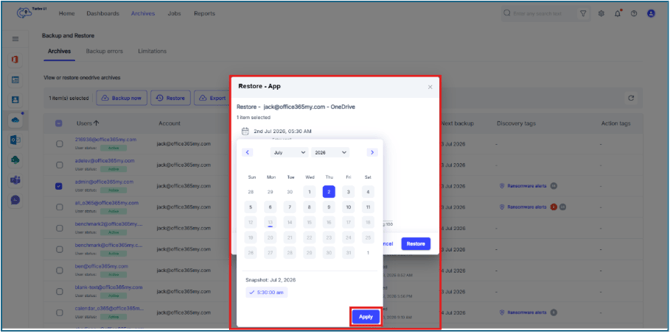
Step 5: and select the backup snapshot date and time from which you want to restore the app data. Click Apply.
Step 6: From the Restore to dropdown, select the account to which the data should be restored.
By default, the data is restored to the same user account. To perform a cross-user restore, select a different user account from the same Microsoft 365 domain.
Select the required restore options. For each app there would be different restore options.
For OneDrive, you can select:
- Restore all share permissions: Restores the sharing permissions associated with the backed-up files.
- Create a new folder for restore: Restores the data to a separate restore folder instead of restoring it directly to the original location.
Restore options may vary based on the Microsoft 365 app selected.
Add an optional comment to be shown in the Restore report and click Restore to confirm the restore.
Step 7: You can view the restore status from Reports > Restore report.