![Untitled design (1)-Aug-01-2022-12-37-27-80-PM.png]](https://help.syscloud.com/hs-fs/hubfs/Untitled%20design%20(1)-Aug-01-2022-12-37-27-80-PM.png?height=40&name=Untitled%20design%20(1)-Aug-01-2022-12-37-27-80-PM.png)
This article applies to the two versions of UI. Click on the link to directly jump to the applicable steps.
For Turbo UI Customers onboarded after 12/13/2024 ||For Turbo UI Customers onboarded before 12/13/2024
Applicable for SysCloud Turbo UI Users onboarded after 12/13/2024:
Steps
Step 1: Log in to the SysCloud backup application using your admin credentials.
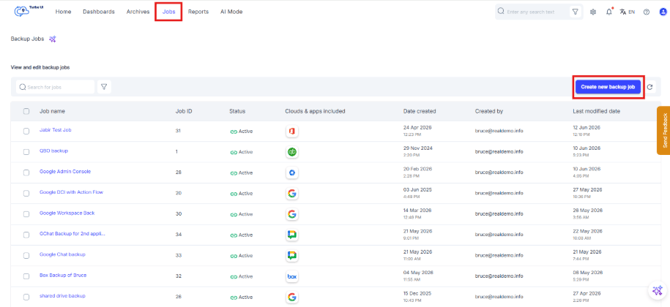
Step 2: Go to Jobs and click Create new backup job.
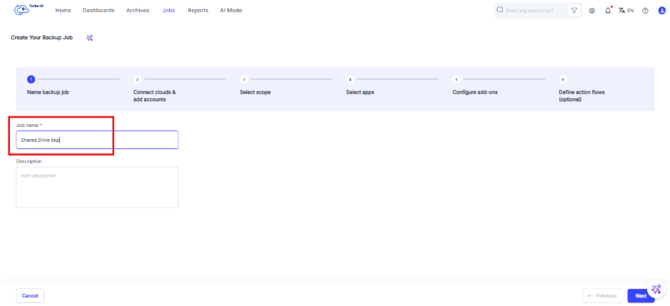
Step 3: Enter a name and description for the backup job and click Next.
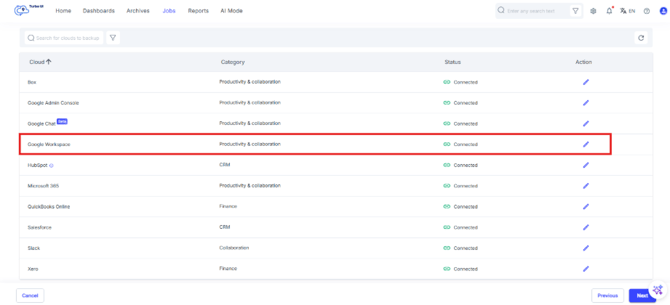
Step 4: In Step 2: Connect clouds & add accounts, make sure that the status is “Connected”. Click on the Edit pencil icon under the Action column to check the accounts added.
- Verify if the required Google account is added.
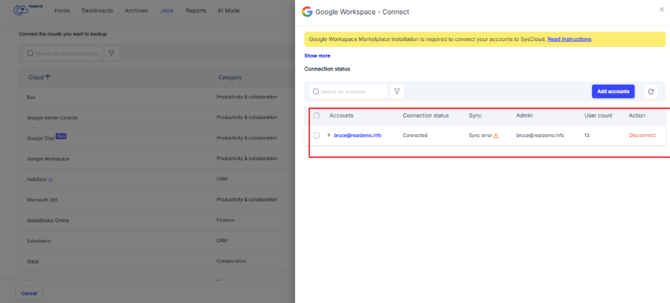
- If the Google Workspace account is not connected, connect and add account before continuing. Refer How can I connect my Google Workspace account to the SysCloud backup application?
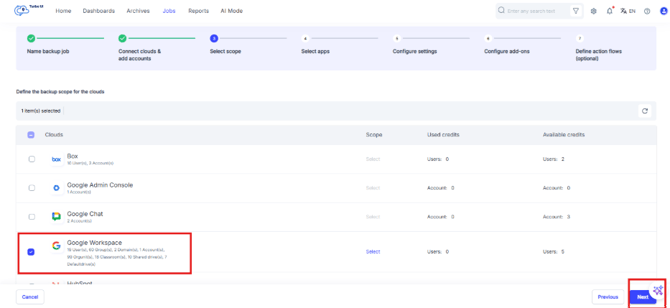
Step 5: In Step 3: Select the scope of the job, select the Google Workspace domain that contains the shared drives, and click Next.
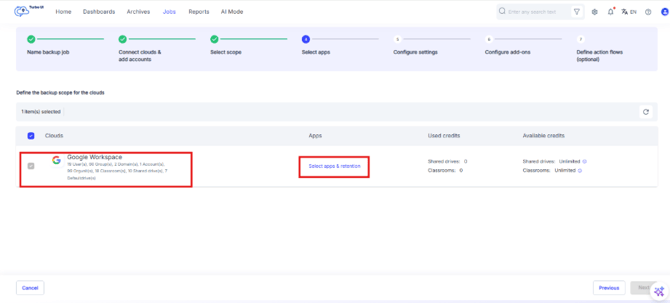
Step 6: In the Select apps step, click on Select apps & retention option in Apps column.
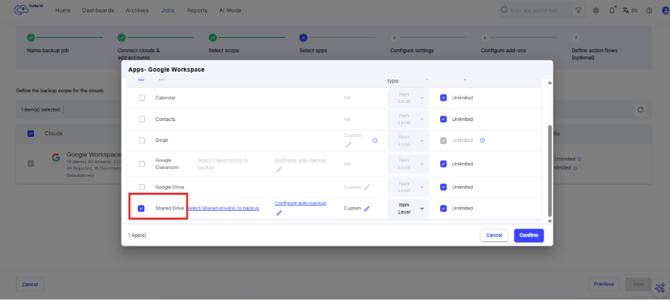
Step 7: In the app selection step, select Shared Drive.
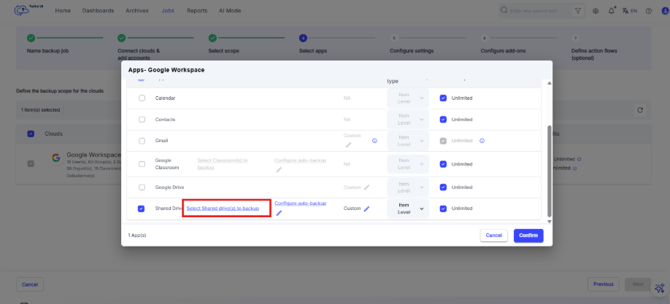
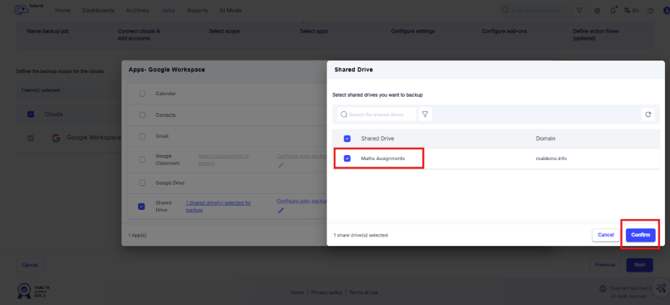
Step 8: Click the Select Shared Drives to choose the drives to be backed up.
Step 9: Choose the required shared drives and click Confirm.
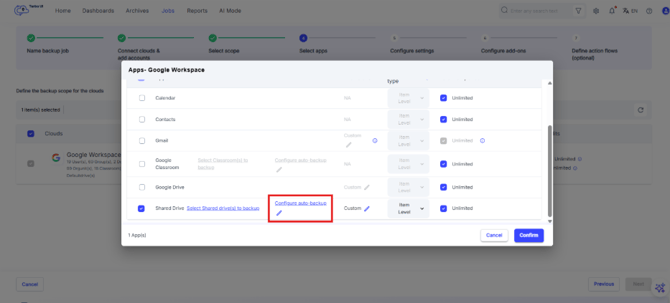
Step 10: Click on Configure auto-backup if you want SysCloud to automatically back up newly created shared drives in the selected domain.
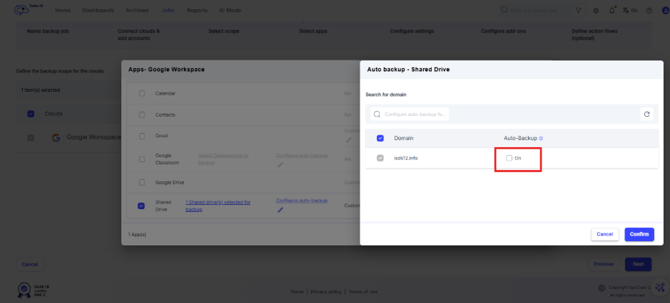
Step 11: Enable the Auto-Backup by checking the on switch for the selected domain.
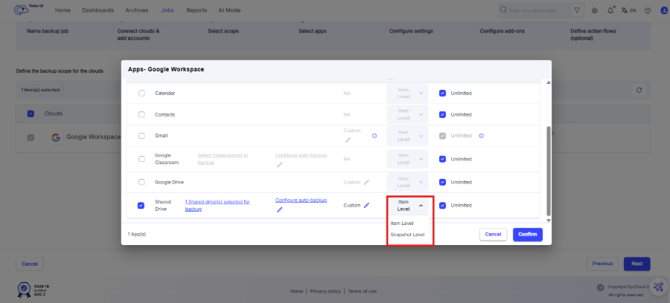
Step 12: Configure retention type:
- Item-level retention: Retention is calculated based on the last modified date of an item.
- Snapshot-level retention: Retention is calculated based on the date of the latest snapshot.
Step 13: Configure the retention period:
- To retain shared drive backup data indefinitely, keep the default unlimited retention option selected.
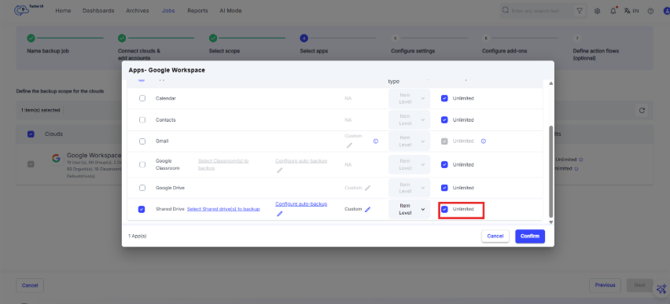
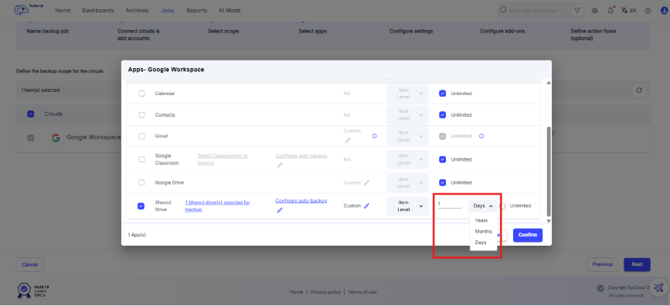
- To set a specific retention period, clear the unlimited retention option and enter the required duration.
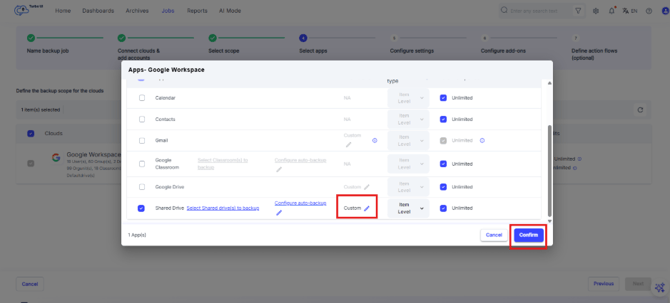
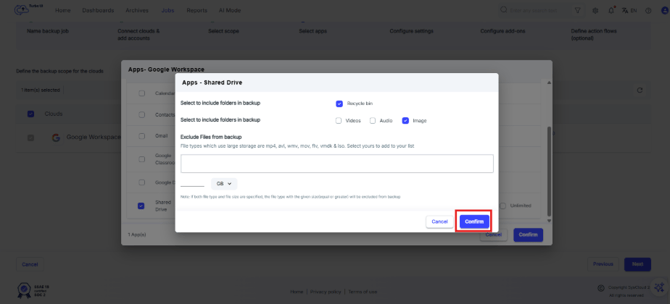
Step 14: Configure file exclusion settings, if required. You can exclude files from backup based on file type or file size. Click on Custom Edit icon.
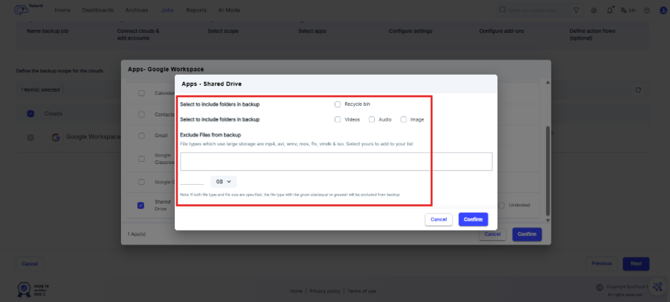
Step 15: In the Exclusion configuration window, use following options as per requirements:
- Include or exclude recycle bin files. By default, excluded.
- Include or exclude Video, Audio or Image. By default, excluded.
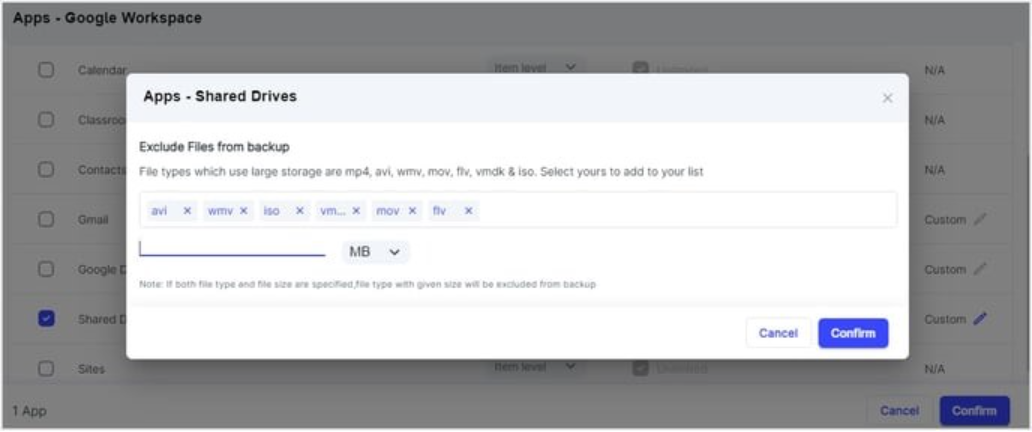
- Exclude specific file formats from backup
- File size exclusions
Step 16: Once the exclusions are configured, click Confirm to proceed.
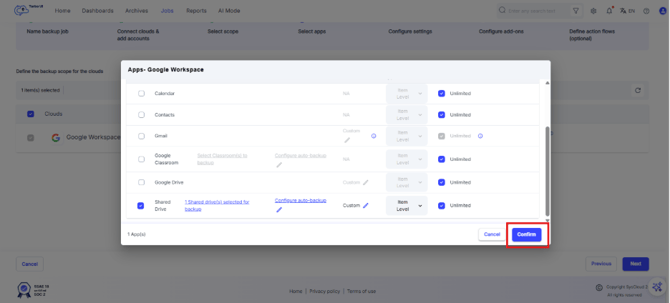
Step 17: On the Apps- Google Workspace window, Click Confirm to proceed.
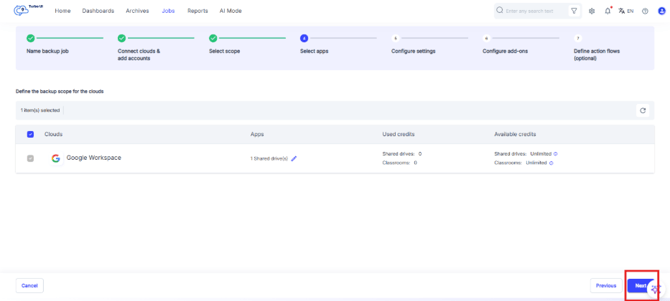
Step 18: Click Next to go to the Configure settings step.
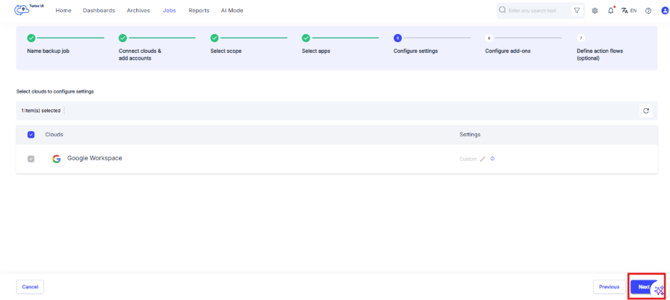
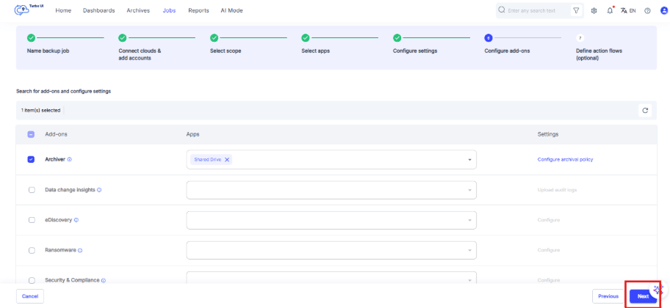
Step 19: Click Next to skip and go to the Configure add-ons step.
Step 20: Click Next to skip and go to Define action flows step.
Step 21: On the Define action flows step, Click Start backup.
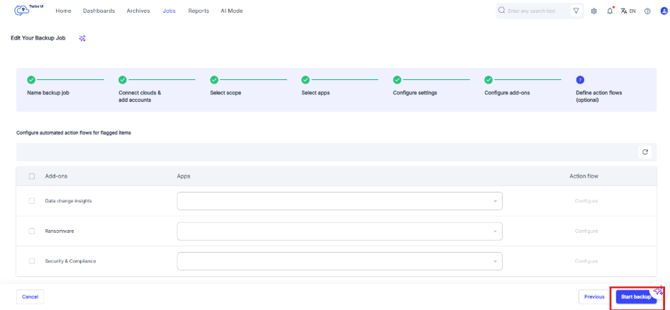
SysCloud will start backing up the selected Google shared drives.
View backed-up shared drive data
To view backed-up shared drive data, go to Archives > Google Workspace > Shared Drive.
Refer How do I view my Shared Drive application’s backup archive?
Applicable for Turbo UI Customers onboarded before 12/13/2024:
To back up Google shared drives using SysCloud, follow the steps below:
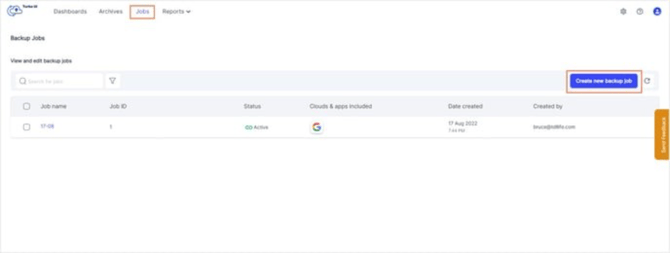
Step 1: Log in to SysCloud using your admin credentials. Go to Jobs and click on Create new backup job.
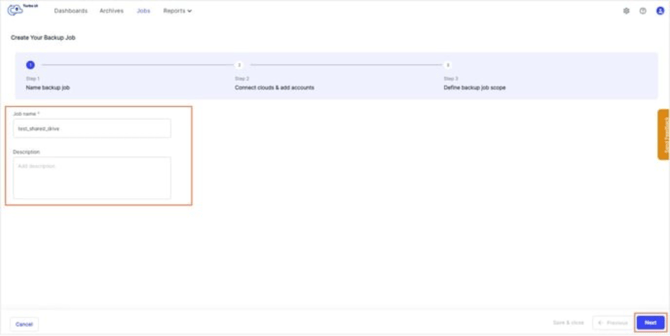
Step 2: Enter a name and description (optional) for the backup job and click Next.
Step 3: Add the Google Workspace account that contains the shared drives that need to be backed up. Click Next.
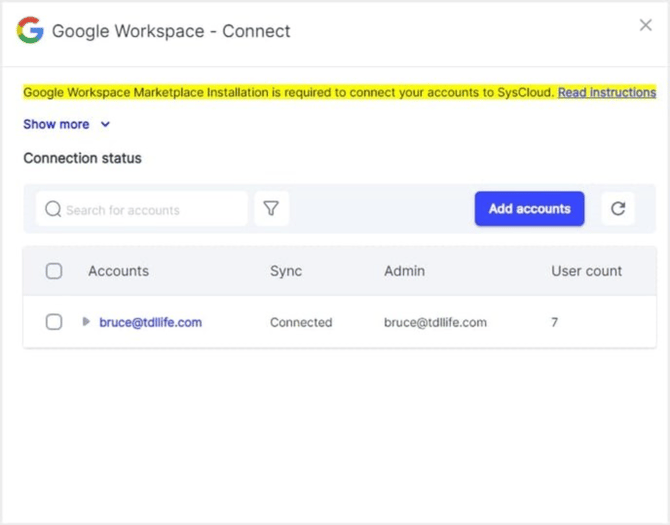
- You will have to connect your Google Workspace account to SysCloud if it’s not already connected. Learn how to do this.
Step 4: Under Scope, select the Google Workspace account and the domain for which you need to back up shared drives.
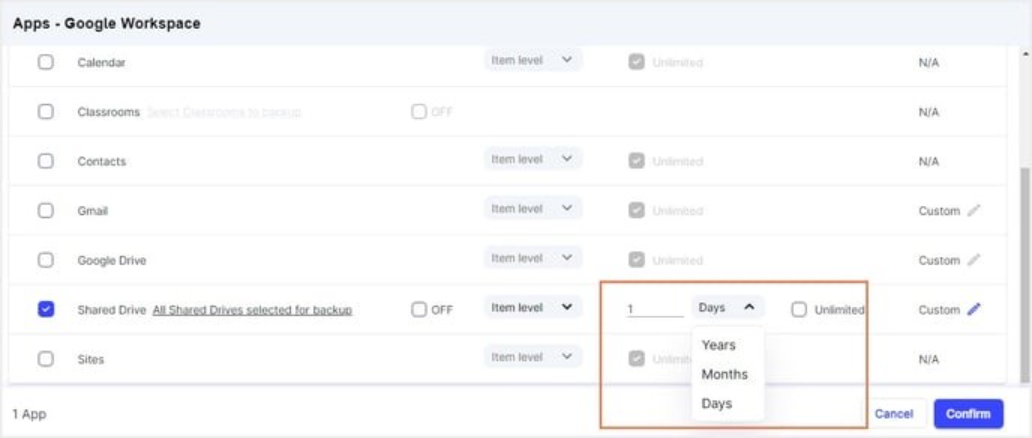
Step 5: Under Apps, select Shared Drive. By default, all shared drives are included in the backup job. To choose specific shared drives, click on the link All Shared Drives selected for backup. In the pop-up box that appears, choose the required shared drives and click Confirm.
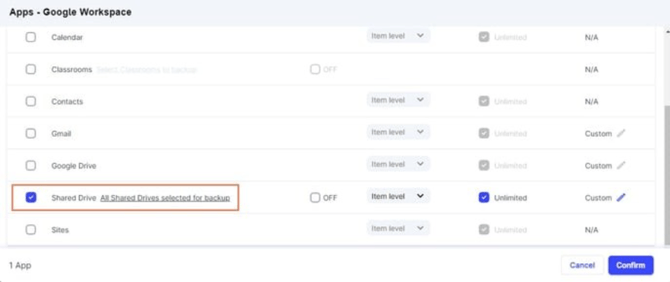
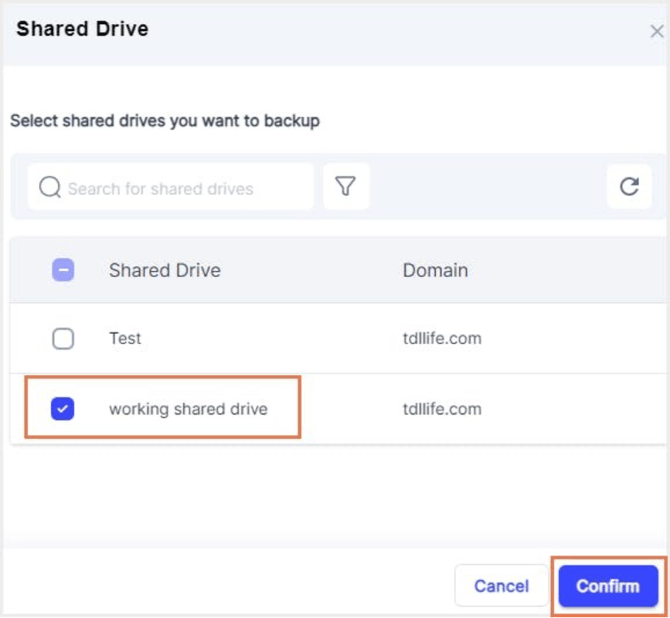
Step 6: You can turn on auto-backup if you want to back up all selected shared drives and any newly created shared drives in the selected domain.
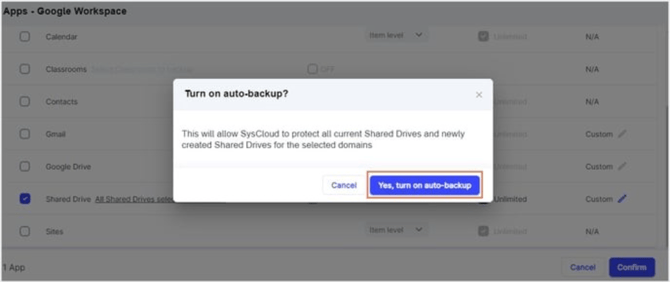
Step 7: Choose how long the shared drives need to be retained. By default, the selected shared drives are retained for an unlimited period. To give a specific retention period, uncheck the Unlimited option and enter the desired retention period. You can also exclude certain files from the backup based on the file type and file size.
Step 8: Once all the selections are made, click Confirm -> Start backup.
This will back up the selected shared drives. To view the backed-up data, go to Archives -> Shared Drive.