- Help Center
- Manage admin roles
- Admin roles (Turbo backup)
-
Turbo backup vs Legacy backup
-
Get started with Turbo backup
-
Manage Legacy backup
-
Google Workspace
-
Google Classroom
-
Microsoft 365
-
Slack
-
QuickBooks Online
-
Xero
-
HubSpot
-
Salesforce
-
Box
-
Sky - AI Copilot
-
Add-ons
-
Partner Portal
-
Subscription and payments
-
Manage admin roles
-
Manage account
-
K-12 Security & Compliance
-
Google Drive Encryption
-
Shopify
How to add a super administrator in the SysCloud application?
Applicable for both Turbo and Legacy backup versions.
Choose the version Turbo backup | Legacy backup
Follow the steps below to add a super administrator to the Turbo version of the SysCloud backup application:
Step 1: Log in to the SysCloud backup application using your super admin credentials.
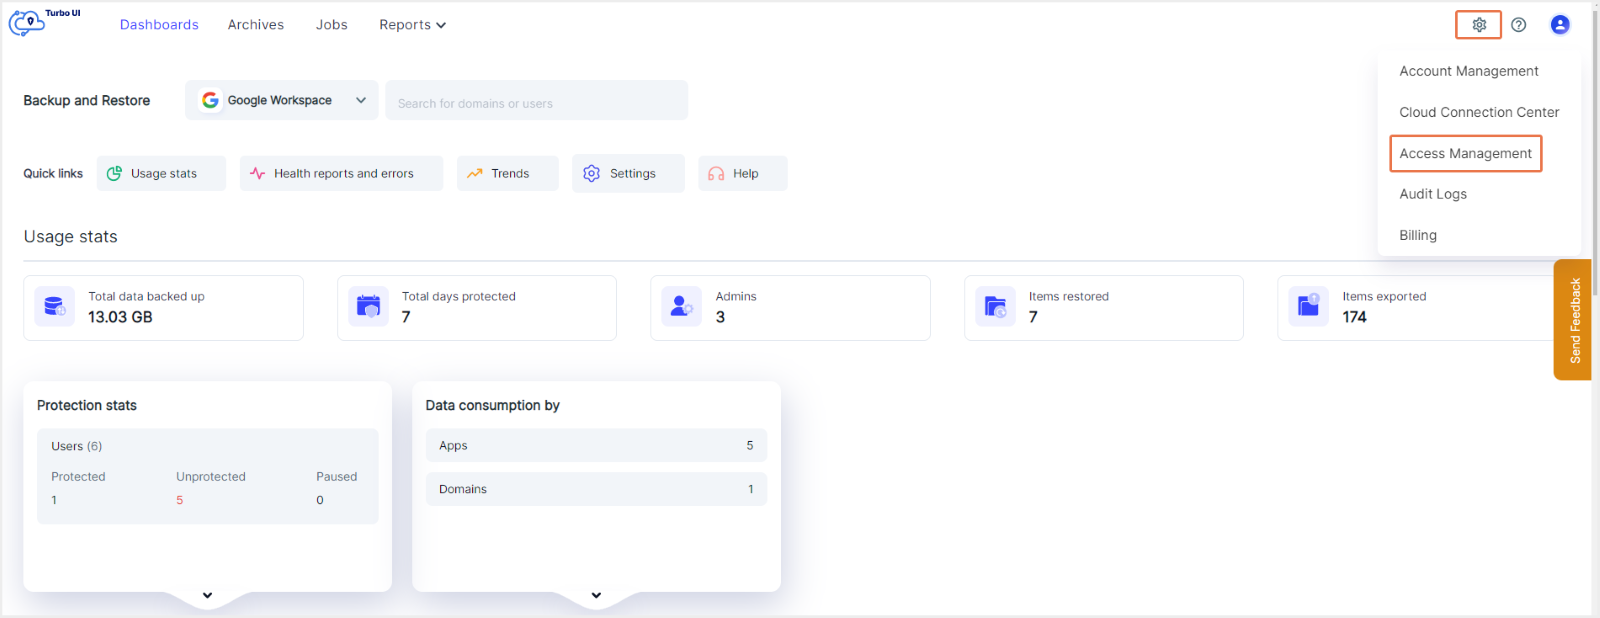
Step 2: Click on the “Settings” icon on the top right corner of the page. Select “Access management” from the drop-down.
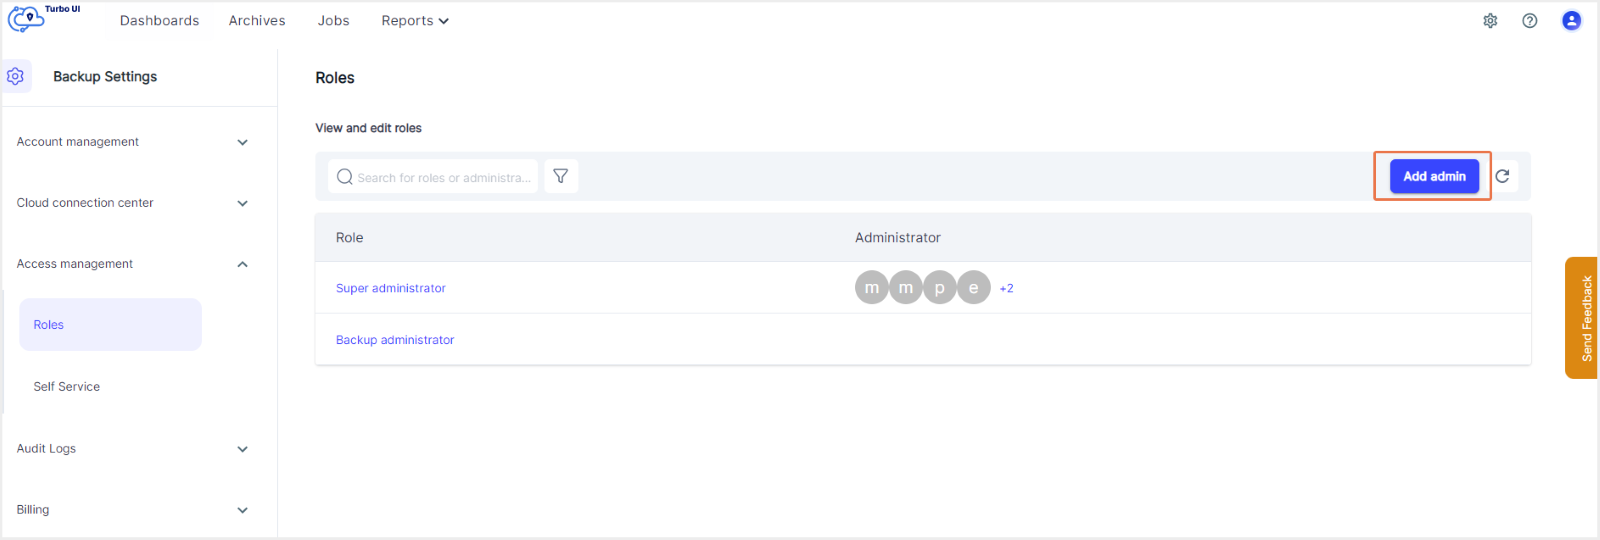
Step 3: To add a new super admin role, click on “Add admin.”
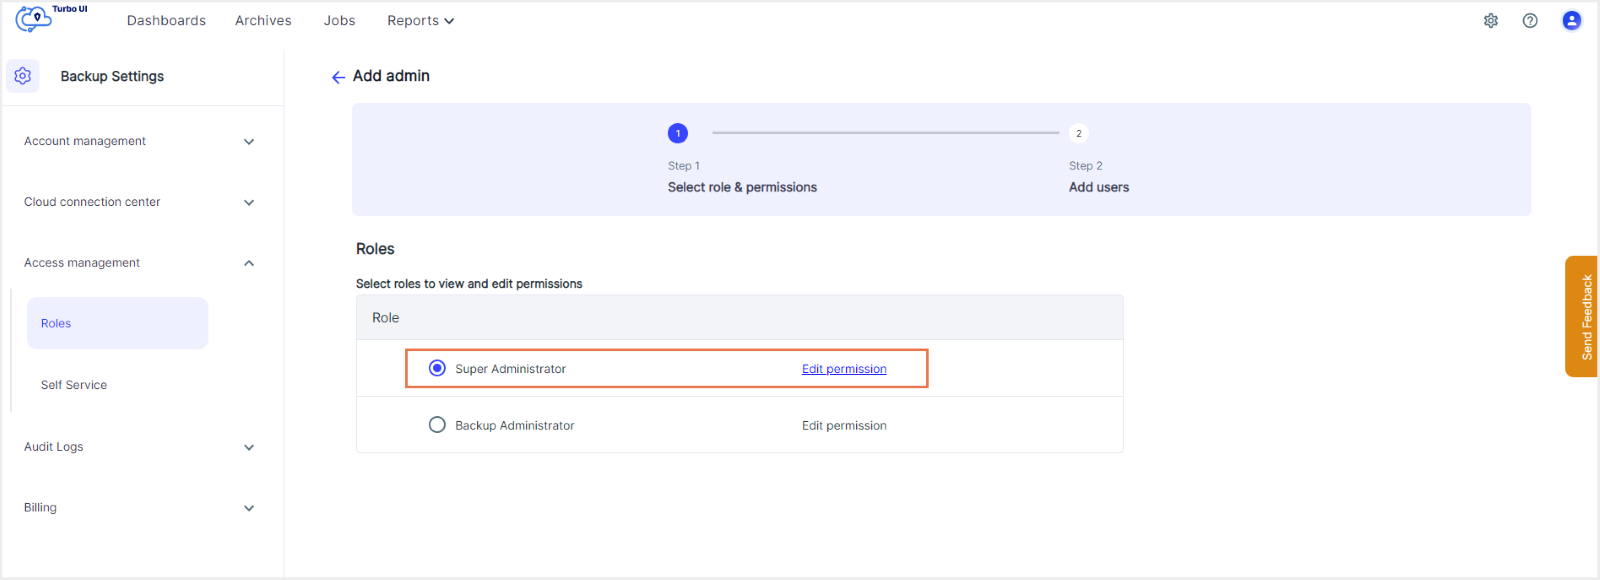
Step 4: Select “Super administrator” from the list. If you want to view and edit permissions, click on “Edit permission.”
Note: By default, all permissions are enabled. Click on the checkbox next to the permissions to disable any of the permissions and click on “Continue.”
Step 5: Click on “Next.”
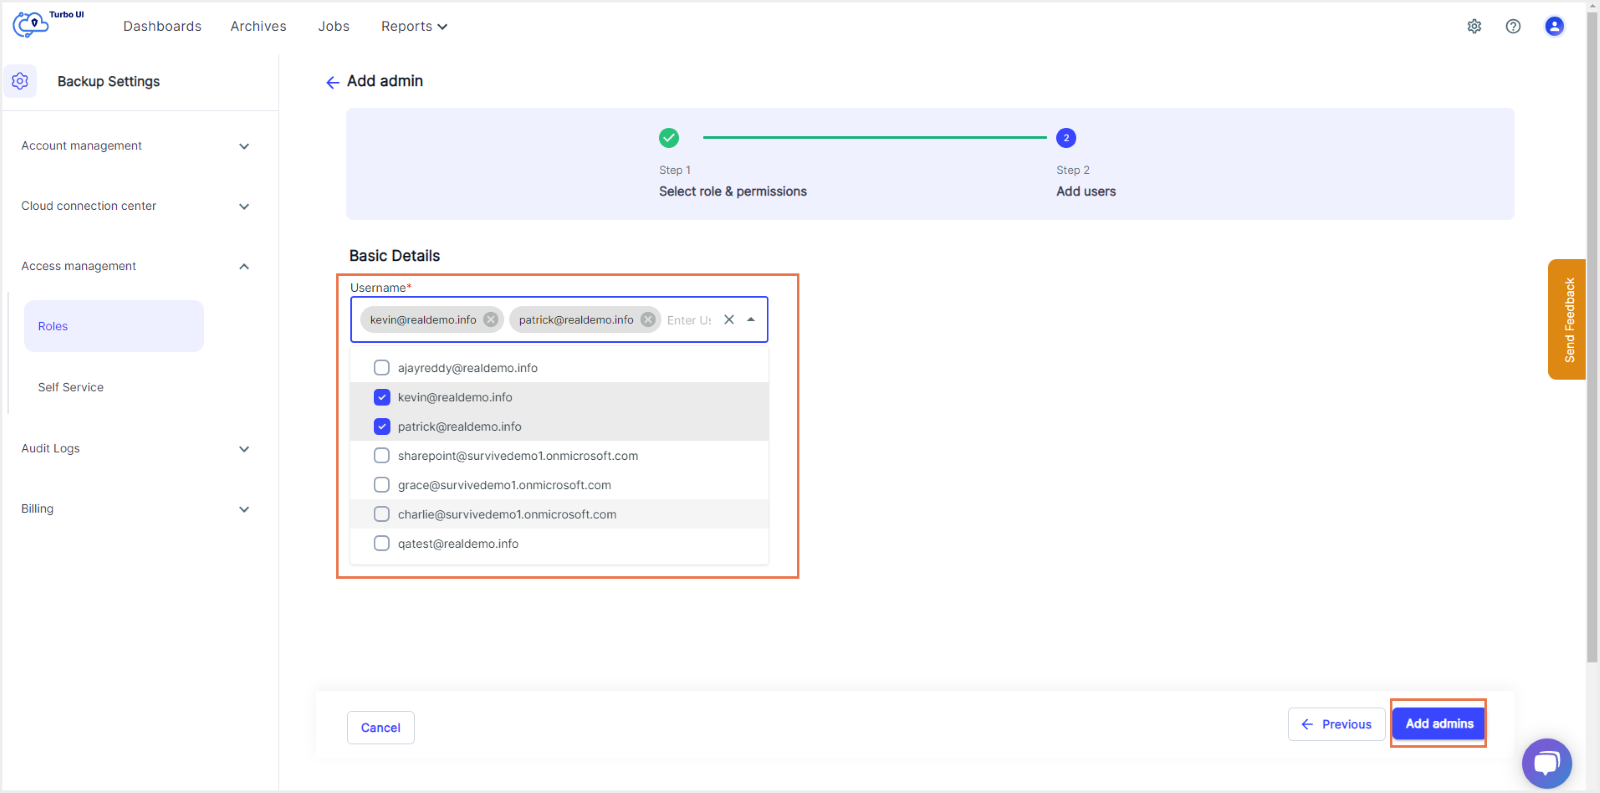
Step 6: Choose the username(s) that is to be added as the SysCloud application super admin from the drop-down list and click on “add admins.”
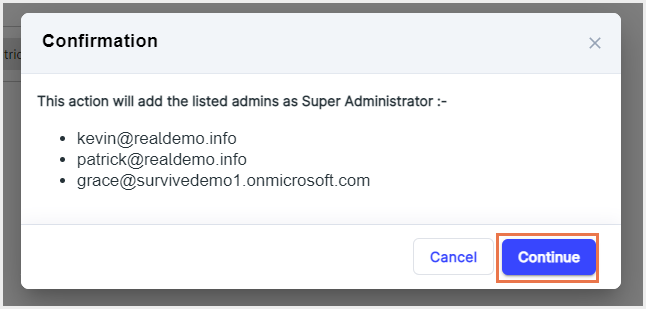
Step 7: In the confirmation pop-up box, click on “Continue” to confirm adding the listed admins as super administrators.
Follow the steps below to add a super administrator to the Legacy version of the SysCloud backup application:
Step 1: Log in to the SysCloud Application with your admin credentials.Step 2: Click “Setup”→“Manage Admin Roles.”
Step 3: Click the vertical ellipsis icon under the “Actions” section for the Super Administrator role.
Step 4: Click “Edit.”
Step 5: Locate the user by typing the name in the search bar.
Step 6: Check the box for selecting the user and click “UPDATE ROLE.”
