Follow the steps below to grant admin consent for the required SysCloud application permissions in Microsoft Entra.
Microsoft has renamed Azure Active Directory to Microsoft Entra ID. Use the Microsoft Entra admin center and Enterprise applications section to review and grant permissions for the SysCloud application. Microsoft’s official documentation lists the admin consent path as Identity > Applications > Enterprise applications and explains that tenant-wide admin consent can be granted from the Permissions page of an enterprise application.
Prerequisite
You must sign in to the Microsoft Entra admin center using an account with the required administrator role to grant admin consent. Microsoft states that tenant-wide admin consent requires an eligible administrator role, such as Privileged Role Administrator or another role that has permission to grant consent.
Steps
Step 1: Go to the Microsoft Entra admin center and Sign in using your Microsoft administrator credentials.
Step 2: In the left navigation pane, Go to Entra ID > Enterprise applications.

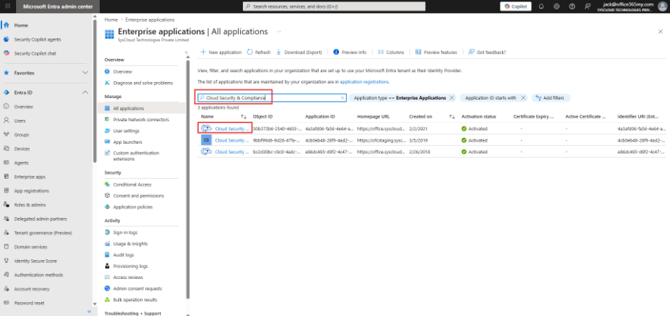
Step 3: On the Enterprise applications page, Click on All applications in the submenu.

Step 4: Search for and select Cloud Security & Compliance from the application list.
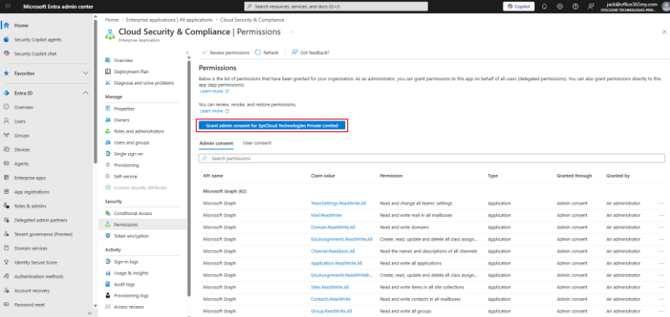
Step 5: Select Permissions under the Security section in the left menu.

Step 6: Click the Grant admin consent for SysCloud Technologies Private Limited button.
Step 7: Sign in again with your administrator credentials if a Microsoft prompt appears.

Step 8: Review the list of permissions requested by the SysCloud application.
Step 9: Click Accept to finalize and grant the required scopes.
The required scopes will be added to the SysCloud application after admin consent is granted.
-
Granting tenant-wide admin consent allows the application to access the requested resources for users in the tenant, unless user access is restricted separately. Microsoft also notes that granting tenant-wide admin consent may revoke permissions that were previously granted tenant-wide for the application, while permissions granted by individual users on their own behalf are not affected.
-
After granting the permissions, return to SysCloud and reconnect or re-authenticate the Microsoft 365 account if the backup application still shows a permission or authentication error.