How can I restore my Outlook data from the SysCloud backup archives?
Applicable for the Turbo backup version
To restore your Outlook data from the SysCloud backup archives, follow the below steps:
- Step 1: Log in to SysCloud using your admin credentials.
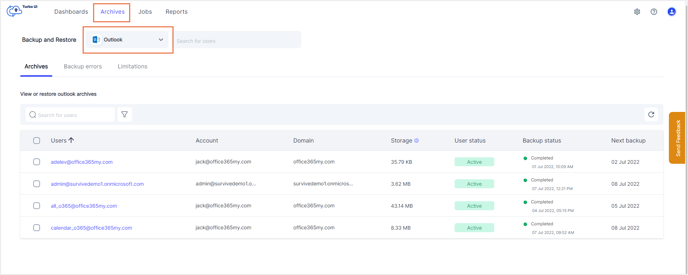
- Step 2: Click on “Archives” and select “Outlook” from the Backup and Restore drop-down.

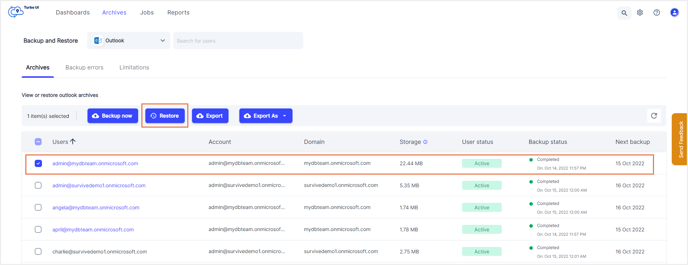
- Step 3: Select the user whose Outlook data needs to be restored by clicking the checkbox next to the user account. Click “Restore.”

Note: If you need to restore specific emails or folders, click on the user account to go to the Outlook archives for that user. You can either perform a mail-level restore or a folder-level restore. Select one or more emails or folders and click “Restore.”
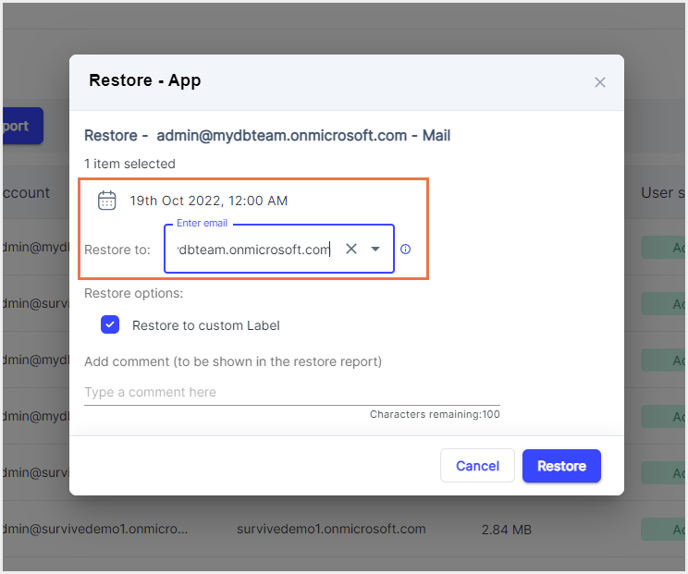
- Step 4: In the restore pop-up box, select the snapshot date and time, and select an account to restore the data to.

Note: By default, data is restored to the same account from which it was deleted. To perform a cross-user restore, you can select a different account of the same domain.
- Step 5: To restore deleted mails to a custom folder, click the checkbox next to " Restore to custom folder.” If this option is unchecked, the selected data will be restored to its original location.
-3.png?width=688&height=574&name=Restore%20pop-up%20(1)-3.png)
Note: When you choose the “Restore to custom folder” option, the application will create a default “Restored on (dd-mm-yy)” folder in your inbox and restore emails under it. - Step 6: Add comments to be shown in the restore report (optional) and click on “Restore” to confirm the restore.
-2.png?width=688&height=574&name=Restore%20pop-up%20(2)-2.png)
You can see the restore progress in the restore reports. To access restore reports, navigate to Reports -> Microsoft 365.