Follow the steps below to restore Salesforce records from the SysCloud backup application:
Step 1: Log in to SysCloud using your admin credentials.
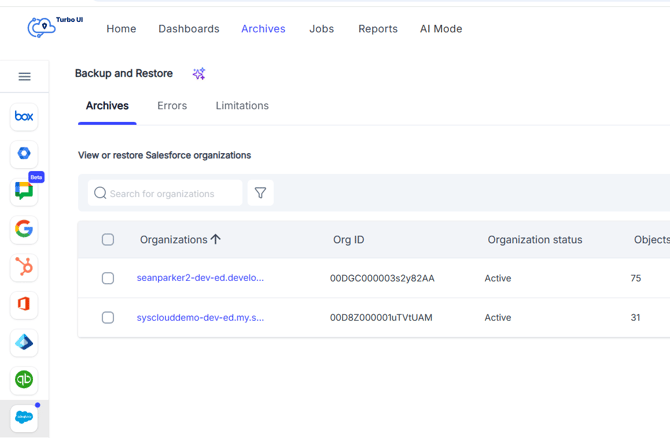
Step 2: Navigate to Archives from the main dashboard. The Archives tab displays the list of Salesforce organizations available in the backup archive. Select the organization you want to restore the record from.
Step 3: Under the Objects tab, select the Salesforce object that contains the record you want to restore.

Step 4: Select the account you want to restore the record(s) from.
Step 5: Select the record(s) you want to restore by clicking the checkbox next to the record name.

Step 6: Click “Restore.”
Step 7: In the confirmation dialog box, select the checkbox next to “Restore all levels of child records” if you want to restore all the child records associated with the record. If this is left unchecked, only the selected record(s) and the other mandatory record(s) associated with it (if any) will be restored.
- Select the checkbox beside “Create new records” if you want the record(s) to be duplicated with a new ID.
To learn more, see: What happens if you choose the option "create new record" when restoring Salesforce records using the SysCloud backup application. - Select the checkbox beside “Overwrite record(s)” to overwrite the selected record(s) (if unselected, the record will be restored with a new ID).
To learn more, see: What happens if I select the "Overwrite record(s)" option when restoring Salesforce records using the SysCloud backup application? - Select the checkbox beside “Skip if present in Salesforce” to skip restore if duplicate records are found.
To learn more, see: What happens if I choose the "skip if present" option when restoring Salesforce records using the SysCloud backup application?

Step 8: Add comments (if any) to be shown in the restore report, and click the “Restore” button.
- If a record is found in the Salesforce Recycle Bin, SysCloud recovers the record before restoring it with the selected backup snapshot data. The record is restored to its original destination, and where supported, the original Salesforce record ID is preserved.
- Validation rules and workflows will be disabled during restore and reenabled after restore.