Yes, you can restore data at an item-level using the SysCloud backup application. To perform an item-level restore, follow the steps below:
Step 1: Log in to SysCloud using your admin credentials.
Step 2: Click on “Archives” and select “Google Workspace” from the Backup and Restore drop-down. Select the required account and domain from the list to view your user archives. 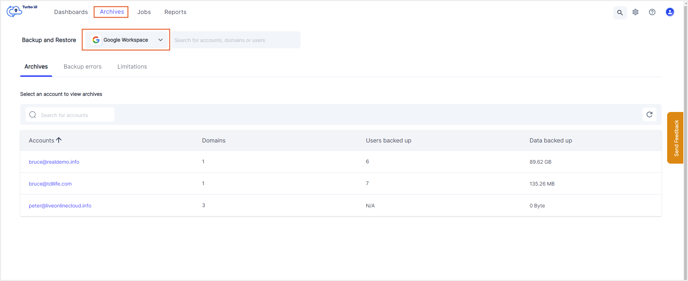
Step 3: Click on the user whose data needs to be restored. This will take you to the app archives for that user. 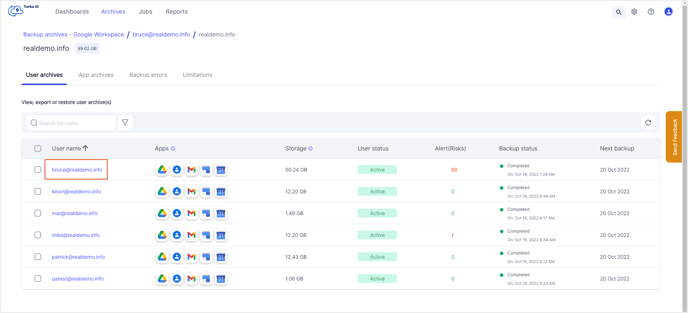
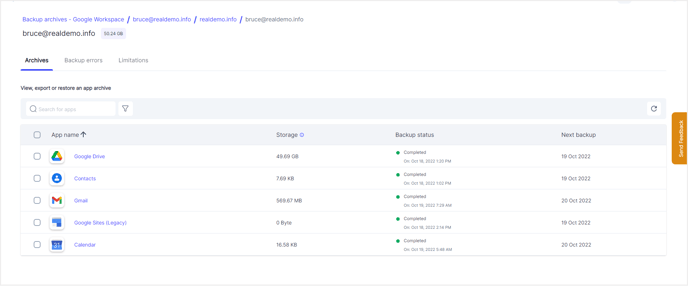
Step 4: Click on the app from which you need to restore specific items.
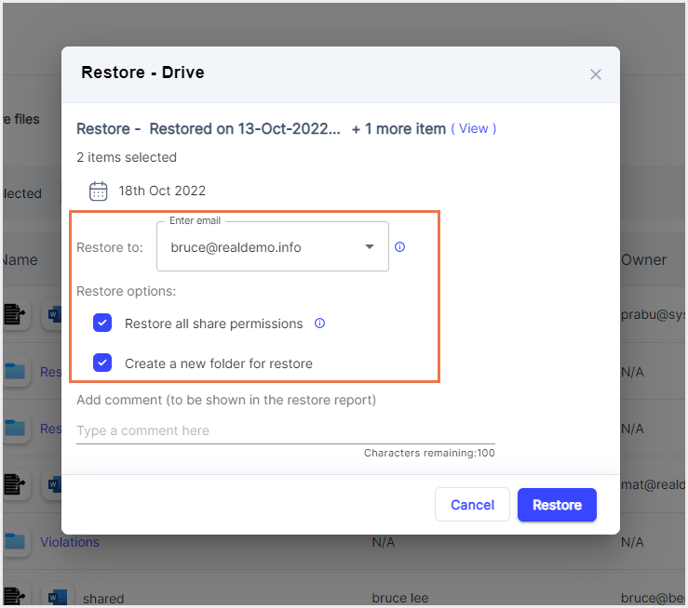
1. Drive:
- If you need to restore specific files or folders from Google Drive, click on “Drive.” This will take you to the Google Drive archives for the selected user.
- Select the snapshot date and time, and click Apply. Select the file(s) or folder(s) that you need to restore. Click “Restore.”
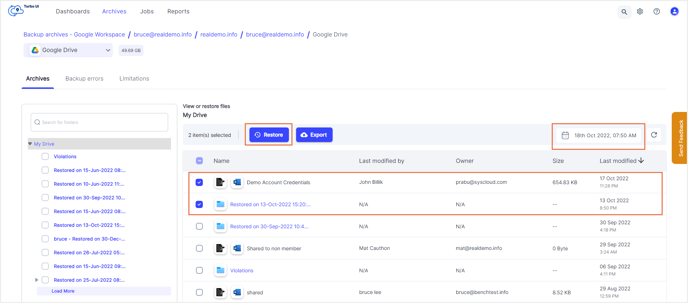
Note: You can either perform a file-level restore or a folder-level restore. You cannot restore a file and a folder at the same time. - Select the account to restore the data.
Note: By default, data is restored to the same account from which it was deleted. To perform a cross-user restore, you can select a different account of the same domain.
- Click the checkbox next to "Restore all share permissions” if you want to restore the data with all its sharing permissions intact. If this option is unchecked, the collaborators of the original file will not have access to the restored file.
- Click the checkbox next to “Create a new folder for restore” if you wish to restore the data to a new folder. If this option is unchecked, the data will be restored to its original location.
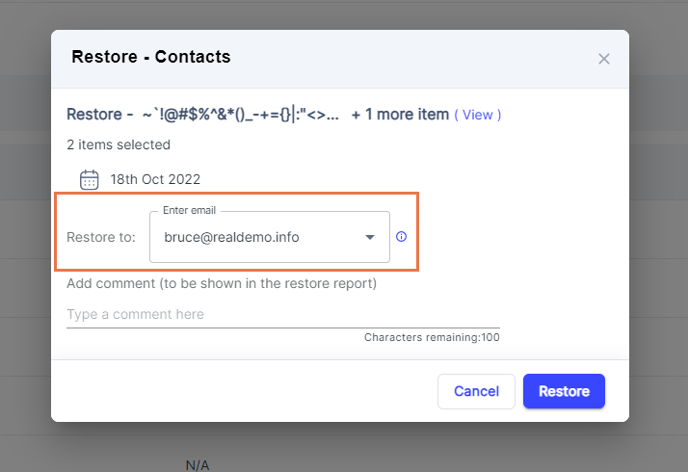
2. Contacts:
- If you need to restore specific contacts, click on “Contacts.” This will take you to the Contact archives for the selected user.
- Select the snapshot date and time, and click Apply. Select the contact(s) or contact folder(s) that you need to restore. Click “Restore.”
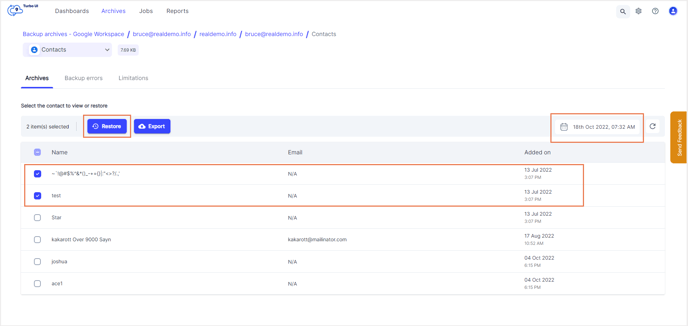
- Select the account to restore the data.
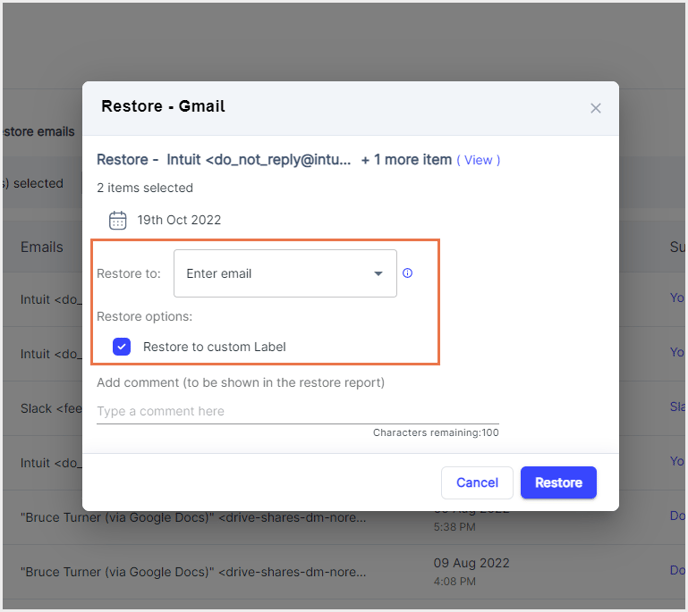
3. Gmail:
- If you need to restore specific emails or labels from Gmail, click on “Gmail” This will take you to the Gmail archives for the selected user.
- Select the snapshot date and time, and click Apply. Select the mail(s) or label(s) that you need to restore. Click “Restore.”

Note: You can either perform a mail-level restore or a label-level restore. You cannot restore a mail and a label at the same time.
- Select the account to restore the data. To restore deleted emails to a custom label, click the checkbox next to " Restore to custom label.” If this option is unchecked, the selected data will be restored to its original location.
4. Google Sites: - If you need to restore specific Google Sites items, click on “Sites.” This will take you to the Sites archives for the selected user.
- Select the snapshot date and time, and click Apply. Select the Site(s) that you need to restore. Click “Restore.”
- Select the account to restore the data.
5. Calendar:
- If you need to restore specific Calendar items, click on “Calendar.” This will take you to the Calendar archives for the selected user.
- Select the snapshot date and time, and click Apply. Select the calendar(s) or event(s) that you need to restore. Click “Restore.”
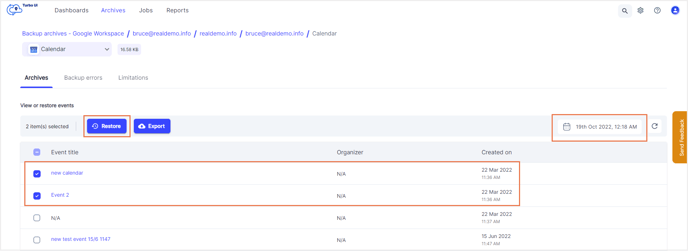
Note: You can either perform a calendar-level restore or an event-level restore. You cannot restore a calendar and an event at the same time.
- Select the account to restore the data to.
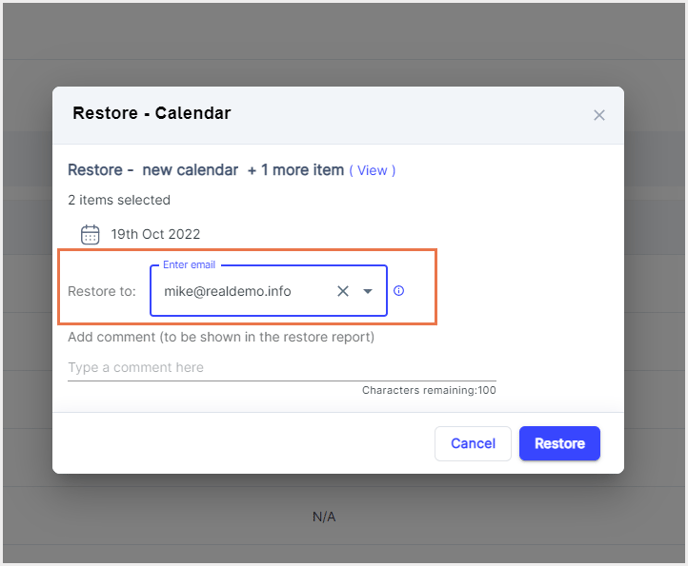
Step 5: Add any comments to be shown in the restore report and click Restore.