Follow the steps below to restore the Google Calendar data from the SysCloud backup application:
There are 2 ways how you can access to archives of Gmail:
From Google Calendar App | From user level
Follow the steps below to restore Google Drive data at the application level:
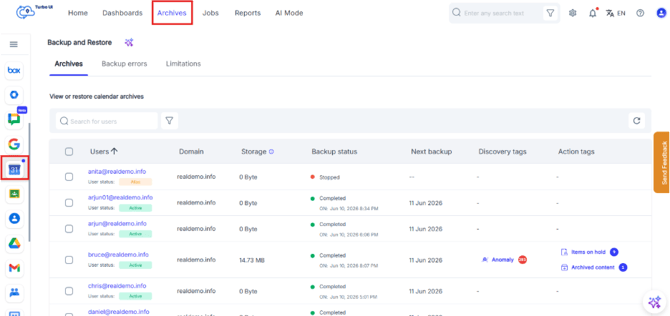
Step 1: Log in to SysCloud using your admin credentials.
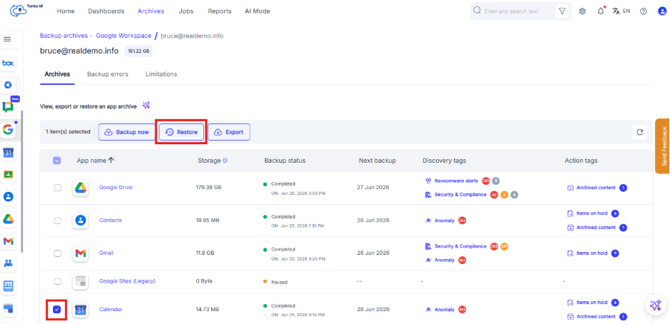
Step 2: Click on “Archives” and select Google Calendar under Google Workspace.
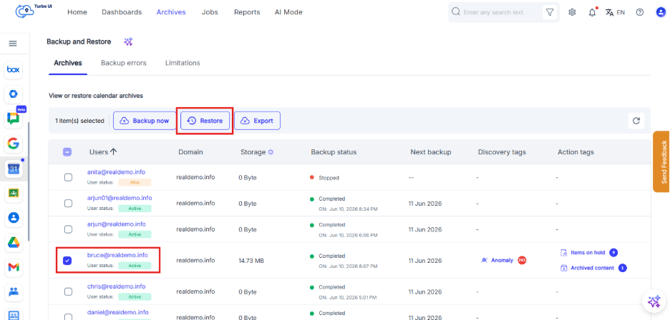
Step 3: Select the user account from the list by clicking the checkbox next to the account name and click on Restore.
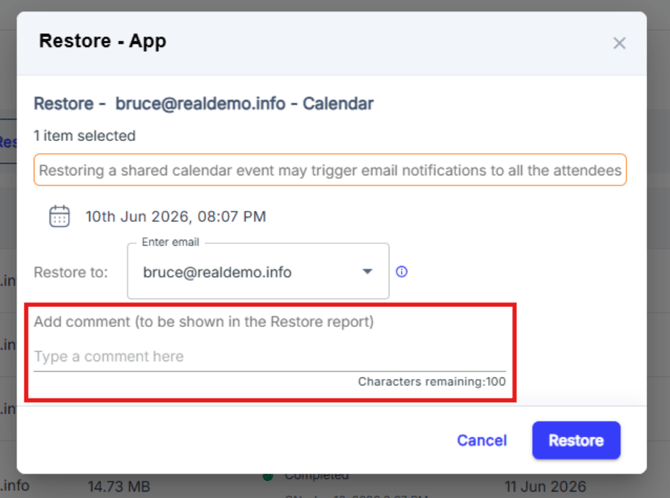
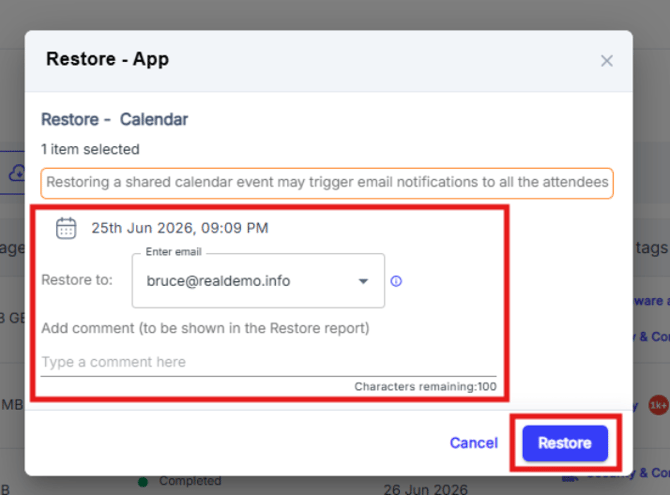
Step 4: In the restore pop-up box, select the snapshot date and time and select an account to restore the data.
-
By default, data is restored to the same account from which it was deleted. To perform a cross-user restore, you can select a different account of the same domain. Refer to this article for step by step instructions on how to initiate cross-user restore.
-
Restoring a shared calendar event may trigger email notifications to all attendees.

Step 5: Add comments to be shown in the Restore Report (optional) and click on Restore to confirm the restore.
Step 6: You can monitor the restore status from Reports > Restore Reports.

Follow the below steps to initiate restore from User level:
Step 1: Log in to SysCloud using your admin credentials.
Step 2: Click Archives, select Google Workspace, and then choose the user whose data you want to restore to access their archive.
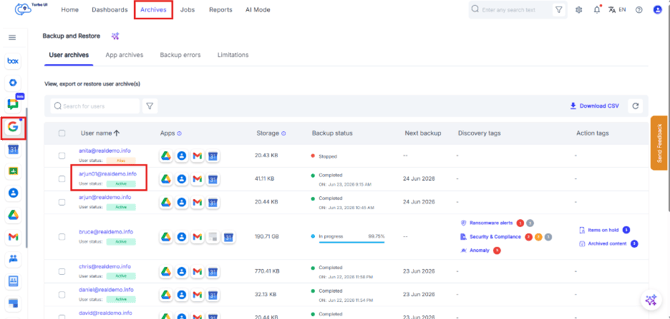
Step 3: From the list of available apps, select the checkbox next to Google Calendar and click on Restore.
Step 4: You can monitor the restore status from Reports > Restore Reports.
