How can I restore my Microsoft 365 data at a user level from the SysCloud backup archives?
Applicable for both Turbo and Legacy backup versions.
Choose the version Turbo backup | Legacy backup
Follow the steps below to restore Microsoft 365 data for an individual user from the Turbo version of the SysCloud backup application:
Step 1: Log in to SysCloud using your admin credentials.
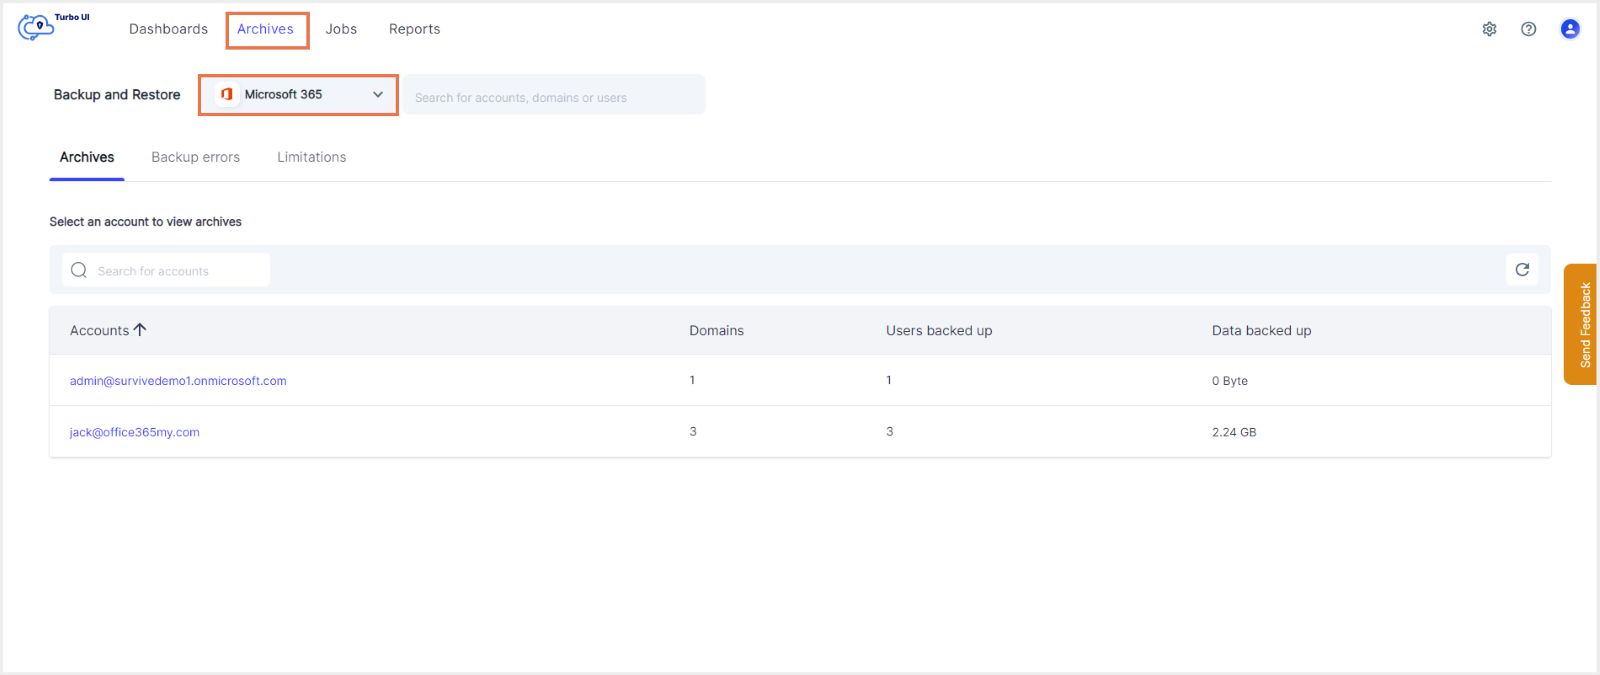
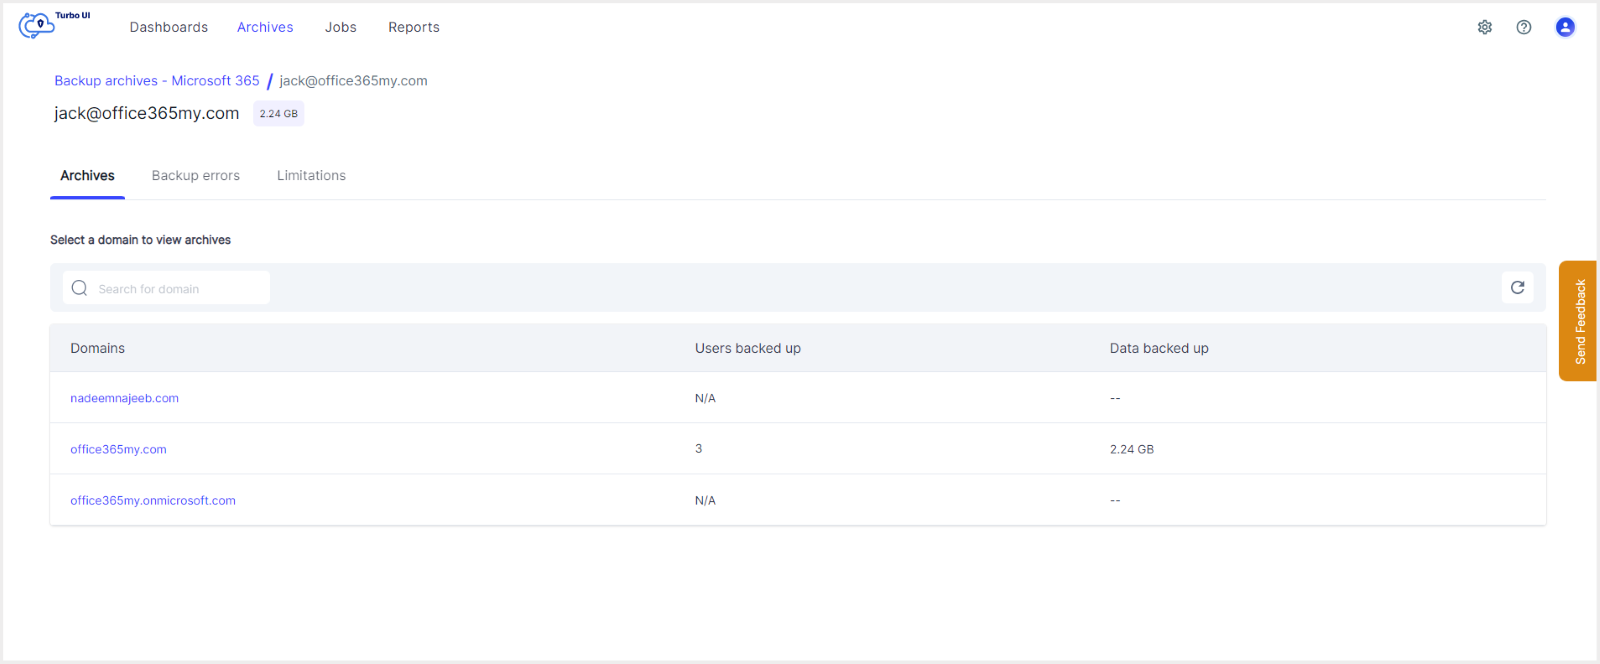
Step 2: Click on “Archives” and select “Microsoft 365” from the Backup and Restore dropdown. Select the required account and domain from the list to view your user archives.
Note: You can also search for users, accounts, or domains in the global search bar to make the restore process easier.
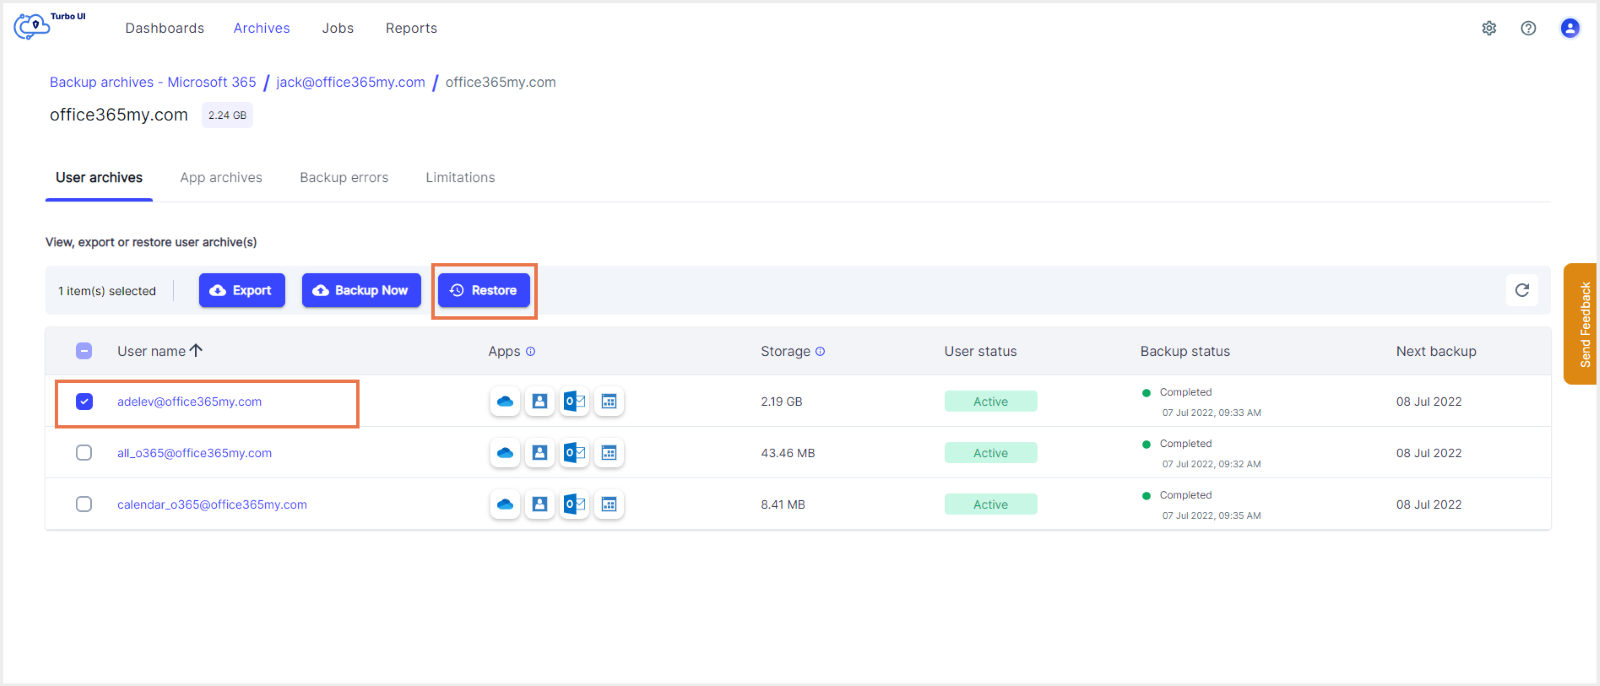
Step 3: To restore data at a user level, click on the checkbox next to the user whose data you wish to restore. Click “Restore.”
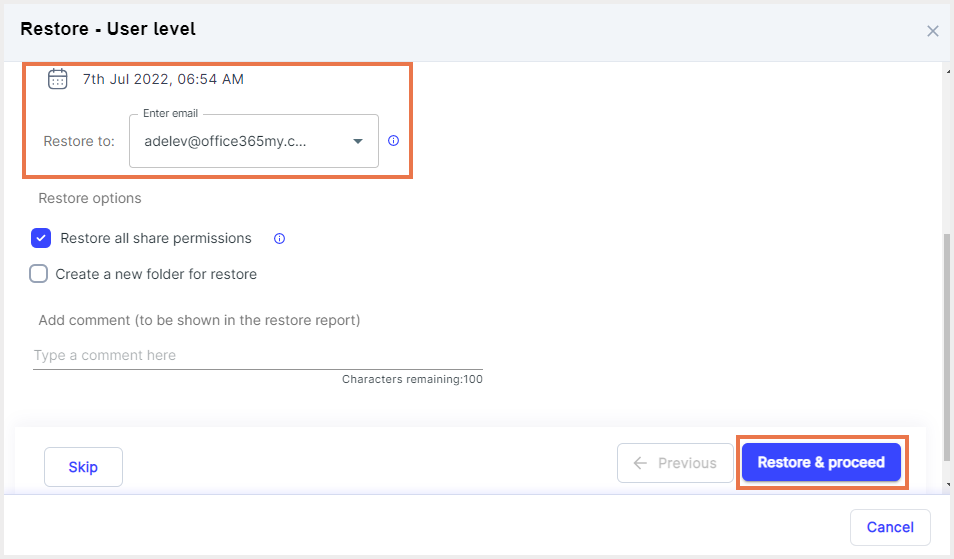
Step 4: In the restore pop-up box, select the snapshot date and time, and select an account to restore the data. Click “Restore and Proceed” to initiate the restore and move to the next app.
Note: By default, data is restored to the same account from which it was deleted. To perform a cross-user restore, you can select a different account of the same domain.
- OneDrive:
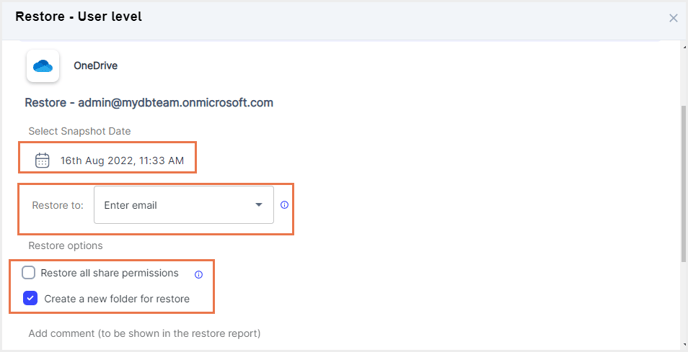
- Select the snapshot date, time, and account to restore the data.
-
- To restore OneDrive data with all sharing permissions intact, click the checkbox next to "Restore all permissions.” If this option is unchecked, the collaborators of the original file will not have access to the restored file.
-
- To create a new folder for restore, click the checkbox next to the option “Create a new folder for restore.” The data will be restored to the original location if this option is unchecked.
- Add comments to be shown in the restore report (optional) and click “Restore and Proceed.”
- Contacts:
Select the snapshot date, time, and account to restore the data. Add comments to be shown in the restore report (optional) and click “Restore and Proceed.” - Mail:
Select the snapshot date, time, and account to restore the data. To restore deleted mails to a custom folder, click the checkbox next to " Restore to custom folder.” If this option is unchecked, the selected data will be restored to its original location.
Add comments to be shown in the restore report (optional) and click “Restore and Proceed.” - Calendar: Select the snapshot date, time, and account to restore the data. Add comments to be shown in the restore report (optional) and click “Restore and Close” to confirm the restore.
Note: You can click on the “Skip” button to skip the restore for a particular app and move to the next app.
You can see the restore progress in the restore reports. To access restore reports, navigate to Reports -> Microsoft 365.
Follow the steps below to restore Microsoft 365 data for an individual user from the Legacy version of the SysCloud backup application:
Step 1: Log in to SysCloud Backup Application with your credentials.
Step 2: Click “Backup” → “Archive & Restore.”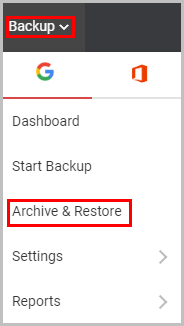
Step 3: Select the username of the account you want to restore.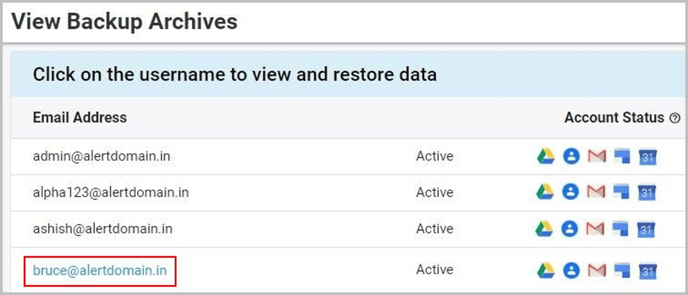
- Outlook
- OneDrive
- People
- Calendar
- SharePoint

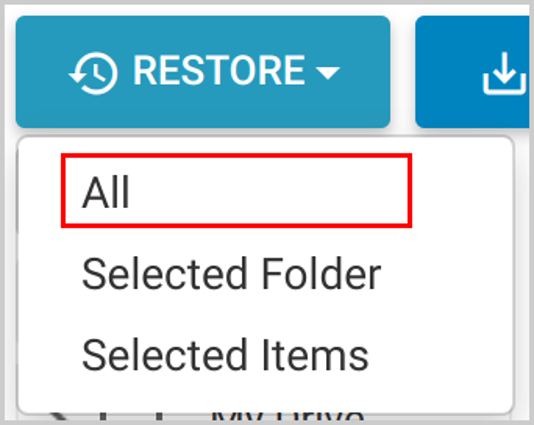
Step 5: Click “Restore”→“All.”
Step 6: Click “Restore.”

Note:
- You can change the email id here if you want to restore the data to another user (cross-user restore) – this is applicable only if you are a super admin.
- Check the “Check to restore a file with share permission” option if you want to retain sharing permissions on the restored files – this is applicable only for Drive and OneDrive applications.
Step 7: Click “Yes.”
Step 8: Repeat the procedure for all the services.
Note
1. You can restore only one service at a time.
2. You cannot restore archived data into a user account on a different domain. You can only restore data to a user in the same domain.
3. As an admin, you can turn on self-service restore for the “Backup” module.
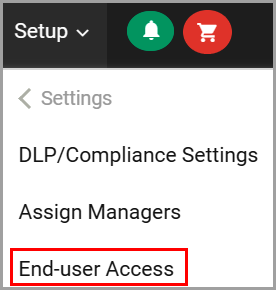
- Click “Setup”→“Settings”→“End-User Access.”
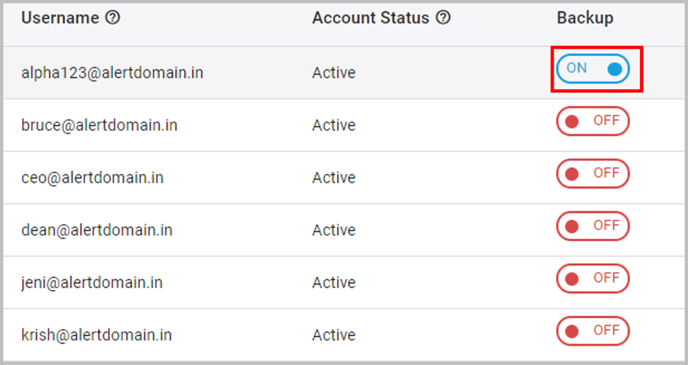
- Toggle Backup to “ON” at the domain level, user level, or organization unit level.
- Click “Yes.”

Tip:
To test out the restores, we recommend the following:
- Use a temporary new user account as the destination account: To ensure that the restored version does not overwrite the current version of a file.
- Check the option “Create a new folder/label for restore” for Drive/email restores: To filter and easily access the restored files/emails.