![Untitled design (1)-Aug-01-2022-12-37-27-80-PM.png]](https://help.syscloud.com/hs-fs/hubfs/Untitled%20design%20(1)-Aug-01-2022-12-37-27-80-PM.png?height=40&name=Untitled%20design%20(1)-Aug-01-2022-12-37-27-80-PM.png)
You can add Teams Private Chat to an existing Microsoft 365 backup job by editing the job and selecting Teams Chat in the app selection step.
Use this article if Microsoft 365 backup is already configured in SysCloud and you want to start backing up Teams Private Chat for users who are already included in the backup job.
Prerequisite
Users with an existing Microsoft 365 backup must reconnect their Microsoft 365 account from the Cloud Connection Center before enabling Teams Private Chat backup. This ensures SysCloud has the required permissions to back up Teams Private Chat data.
Read How can I reconnect or re-authenticate my Microsoft 365 account? for detailed steps.
Steps
Step 1: Log in to the SysCloud backup application using your admin credentials.
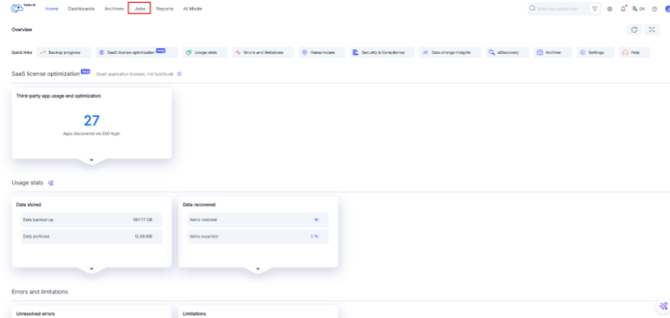
Step 2: Go to Jobs.
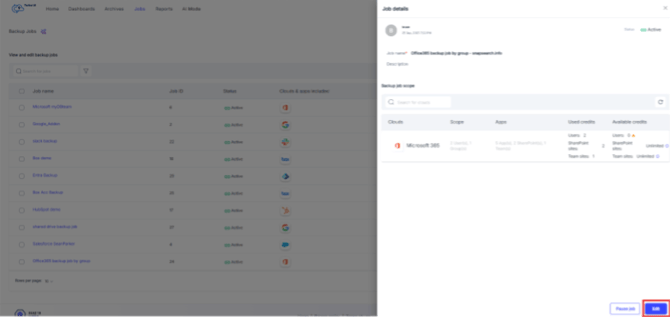
Step 3: Open the Microsoft 365 backup job you want to update. From the side tray, click Edit.
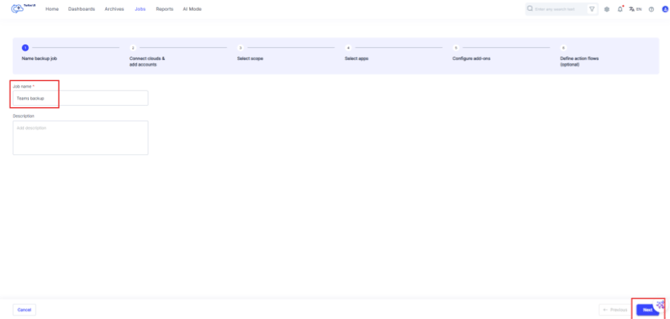
Step 4: In Step 1: Name backup job, review the backup job name and description. Make changes if required and click Next.
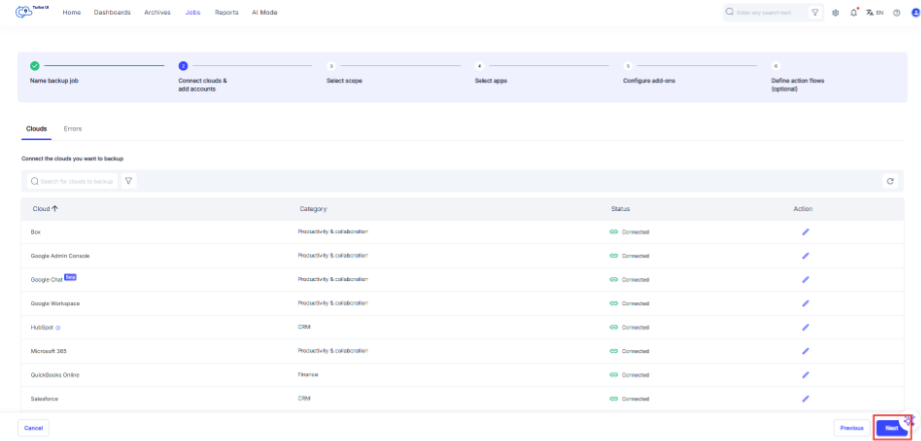
Step 5: In Step 2: Connect clouds & add accounts, verify that Microsoft 365 is connected. If the account was not reconnected after Teams Private Chat support was enabled, reconnect the Microsoft 365 account from Settings > Cloud Connection Center before continuing. Read
How can I reconnect or re-authenticate my Microsoft 365 account?
Step 6: Click Next to go to Step 3: Select scope.
Step 7: In Step 3: Select scope, click Select under the Scope column.
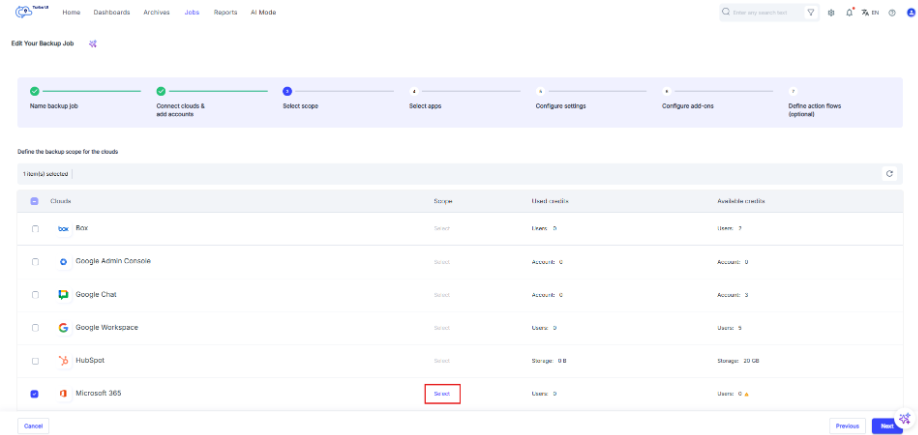
Step 8: In Entities – Microsoft 365, verify that the users whose Teams Private Chat data must be backed up are included in the backup scope. Depending on the job configuration, users may be included through:
- Entire domain
- Specific groups
- Specific users
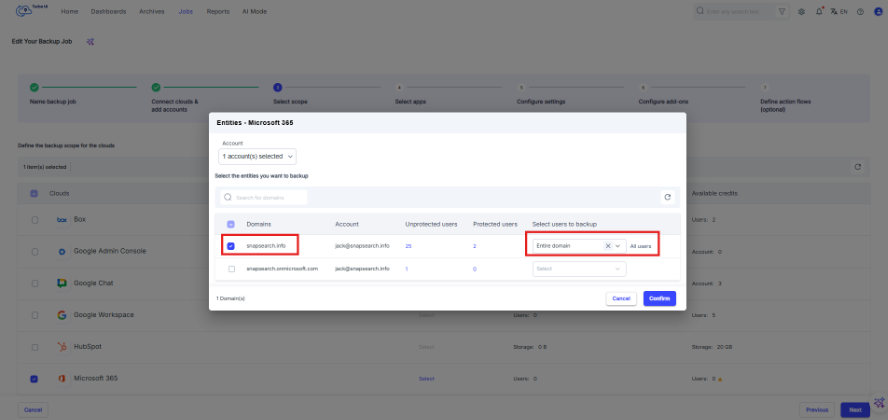
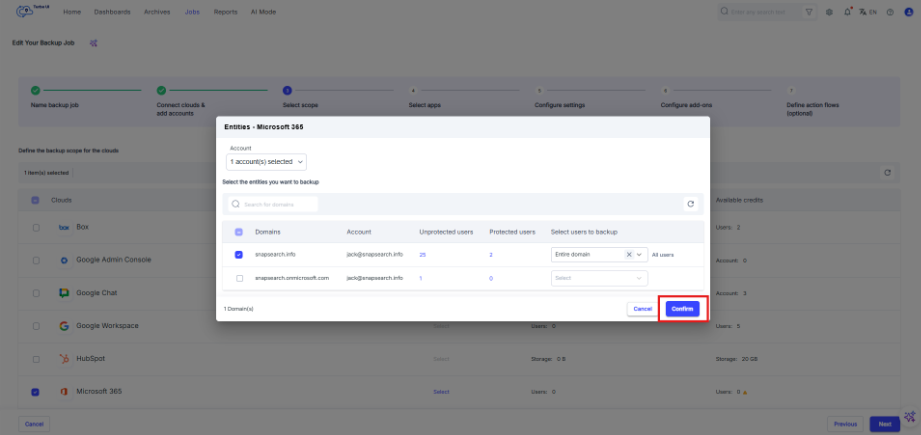
Step 9: After adding the required user, group, or domain to the backup scope and click Confirm.
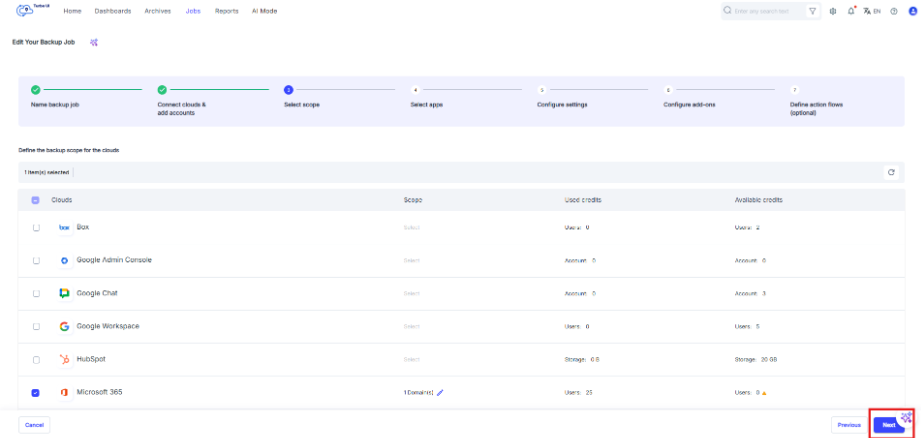
Step 10: Click Next to go to Step 4: Select apps.
Step 11: In the Apps column for Microsoft 365, click the edit icon.
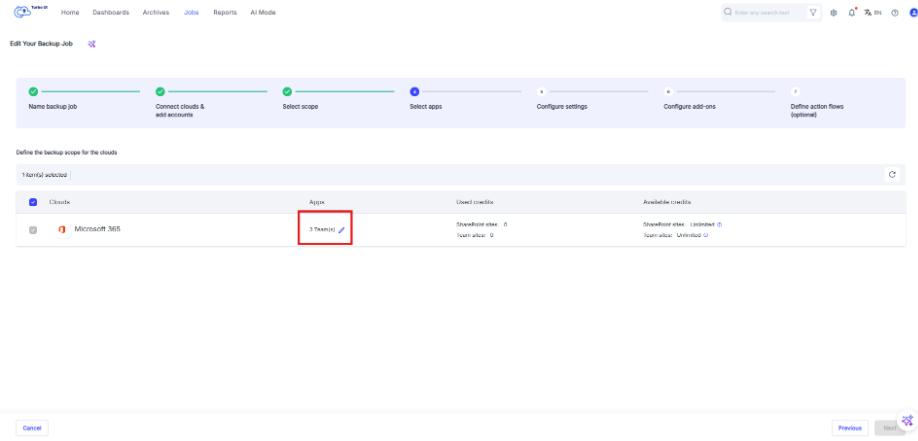
Step 12: In the Apps - Microsoft 365 pop-up, select Teams Chat.
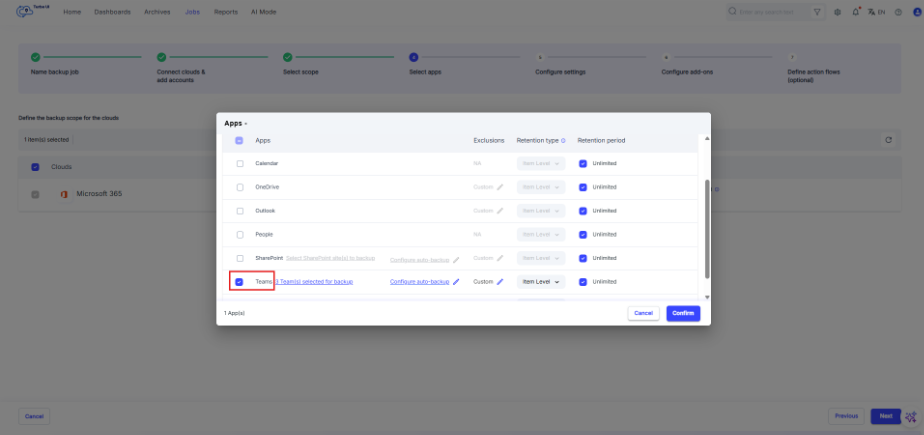
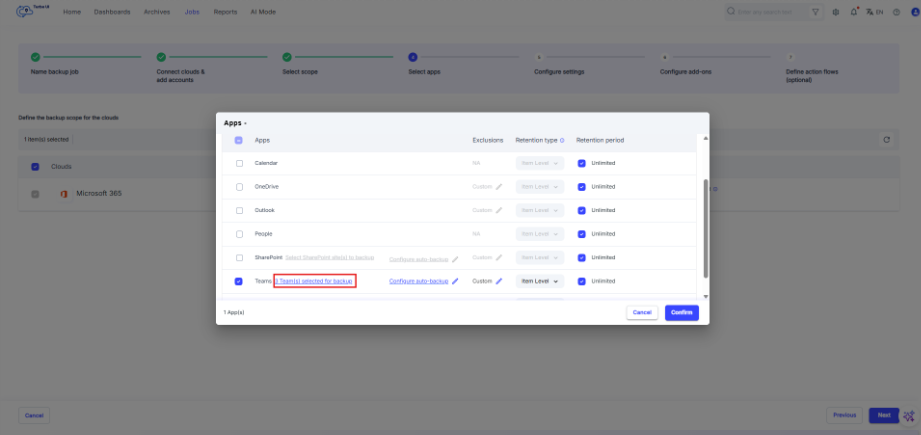
Step 13: Click on the highlighted text to select the teams for backup.
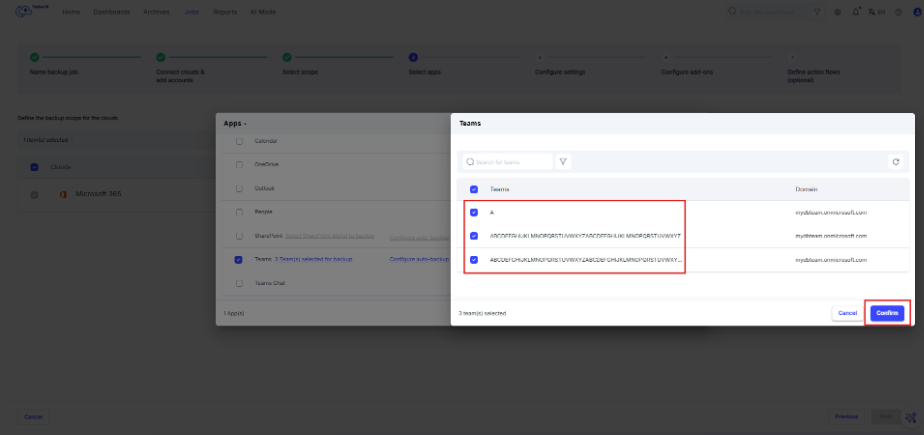
Step 14: Select the Teams for backup and click Confirm.
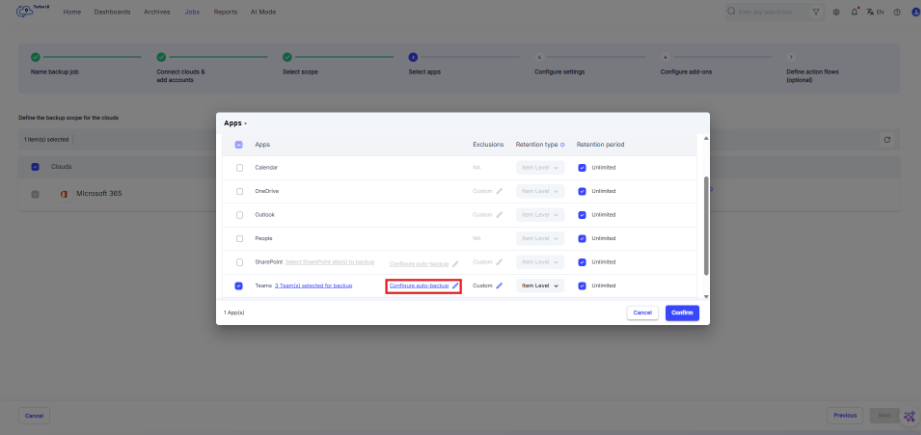
Step 15: Click on the Configure auto-backup highlighted text to configure the auto-backup.
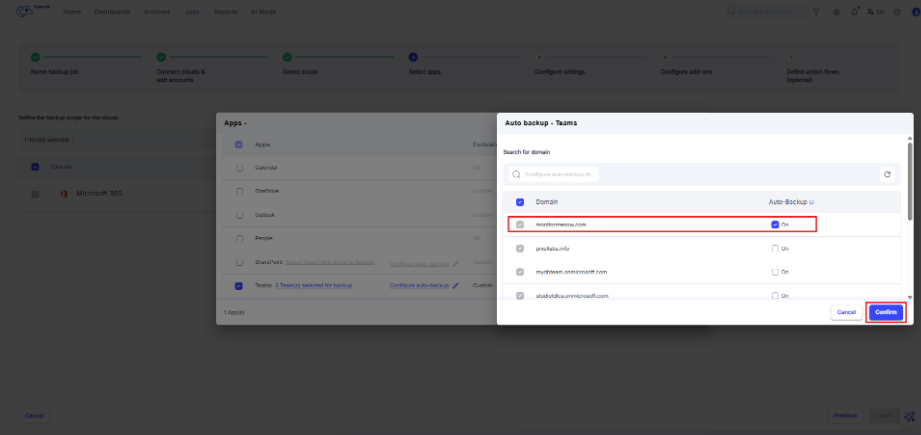
Step 16: Select Auto-backup checkbox for desired domains and click Confirm.
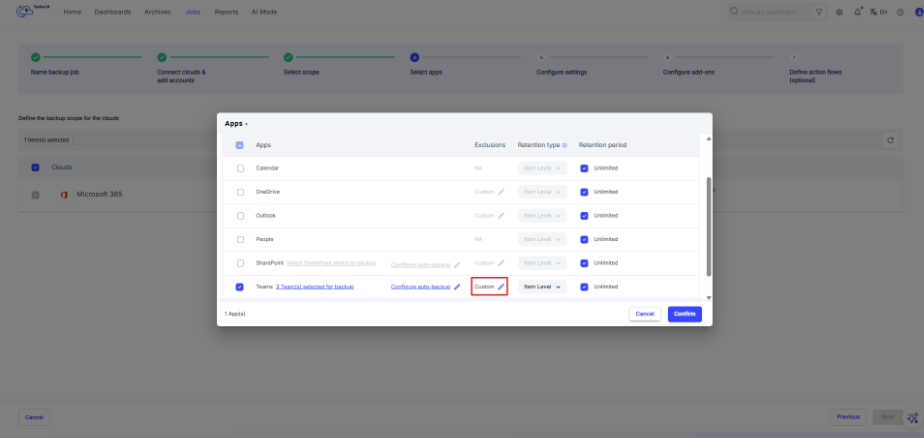
Step 17: Click on Edit icon under Exclusions column to configure the exclusion settings.
Step 18: Select the check box for Image, Audio, Video if you wish to include these in the backup. By default, they are excluded.
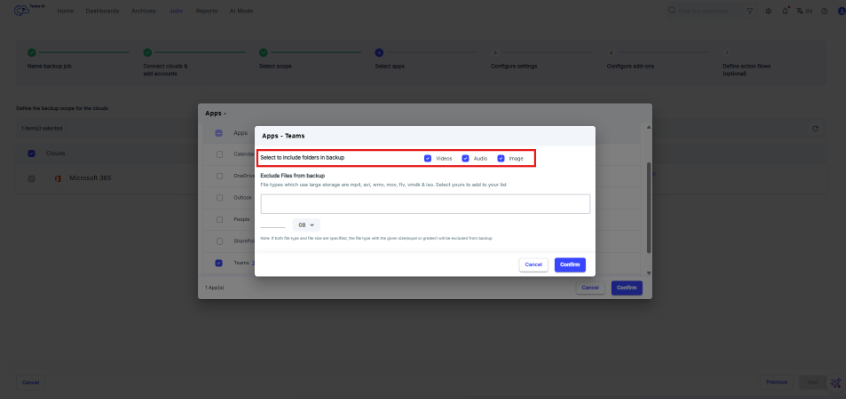
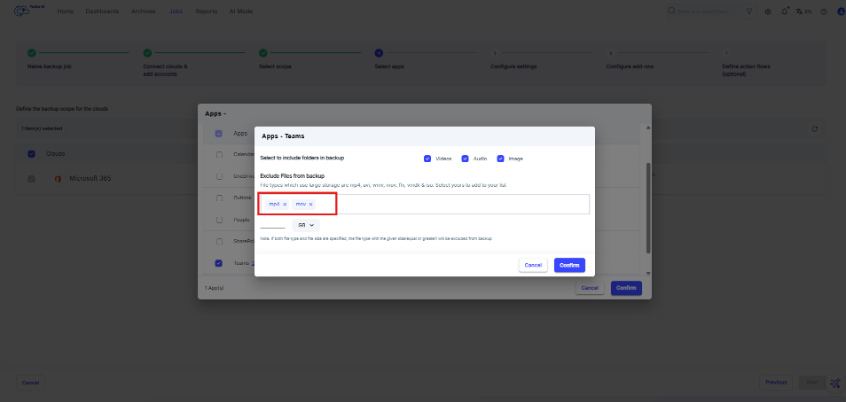
Step 19: Exclude any specific file format form the backup.
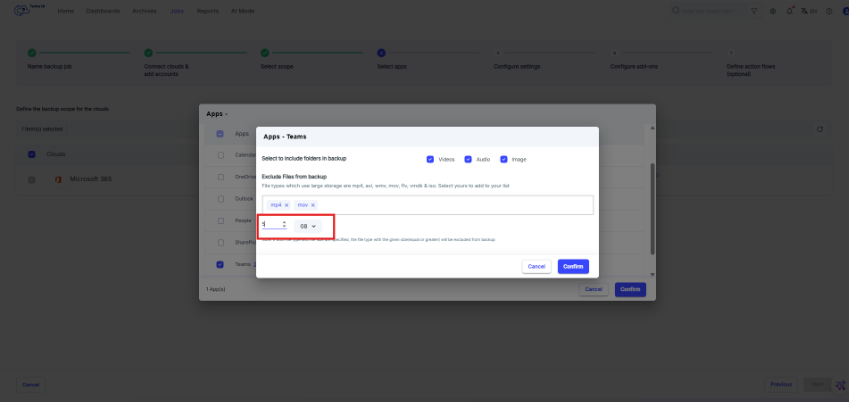
Step 20: Exclude files based on size limits.
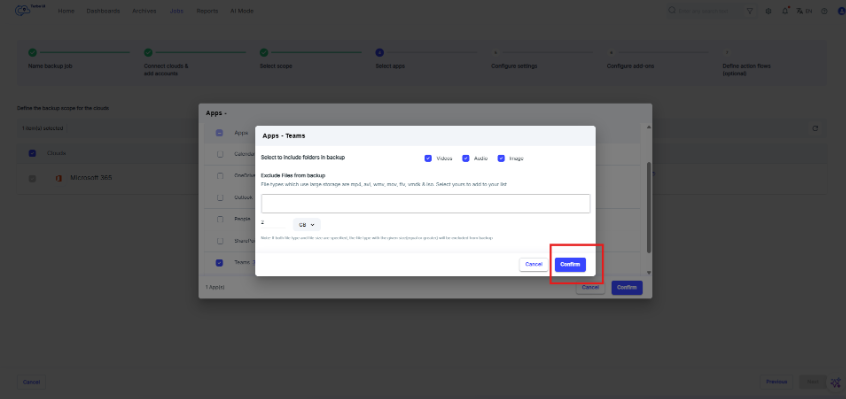
Step 21: Click Confirm to lock the exclusion settings.
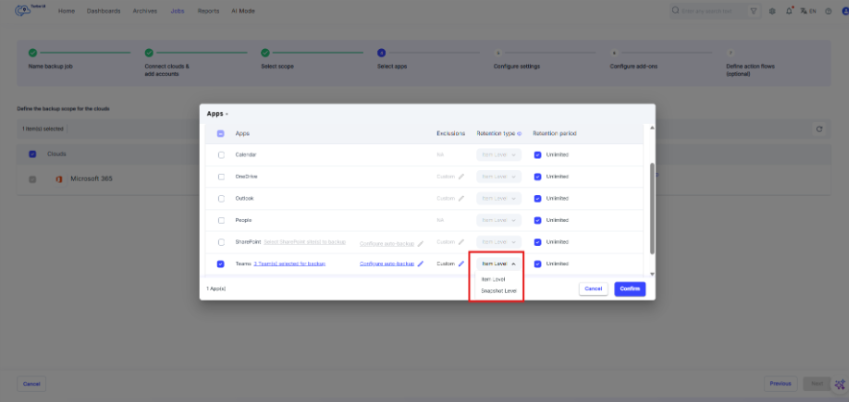
Step 22: Choose the retention type: Item level or snapshot level.
- Item-level retention calculates the retention period based on an individual file or email's last modified date.
- Snapshot-level retention calculates the retention period from the date the latest snapshot of that item was taken
Step 23: Configure the retention period for Teams Chat. Custom period can be defined, or else Unlimited option can be selected.
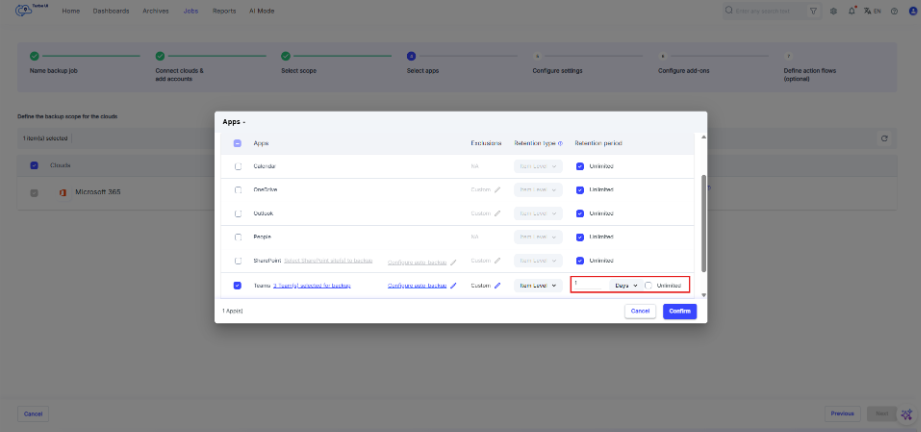
Step 24: Click Confirm to save the app selection.
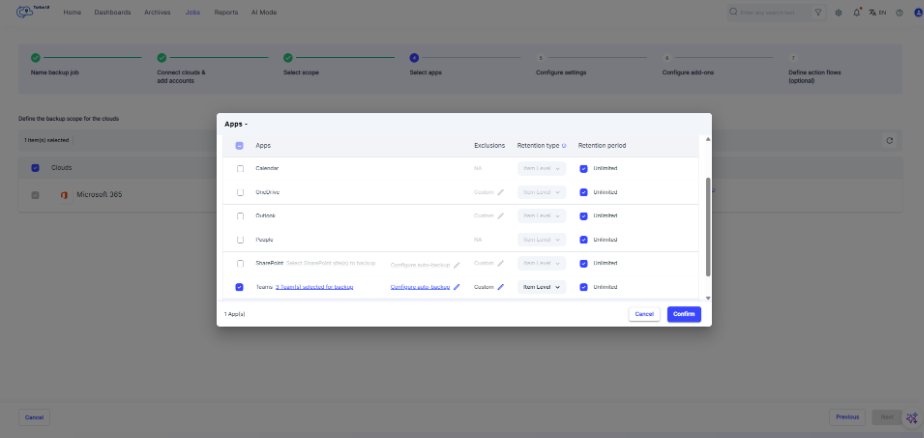
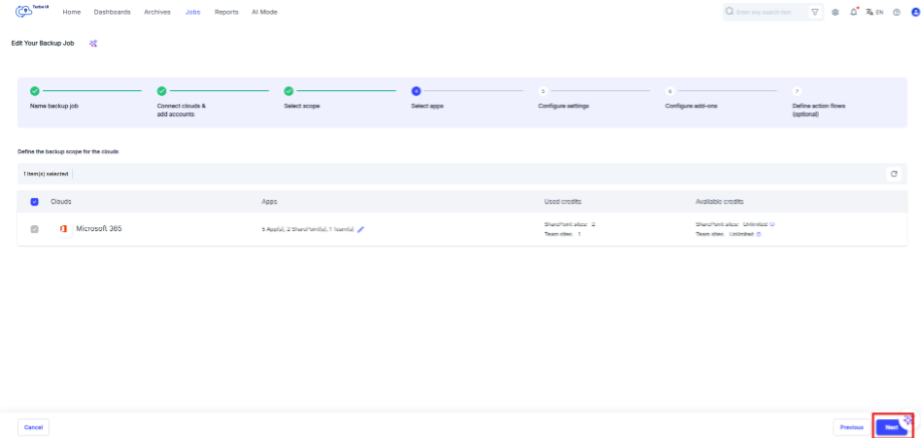
Step 25: Click Next to go to the Configure settings step.
Step 26: Configure the required settings or click Next to continue.
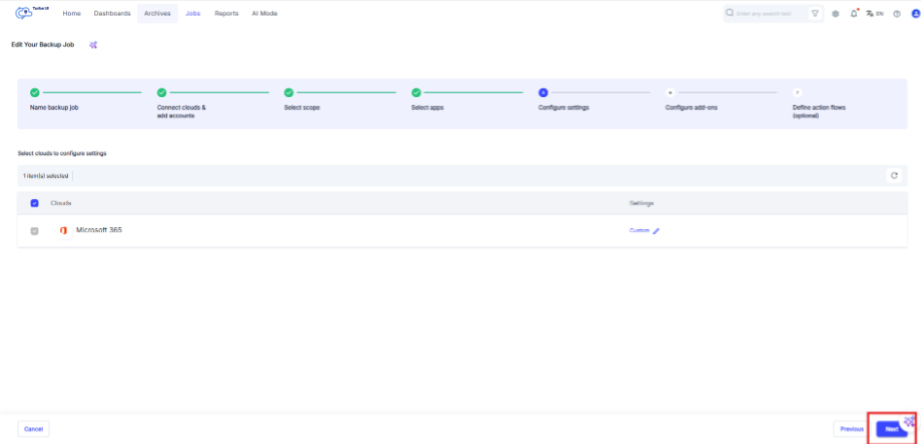
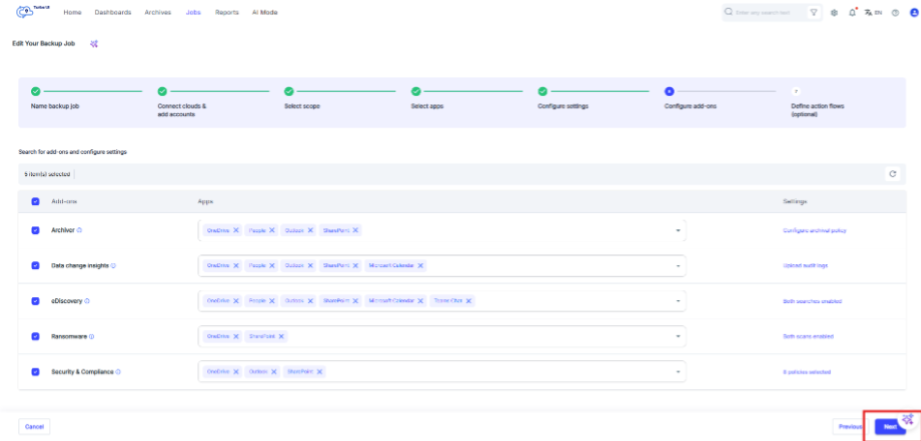
Step 27: In the Configure add-ons step, configure add-ons if required, or click Next to skip this step.
Step 28: In the Define action flows step, configure action flows if required. Click Start Backup to save the backup job and start the backup.
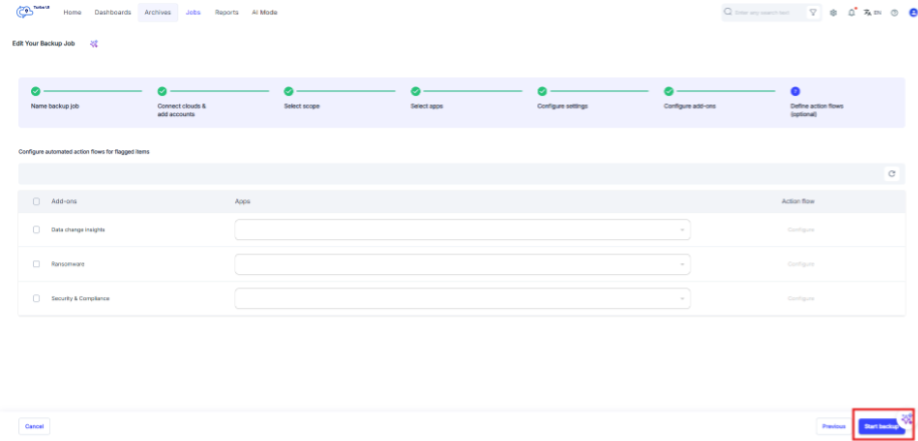
Teams Private Chat will now be included in the existing Microsoft 365 backup job.
-
Teams Private Chat backup applies only to users included in the Microsoft 365 backup job scope. If a user is not part of the selected domain, group, or user scope, that user’s Teams Private Chat data will not be backed up.
-
Reconnecting Microsoft 365 is required for existing customers if the required Teams Private Chat permissions were not granted earlier. This does not affect actively running backups for the account.