How to set up Slack backup?
Here are the steps to connect and configure Slack workspace(s) backup with SysCloud.
Note: Only the org owner/workspace owner can set up SysCloud’s backup for Slack workspace(s).
For customers who onboarded after 12/13/2024 | For customers who onboarded before 12/13/2024
Follow the steps below to create and start a backup job for Slack:
Step 1: Log in to the SysCloud backup application using your admin credentials.
Note: If this is your first backup job (after clicking “create backup job” on the final setup page), directly navigate to step 3.
Step 2: Navigate to “Jobs” on the top menu and click on “Create a new backup job.”
Step 3: Name the backup job and give a description (optional). Click on “Next.”

Step 4: To connect your Slack account to SysCloud, navigate to “Slack” and click “Connect.”
To know how to connect your Salesforce account to SysCloud, read this article.
Step 5: To define the scope of the backup job, select “Slack” from the clouds list, and click on “Select” under Scope.

Step 6: Select the workspaces you want to back up. Select users to send authorization request and enable private channel and direct message backups. Click on "Confirm."


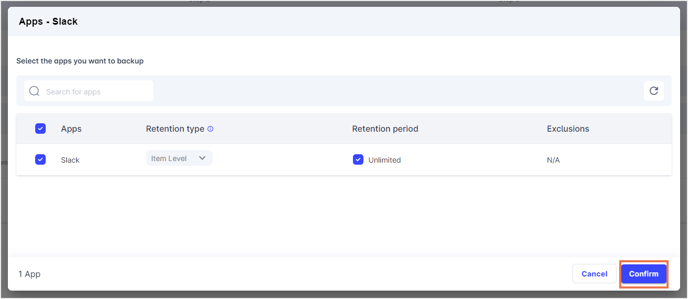
Step 7: Next, click on “Select apps and retention” to define the retention period for your backup job. If you want the items retained only for a certain period of time, uncheck the box under “Retention period” and specify the number of days, months or years for which you want the items retained. Click on “Next.”


Step 8: In the next step, you can select add-ons. Configure add-on settings by clicking on “Configure” under “Settings.”

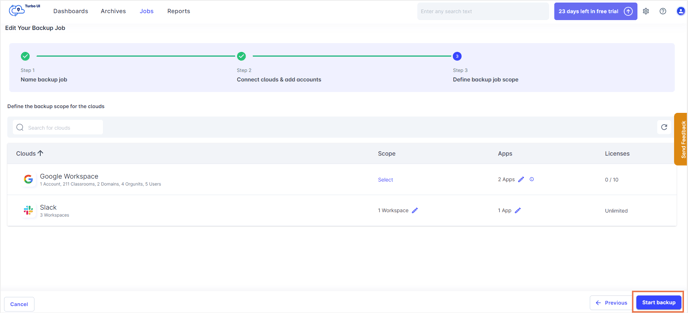
Step 9: Finally, click “Start backup” to back up your selected scope.
Follow the steps below to create and start a backup job for Slack:
- Step 1: Log in to your SysCloud account.
If you are new to SysCloud, start free trial and create an account with SysCloud to setup your backup.
- Step 2: Navigate to "Jobs” and click “Create new backup job”.
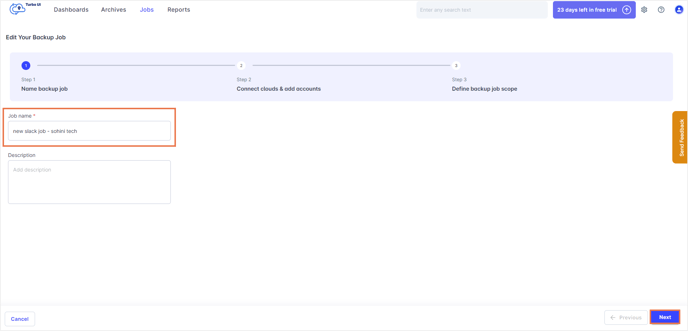
- Step 3: Enter a name and description for the new backup job. Click "Next."
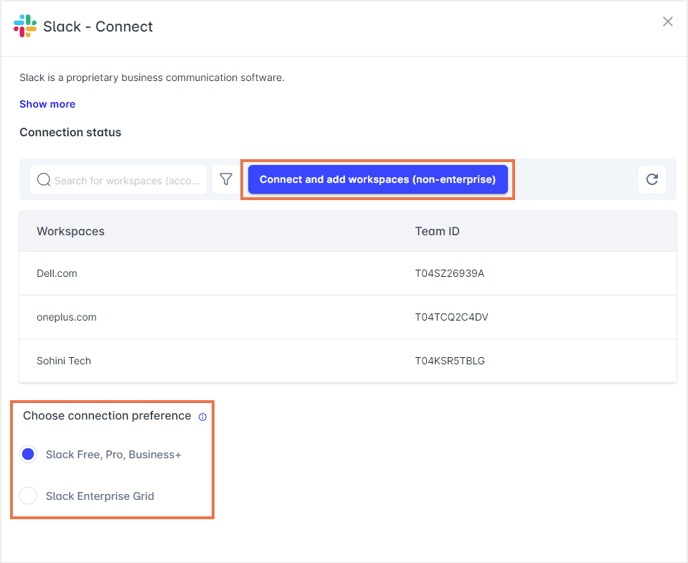
- Step 4: Select the radio button corresponding to your Slack subscription and click “Connect and add workspaces.”
Connect your Slack account to the SysCloud backup application based on your subscription here: For Slack Free/Pro/Business+ | For Slack Enterprise Grid
- Step 5: Under Scope, click on "Select" to choose the workspaces to be backed up.
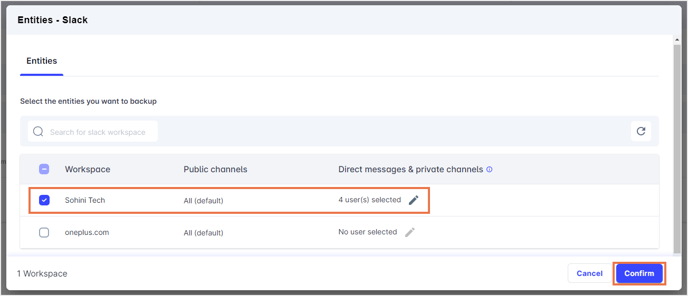
- Step 6: By default, all Slack public channels in a workspace and all the DMs and private channels of admin(s) are backed up. To enable direct message and private channel backups for non-admins', select users to send authorization requests.
To protect the privacy of users' data, Slack restricts access to users' DMs and private channels with a unique user token. Only those with access to the user token are allowed to access the user's Slack data.
Thus, to back up a user's DMs and private channels with SysCloud, a Slack workspace admin requires authorization from the user.
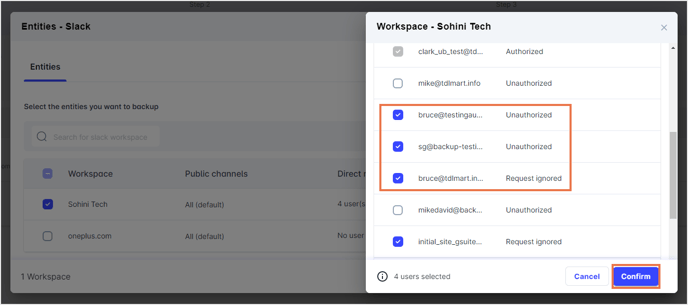
- Step 7: Click on "Select" under Apps to choose the retention type and retention period.
By default, Slack data is retained in the SysCloud backup archives for an unlimited period. To add a custom retention period, uncheck the “ Unlimited” option and enter the custom retention period. Click “ Confirm."
Step 8: Click “Start backup.”
