Basic Office 365 FAQ
Backup:
-
How to log in to SysCloud Backup Application?
There are two ways to log in to the SysCloud Backup application:
- Through Office 365 login page
- Through the SysCloud login page
Through Office 365 login page:
- Log in to Office 365 with your account credentials.
- Select the SysCloud Cloud Security & Compliance application.
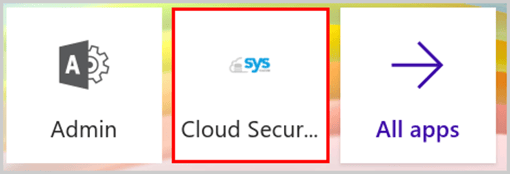
- You will be logged in automatically.
Through the SysCloud login page:
i. Click app.syscloud.com.
ii. Select your Cloud: Office 365 and log in.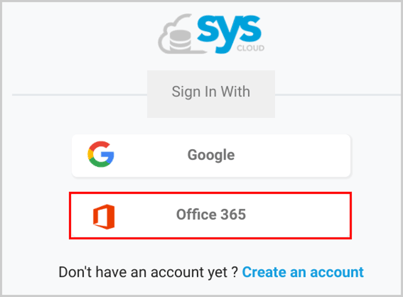
-
How to access the backup archive data?
- Login to app.syscloud.com with your SysCloud account credentials.
- Click on “Backup” and select “Archive and Restore.”
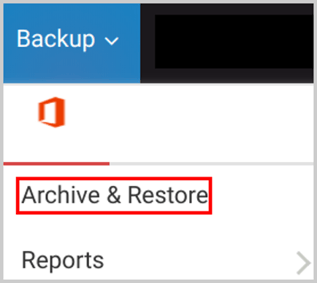
- Click on the user whose archive data you want to access.
Restore:
-
How to restore a single file?
Follow these steps to restore a single file from the SysCloud Backup Application:
-
- Log in to the SysCloud Backup Application.
- Click “Backup”→“Archive & Restore.”
- Select the required Office 365 app: Mail (Outlook), Drive (OneDrive), Contact(People), Calendar, or Sites (SharePoint).

- Select the file.

- Click “Restore” and select “Selected Items.”
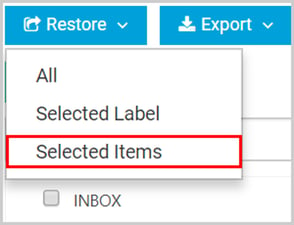
- Select restore options if needed:
- Create a folder for restoring the file.
- Restore the file with sharing permissions and click “Restore.”

- Click “Yes” to restore the file.
Note: You can restore only the files owned by you. For the files owned by other users and shared with you, uncheck the “Check to restore file with sharing permission” checkbox.
-
How to restore multiple files?
Follow these steps to restore multiple files from the SysCloud Backup Application:- Log in to the SysCloud Backup Application.
- Click “Backup”→“Archive & Restore.”
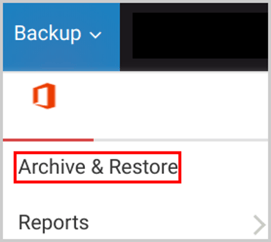
- Select the required Office 365 app: Mail (Outlook), Drive (OneDrive), Contact(People), Calendar, or Sites (SharePoint).

- Select the files.

- Click “Restore” and select “Selected Items.”
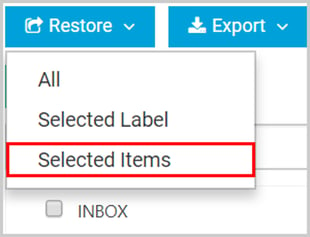
- Select restore options if needed:
- Create a folder for restoring the file.
- Restore the file with sharing permissions and click “Restore.”

- Click “Yes” to restore the files.
Note: You can restore only the files owned by you. For the files owned by other users and shared with you, uncheck the “Check to restore file with sharing permission” checkbox.
-
How to restore a folder?
Follow these steps to restore a folder from the SysCloud Backup Application:
-
- Log in to the SysCloud Backup Application.
- Click “Backup”→“Archive & Restore.”
- Select the required Office 365 app: Mail (Outlook), Drive (OneDrive), Contact(People), Calendar, or Sites (SharePoint).
- Click the arrow beside “OneDrive.”

- Select the folder.
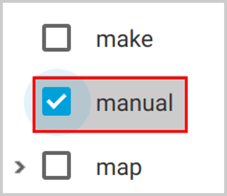
Note: You can choose to restore:- only the folder (or)
- both the folder and its subfolders.
- Click “Restore” and choose “Selected Folder.”
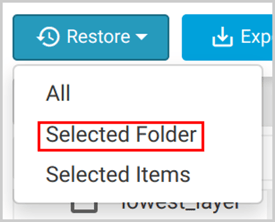
- Select restore options if needed:
- Create a folder for restoring the file.
- Restore the file with sharing permissions
and click “Restore.”

- Click “Yes” to restore the folder.
Note: You can restore only the files owned by you. For the files owned by other users and shared with you, uncheck the “Check to restore file with sharing permission” checkbox.
4. How to restore an entire application: Mail (Outlook), Drive (OneDrive), Contact(People), Calendar, or Sites (SharePoint)?
Follow these steps to restore an entire application’s data from the SysCloud Backup Application:
-
- Log in to the SysCloud Backup Application.
- Click “Backup”→“Archive & Restore.”
- Select the required Office 365 app: Mail (Outlook), Drive (OneDrive), Contact(People), Calendar, or Sites (SharePoint).
- Click “Restore” and select “All.”
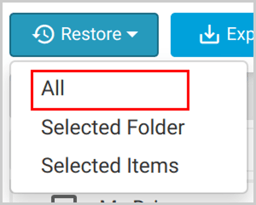
Note: Restoring an entire application will take some time depending on the size of data and the number of files present in the application. You can check the progress by following these steps:
-
-
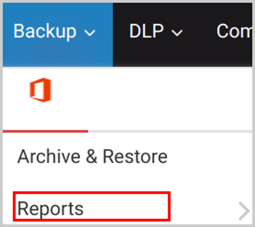
- Click “Backup” and select “Reports.”
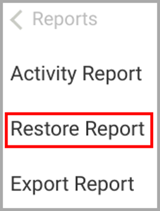
- Select “Restore Report” to view the restore progress.
- Click “Backup” and select “Reports.”
-
5. How to restore with sharing permissions and folder structure?
Follow these steps to restore files with their folder structure and sharing permissions:
-
- Log in to the SysCloud Backup Application.
- Click “Backup”→“Archive & Restore.”
- Select the required Office 365 app: Mail (Outlook), Drive (OneDrive), Contact(People), Calendar, or Sites (SharePoint).
- Click the arrow beside “OneDrive.”

- Select the folders.
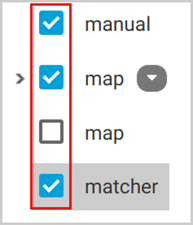
Note: You can choose to restore either only the folder or 'both the folder and its subfolders when you select the folder. - Click “Restore” and choose “Selected Folder.”
- Select restore options if needed:
- Create a folder for restoring the file.
- Restore the file with sharing permissions
and click “Restore.”

- Click “Yes” to restore the folders.
Note: You can restore only the files owned by you. For the files owned by other users and shared with you, uncheck the “Check to restore file with sharing permission” checkbox.
6. How to restore a specific version of a OneDrive document?
- Follow these steps to restore a specific version of a OneDrive document:
- Log in to the SysCloud Backup Application.
- Click “Backup”→“Archive & Restore.”
- Select the Drive (OneDrive) application.
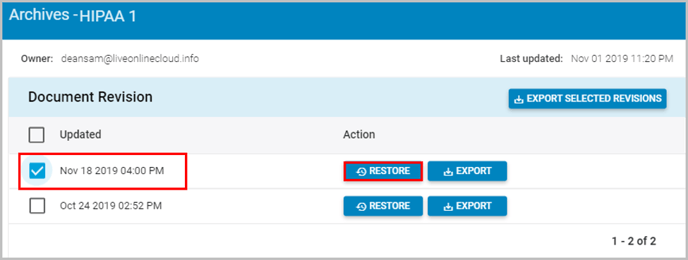
- Click “View details” next to the file name.

- Click the version of the document you want to restore and click on “RESTORE.”
Note: You can restore only the files owned by you. For the files owned by other users and shared with you, uncheck the “Check to restore file with sharing permission” checkbox.
7. How to restore a file to a specific folder location?
By default, the files will be restored to the original location on the OneDrive application from which it was deleted. However, you can choose to have a custom folder for restoring the files and also select whether you want to retain the sharing permissions.
Follow these steps to create a custom folder and change sharing permissions:
-
- Log in to the SysCloud Backup Application.
- Click on “Backup” and select “Archive and Restore.”
- Select the required Office 365 app: Mail (Outlook), Drive (OneDrive), Contact(People), Calendar, or Sites (SharePoint).
- Select the files you want to restore.
- Click “Restore” and select “Selected Items.”
- Click on “Create new folder for restore”.

- Click “Yes” to restore the files.
8. How to restore a file to the original location of the file/folder?
By default, the files and folders will be restored to the original location on the OneDrive from which it was deleted.
9. How to restore my full account?
Please read our article on full account restore here, https://help.syscloud.com/full-account-restore.
10. How to do Point-in-time restore?
Follow these steps to do a Point-in-time restore:
-
- Log in to the SysCloud Backup Application.
- Click “Backup”→“Archive & Restore.”
- Select the required Office 365 app: Mail (Outlook), Drive (OneDrive), Contact(People), Calendar, or Sites (SharePoint).
- Select the specific date and time (if there are multiple backups on a single day)

- Select the files.

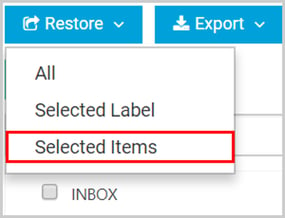
- Select “Restore”→“Selected Items.”
Export:
1. How to export a single file?
Follow these steps to export a single file from the SysCloud Backup Application:
-
- Log in to the SysCloud Backup Application.
- Click “Backup”→“Archive & Restore.”
- Select the required Office 365 app: Mail (Outlook), Drive (OneDrive), Contact(People), Calendar, or Sites (SharePoint).
- Select the file you want to export.
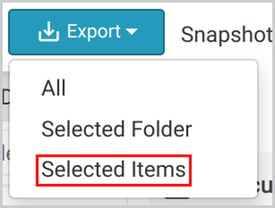
- Click “Export” and choose “Selected Items.”
- Click “Yes” to confirm your export.

- Click “Export Report” to check the status.
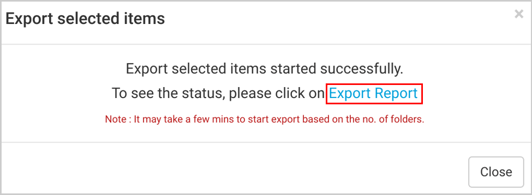
Note: If you had closed the pop-up window, go to “Backup”→“Reports”→“Export Report” to view the export status. - Click “Download” to download the exported file.

Note: The time taken to generate the download link depends on the number of files and their size.
2. How to export multiple files?
Follow these steps to export multiple files from the SysCloud Backup Application:
-
- Log in to the SysCloud Backup Application.
- Click “Backup”→“Archive & Restore.”
- Select the required Office 365 app: Mail (Outlook), Drive (OneDrive), Contact(People), Calendar, or Sites (SharePoint).
- Select the files you want to export

- Click “Export” and select “Selected Items.”
- Click “Yes” to confirm the export.
- Click “Export Report” to check the status.
Note: If you had closed the pop-up window, go to “Backup”→“Reports”→“Export Report” to view the export status.
-
Click “Download” to download the exported file.

Note: The time taken to generate the download link depends on the number of files and their size.
3. How to export a folder?
Follow these steps to export a folder from the SysCloud Backup Application:
-
- Log in to the SysCloud Backup Application.
- Click “Backup”→“Archive & Restore.”
- Select the required Office 365 app: Mail (Outlook), Drive (OneDrive), Contact(People), Calendar, or Sites (SharePoint).
- Click the arrow beside “OneDrive.”

- Select the folder.

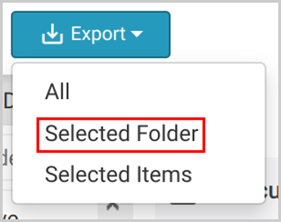
- Click “Export” and select “Selected Folder.”
4. How to export an entire application: Mail (Outlook), Drive (OneDrive), Contact(People), Calendar, or Sites (SharePoint)?
Follow these steps to export an entire application’s data from the SysCloud Backup Application:
-
- Log in to the SysCloud Backup Application.
- Click “Backup”→“Archive & Restore.”
- Select the required Office 365 app: Mail (Outlook), Drive (OneDrive), Contact(People), Calendar, or Sites (SharePoint).
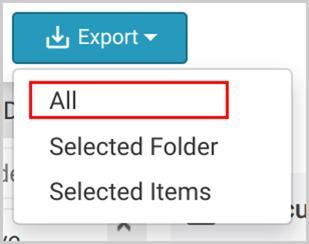
- Click “Export” and select “All.”
- Click “Yes” to confirm your export.

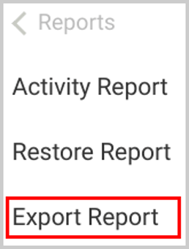
Note: Exporting an entire application will take some time depending on the size of data and the number of files present in the application. You can check the progress by following these steps:- Click “Backup” and select “Reports.”
- Select “Export Report” to view the export progress.
5. How to export with folder structure?
The folder structure in the OneDrive application cannot be retained after the export process is completed. This is because the export operation selects the application data as files, archives, and zips them as a single folder for download.
6. How to export a specific version of a OneDrive Document?
Follow these steps to export a specific version of a OneDrive document:
-
- Log in to the SysCloud Backup Application.
- Click “Backup”→“Archive & Restore.”
- Select the Drive (OneDrive) application.
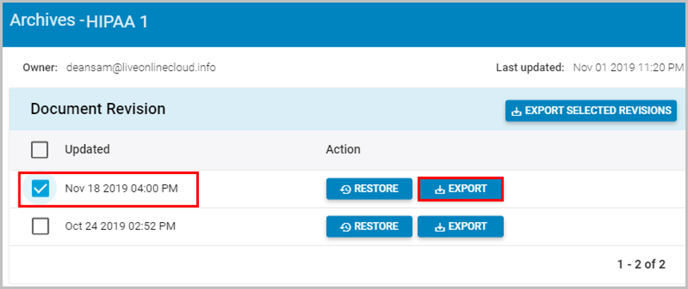
- Click “View details” next to the file name.

- Click the version of the document you want to export and click on “EXPORT.”
- Click on “Yes.”
- Click on the “Export Report” to view the status of your export.

7. How to export my full account?
Follow these steps to export your account data:
-
- Log in to the SysCloud Backup Application.
- Click “Backup”→“Archive & Restore.”
- Click the “EXPORT ALL APPS” option.

Note: Exporting an entire account data will take some time depending on the size of data and the number of files present in the applications.
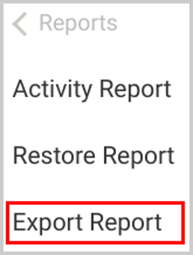
You can check the export progress by following these steps:
- Select “Backup” and click “Reports.”
- Select “Export Report” to view the Export progress.
-Aug-01-2022-12-37-27-80-PM.png?height=120&name=Untitled%20design%20(1)-Aug-01-2022-12-37-27-80-PM.png)