-
Only a Google Workspace owner can set up the SysCloud backup application for Google Workspace.
-
To connect a Google Workspace account to the SysCloud backup application, users should log out of all the other Google accounts in the browser before initiating the backup job. Otherwise, when the user tries to connect and add accounts, Google will not open a sign-in pop-up window but will directly connect to the already signed-in account.
For customers who onboarded after 12/13/2024 | For customers who onboarded before 12/13/2024
Steps for customers who onboarded after 12/13/2024:
Step 1: Log in to the SysCloud backup application using your admin credentials.
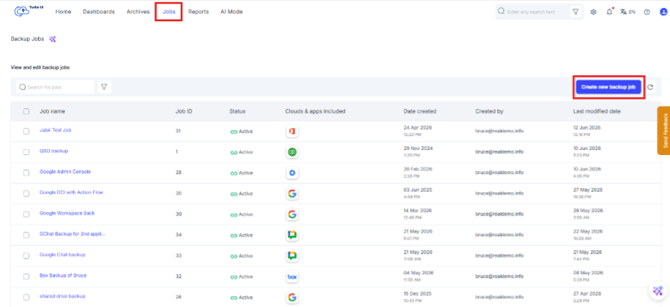
Step 2: Go to Jobs and click Create new backup job.
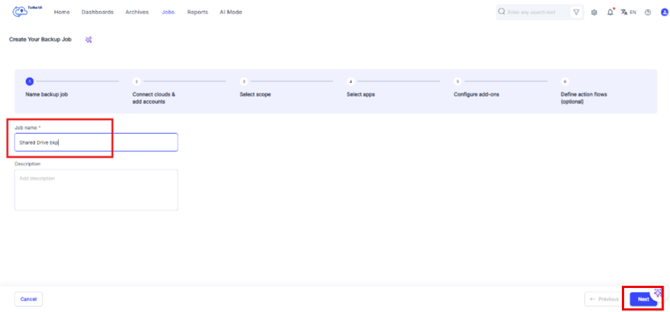
Step 3: In Step 1: Name backup job, enter a name for the backup job. Add a description, if required, and click Next.
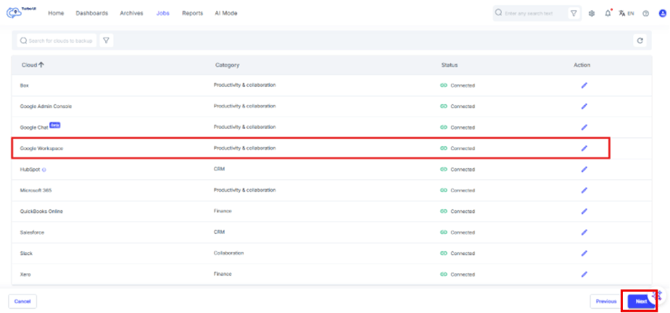
Step 4: In Step 2: Connect clouds & add accounts, locate Google Workspace. If the Google Workspace account is already connected, verify that the status is Connected.
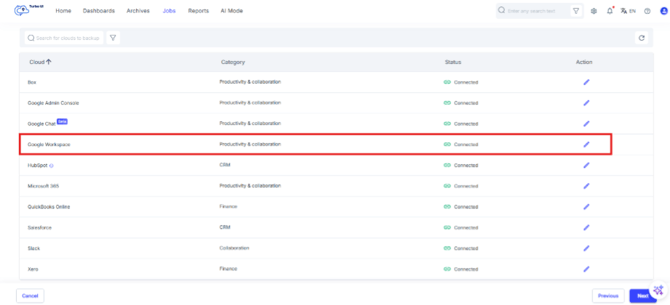
Step 5: To review the connected accounts, click the edit icon next to Google Workspace.
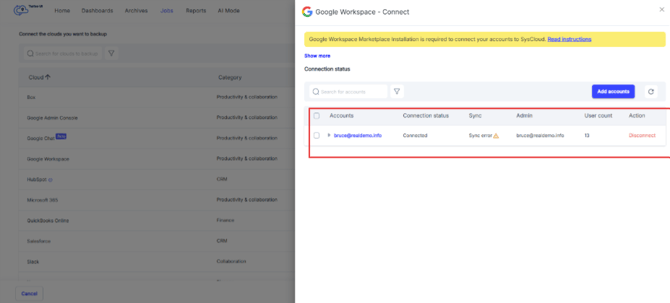
Step 6: If the Google Workspace account is not connected, click Connect and complete the Google Workspace account connection. Refer How can I connect my Google Workspace account to the SysCloud backup application?
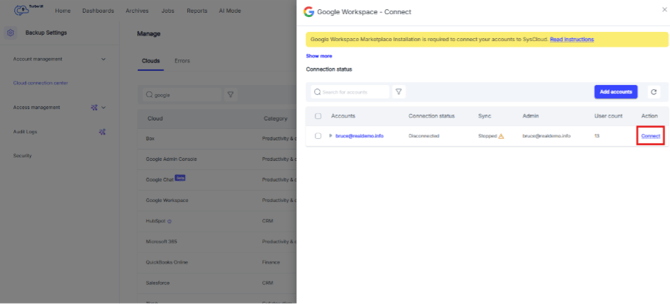
Note: If browser pop-ups are disabled, allow pop-ups for SysCloud and try again.
Step 7: Click Next.
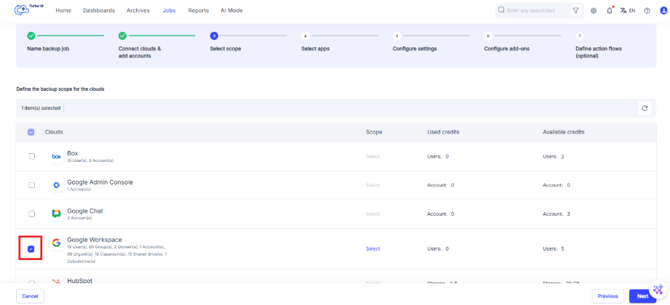
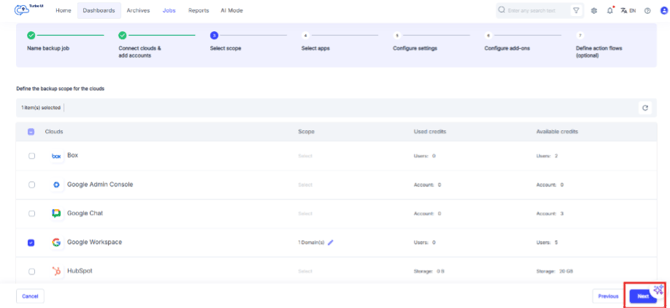
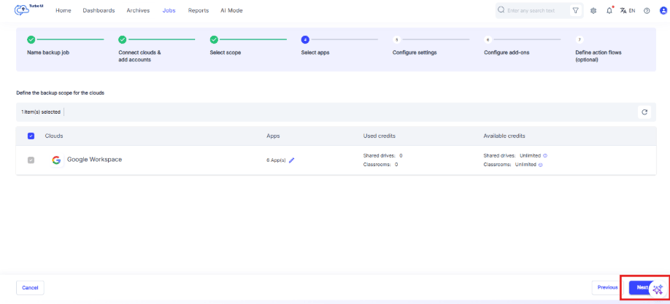
Step 8: In Step 3: Select scope, select the checkbox next to Google Workspace.
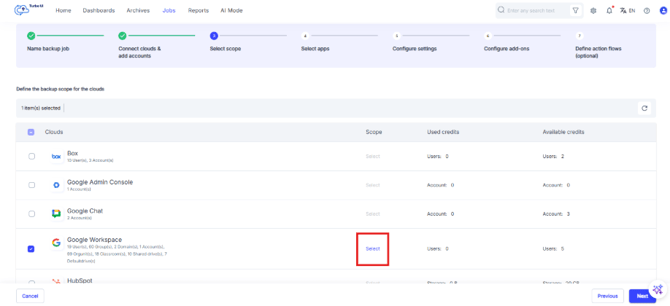
Step 9: Click Select under the Scope column.
Step 10: In the Entities - Google Workspace pop-up, select the Google Workspace administrator account for which you want to configure backup.
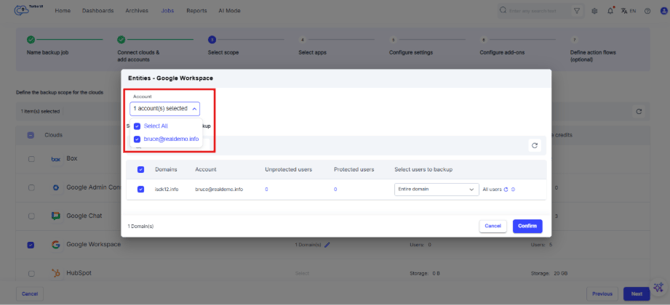
Step 11: In the Entities - Google Workspace pop-up, select the Google Workspace domain for which you want to configure backup.

Step 12: Choose one of the following scope options:
-
Entire domain: Select this option to include all current users in the selected Google Workspace domain in the backup job.
-
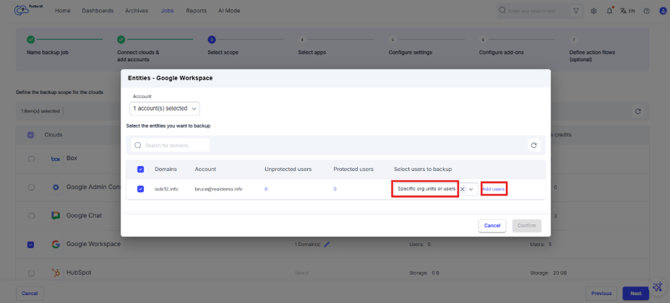
Specific org units or users: Select this option to back up only selected organizational units or users.

Note: If you select Entire domain, all current users in the selected domain are included in the backup scope. Users added to the domain later are included automatically only if Auto-backup is enabled in Step 5: Configure settings.
Step 13: To back up specific organizational units or users, select Specific org units or users and click Add Users.
Step 14: Select users using one of the following tabs:
-
By Org Unit: Select one or more organizational units. Click Confirm.

-
By User: Select one or more users. Click Confirm.

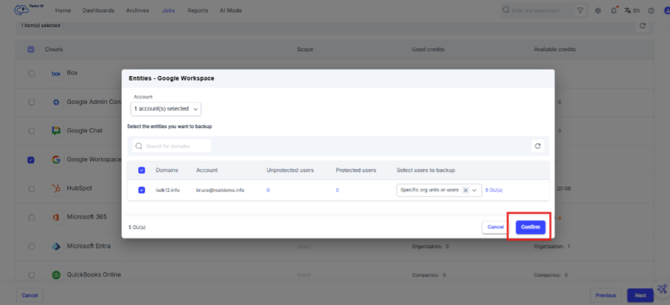
Step 15: In the Entities – Google Workspace pop-up window, Click Confirm to proceed.
Step 16: Click Next to go to the Select Apps step.
Step 17: In Step 4: Select apps, click the edit icon in the Apps column for Google Workspace.
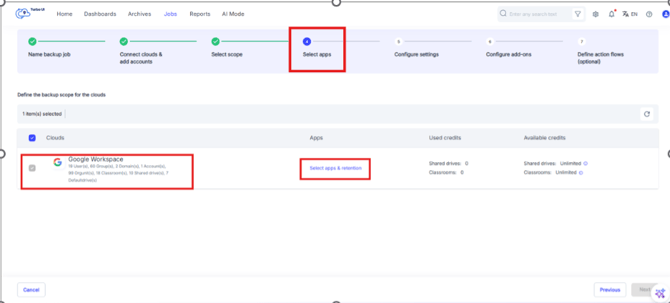
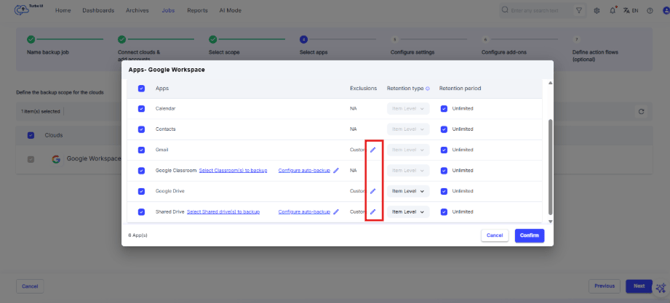
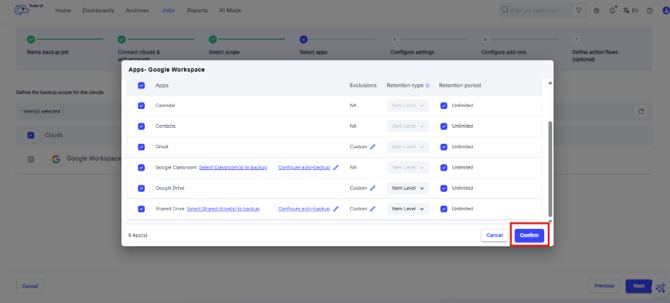
Step 18: In the Apps - Google Workspace pop-up, select the Google Workspace apps you want to back up.
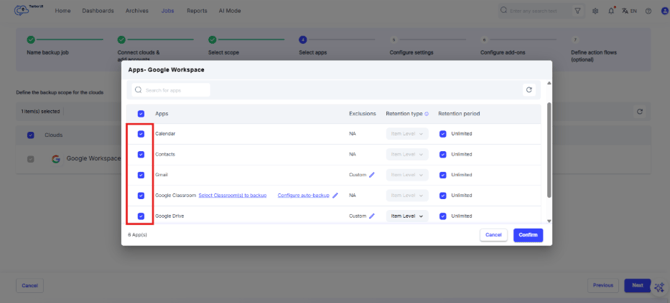
Step 19: Configure the retention type and retention period for the selected apps.
|
Google Workspace app |
Applicable retention type |
|
Gmail |
Item-level retention |
|
Calendar |
Item-level retention |
|
Contacts |
Item-level retention |
|
Google Drive |
Item-level retention or snapshot-level retention |
|
Shared Drive |
Item-level retention or snapshot-level retention |
|
Google Classroom |
Item-level retention |
-
Item-level retention: Retention is calculated based on the last modified date of an item.
-
Snapshot-level retention: Retention is calculated based on the date of the latest snapshot.

Note: Retention type selection is available only for supported apps. For apps where the retention type is fixed, SysCloud displays the applicable retention type in the Retention type column.
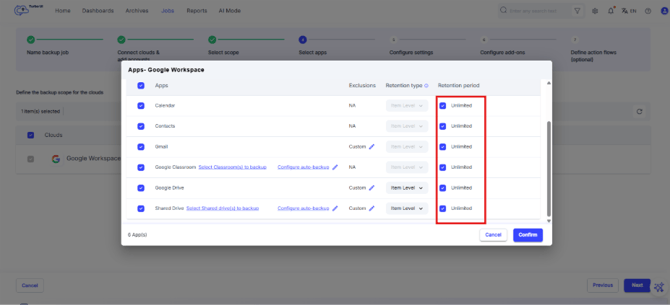
Step 20: To retain backup data without a defined retention limit, keep Unlimited selected in the Retention period column.
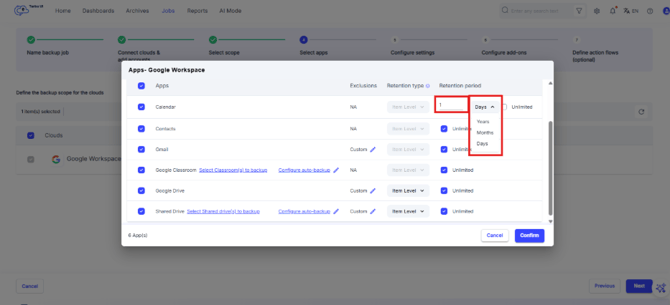
Step 21: To set a custom retention period, clear the Unlimited checkbox, enter the retention duration, and select Years, Months, or Days.
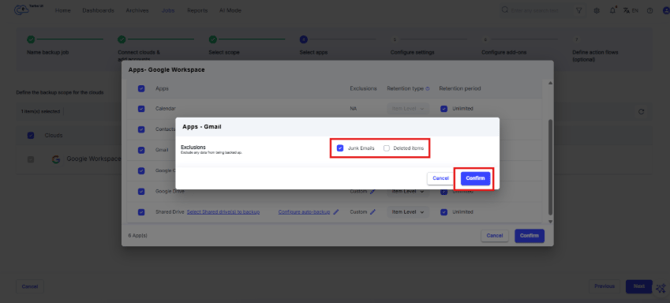
Step 22: To configure app-level exclusions, click the edit icon under the Exclusions column for the required app. You can configure exclusions for supported apps such as Gmail, Google Drive, and Shared Drive.
-
Gmail: Configure whether to exclude Junk Emails and Deleted items from the backup using the checkboxes and click Confirm.
-
Google Drive: Configure the following exclusion options and click Confirm.
- Backup scope to include only the files owned by the user or shared files also.
- Include or exclude recycle bin files. By default, excluded.
- Include or exclude Video, Audio or Image. By default, excluded.
- Exclude specific file formats from backup
- File size exclusions

3. Shared Drive: Configure the following exclusion options and click Confirm.
-
Include or exclude recycle bin files. By default, excluded.
-
Include or exclude Video, Audio or Image. By default, excluded.
-
Exclude specific file formats from backup
-
File size exclusions

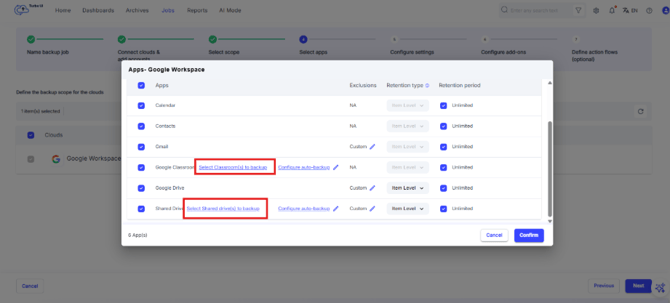
Step 23: To configure Classroom or Shared Drive backup scope, click the corresponding selection link and choose the drives or shared drives to include in the backup job.
Step 24: To automatically include newly created classrooms and shared drives in the backup job, configure auto-backup for Shared Drive, if required.
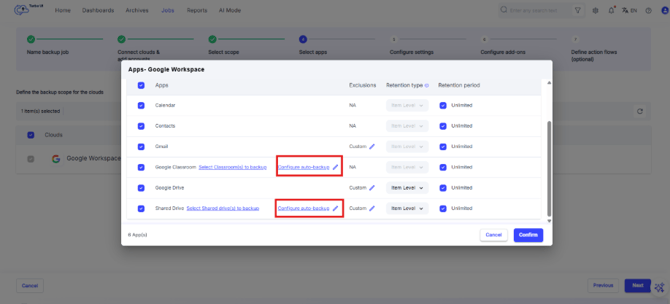
Step 25: Click Confirm in the Apps - Google Workspace pop-up.
Step 26: Click Next to proceed to Step 5: Configure settings step.
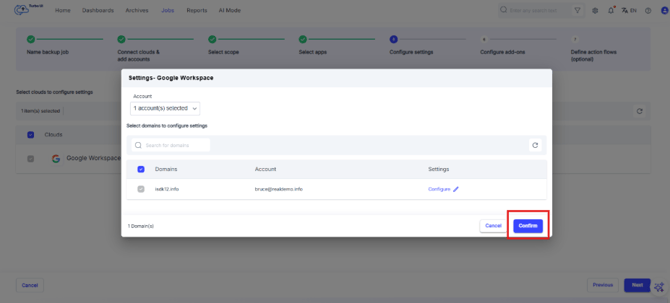
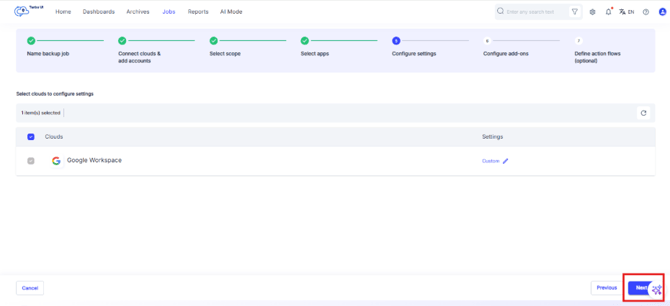
Step 27: In Step 5: Configure settings, click the edit icon under the Settings column for Google Workspace.
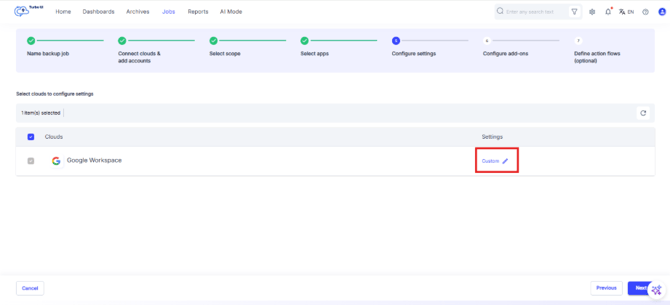
Step 28: In the Settings – Google Workspace pop-up window, click on the Configure edit icon under the Settings column.
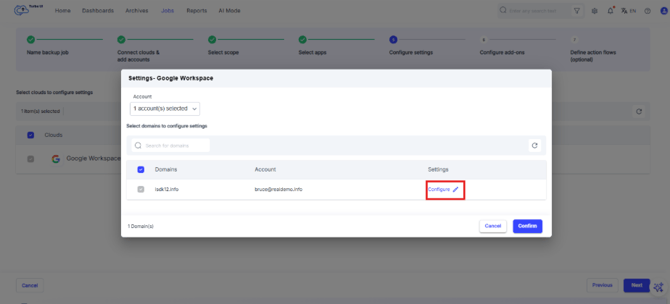
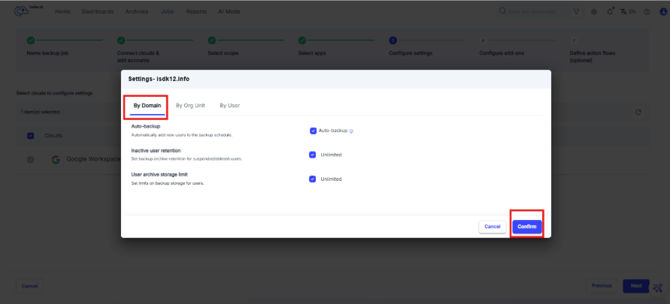
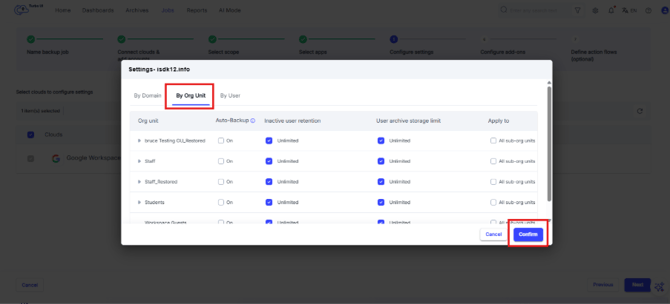
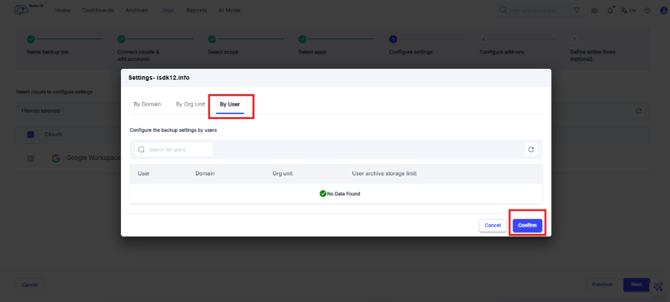
Step 29: Configure the required domain-level, org-unit-level, or user-level backup settings. You can configure options such as:
-
Auto-backup: Automatically add newly created users to the backup job.
-
Inactive user retention: Configure archive retention for suspended or deleted users.
-
User archive storage limit: Set a backup storage limit for users.
If Auto-backup is enabled at the domain level, SysCloud automatically adds newly created users in the selected domain to the backup job. If Auto-backup is not enabled, newly added users must be added to the backup job manually.
By Domain: Select the required configurations and click Confirm.
By Org Unit: Select the required configurations and click Confirm.
By User: Select the required configurations and click Confirm.
Step 30: Click Confirm to close the Settings – Google Workspace pop-up and proceed.
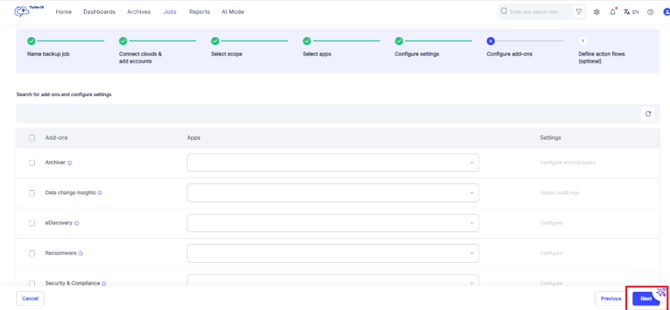
Step 31: Click Next to go to Step 6: Configure add-ons.
Step 32: In Step 6: Configure add-ons, configure the required add-ons, or click Next to skip this step.
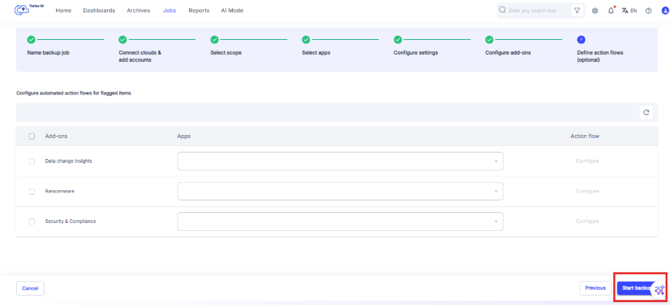
Step 33: In Step 7: Define action flows (optional), configure action flows if required. Click Start Backup. The Google Workspace backup job will be created and started.
-
Selecting Entire domain includes all current users in the selected Google Workspace domain in the backup job.
-
To include users added later to the domain automatically, enable Auto-backup in Step 5: Configure settings.
-
A domain, organizational unit, or user can be included in only one active backup job at a time.
-
Google Drive supports both item-level and snapshot-level retention. Other Google Workspace apps use the applicable retention type shown in the Retention type column.
Steps for customers who onboarded before 12/13/2024:
Step 1: Log in to the SysCloud backup application using your admin credentials.
If this is you r first backup job (after clicking “create backup job” on the final setup page), directly navigate to step 3.
Step 2: Navigate to “Jobs” on the top menu and click on “Create a new backup job.”

Step 3: Name the backup job and give a description (optional). Click on “Next.”

Step 4: To connect your Google Workspace account to SysCloud, navigate to “Google Workspace” and click “Connect.”

Step 5: In the side tray that opens, click "Connect and add accounts" (if this is the first Google Workspace account you are connecting to) or "Add accounts" (if there are other Google Workspace account(s) already connected) which will redirect you to the pop-up login window.
If browser pop-ups are disabled, you will get a message asking you to enable the same. Follow these steps to enable browser pop-ups.

Step 6: In the pop-up window, log in to the account you wish to connect to SysCloud. This will redirect you to the Google Workspace Marketplace (if you have not done marketplace installation for SysCloud). Click on "Admin Install. "
If you have already installed the SysCloud backup application from the Google Workspace Marketplace, you can skip the steps for marketplace installation. Your account will be automatically connected to SysCloud once you log in to the respective Google Workspace account in step 6.


Step 7: In the pop-up box that appears, click “Continue.” Provide the required permissions and click on the “Finish” button.


Step 8: Once the installation is complete, click "Done" to close the pop-up box.

Step 9: If the installation is successful, you will see the message as shown below. Click "Add account" to enable backup for the selected account.

Step 10: To define the scope of the backup job,
- First, click “Select” under Scope. You can select the entities to back up from the “Entities” column. Here you can select the domains, OUs, and users to include in the backup job. Simply navigate to the desired tab and click the checkbox next to the domain, user, or group.
Note: A domain/group/user can be included in one job only. They cannot be included in more than one job. You would need to select at least one user in a backup job.

2. Next, click the edit icon (pencil icon) under Apps to define the apps you want to back up. By default, all apps are selected for the backup job.
- To exclude any app from the backup job, click the checkbox next to it to remove it from the selection.
- If you want the items retained only for a certain period of time, uncheck the box under “Retention period” and specify the number of days, months or years for which you want the items retained.
- You can also choose to exclude certain file types or file sizes in Gmail and Google Drive. Click the pencil icon beside the app name under “Exclusions” and specify the desired exclusions.

Step 11: Finally, click “Start backup” to back up your selected scope.
